

I recommend beginning with a gentle brushing to remove loose dirt and debris from your garden seats. Use a soft-bristled brush or a vacuum with an upholstery attachment for thoroughness. Focus on seams and any textured areas where dust tends to accumulate.
Next, prepare a solution of warm water with a mild detergent. It’s critical to avoid harsh chemicals that could harm the fabric’s fibers. Dampen a clean cloth with the solution, and gently scrub the surface, paying special attention to stained spots. Rinse with a cloth dampened in plain water to remove any soap residue.
For stubborn stains, consider a mixture of white vinegar and water. Apply it directly to the stain and let it sit for a few minutes before blotting with a clean cloth. Ensure you test this solution on a small, inconspicuous area first to avoid discoloration.
As a final touch, let your seating dry completely in the sun. Sunlight not only helps in drying but can also aid in killing any remaining bacteria. This simple process will keep your garden seating looking fresh and inviting.
Identify the Fabric Type of Your Outdoor Seating
Begin by inspecting the texture and feel of the material. Common types include:


- Acrylic: Known for its durability and resistance to mildew. It often feels soft yet sturdy.
- Polyester: Typically has a smooth surface and can mimic the feel of cotton. It dries quickly and is fade-resistant.
- Olefin: Recognized for its moisture-wicking properties and resistance to stains. Often found in various vibrant colors.
- Canvas: A heavier fabric that is more rugged. It can be treated for water resistance and is easy to clean.
- Sunbrella: A brand specifically designed for outdoor use, offering high UV resistance and various patterns.
Check manufacturers’ labels or websites for specific fabric details. If no labels are visible, you can conduct a simple water test: a tightly woven fabric will repel water, while a more porous one will absorb it.
Finally, knowing the fabric type helps determine appropriate maintenance techniques and cleaning agents, ensuring longevity and appearance retention.
Gather Necessary Cleaning Supplies and Tools
For the task ahead, I prepare a selection of supplies. I find that having the right items makes a significant difference in achieving desired results.
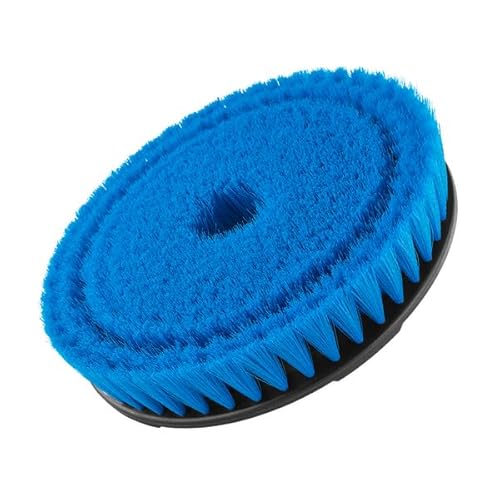
I always grab a soft-bristle brush. This is crucial for removing dirt and debris without damaging the fabric.
An all-purpose cleaner, suitable for various materials, is next on my list. It helps tackle stains and embedded grime effectively. I also ensure I have a bucket filled with warm water to dilute the cleaner.
Microfiber cloths are essential; I use them for wiping surfaces and soaking up excess moisture. Their absorbent nature proves advantageous.
Additionally, I gather a garden hose or a spray bottle filled with water for rinsing off soap after cleaning. A gentle nozzle is preferable to avoid harsh pressure.
A pair of gloves is also included to protect my hands from chemicals or dirt. For stubborn stains, I keep a specialized stain remover handy.
Lastly, having a drop cloth or tarp can prevent messes on surrounding areas. With all these tools collected, I’m ready to proceed systematically and efficiently in refreshing my seating pieces.
Remove Loose Dirt and Debris from the Furniture
I typically begin with a soft-bristle brush or a handheld vacuum to eliminate loose soil and debris. This is vital before applying any moisture or cleaning solutions to ensure that I’m not pushing dirt deeper into the fabric.
<pFor larger pieces, I recline the seating or tilt items slightly to dislodge particles trapped in crevices. A clean, dry cloth can assist in gathering debris from textured surfaces. For fabric with intricate weaves, I sometimes use a can of compressed air to blow out dirt that’s difficult to reach.
Pay special attention to areas that attract dust, such as seams and folds. Regular maintenance reduces buildup, making future upkeep simpler. After removing obvious particles, I prepare for the next steps in the cleaning process.
Create a Suitable Cleaning Solution for the Fabric
I usually mix warm water with a mild detergent to craft an effective cleaning solution. A tablespoon of liquid dish soap per gallon of water works well for general maintenance. For tougher stains, I add a splash of white vinegar, which not only boosts cleaning power but also helps neutralize odors.
<h3.Test the Solution
<p.Before applying the mixture, I test it on a hidden area to ensure it won’t damage the material. After confirming the safety, I use a soft cloth or sponge to apply the solution gently, focusing on stained areas.
<h3.Rinse Thoroughly
<p.After scrubbing, rinsing the area with clean water is crucial to remove any soap residue. I use a garden hose with a spray nozzle to ensure thorough rinsing, preventing any buildup that could lead to discoloration or damage over time.
Test the Cleaning Solution on a Small Area
Before applying the mixture to the entire surface, I always test it in an inconspicuous spot. This step helps ensure that the formula won’t cause discoloration or damage. I choose a hidden section, such as underneath a cushion or at the back of a chair. I apply a small amount of the solution using a soft cloth or sponge. After allowing it to sit for a few minutes, I check the area for any adverse reactions.
Assess for Colorfastness
It’s critical to assess if the fabric is colorfast. If the color remains intact and there are no visible changes, I proceed to clean the entire piece. If discoloration occurs, I modify the mixture by diluting it or choosing a different approach altogether.
Check Texture and Feel
Pay attention to the texture after testing. The fabric should feel unchanged and maintain its original softness. If there’s any stiffening or residue, I know to adjust my cleaning method to avoid compromising the material’s integrity.
Apply the cleaning solution and scrub gently
I carefully pour the prepared mixture onto the fabric, ensuring even coverage without saturating it. Using a soft-bristled brush, I start to scrub in circular motions, applying minimal pressure to avoid damaging the fibers. This method helps to lift dirt and stains without causing fraying or wear.
It’s important to work on small sections at a time, maintaining focus on each area for thoroughness. I ensure to rinse the brush frequently in clean water to avoid redepositing dirt back onto the surface. For tougher spots, I may apply a bit more solution directly to the stain and let it sit for a few minutes before gentle scrubbing.
| Step | Action |
|---|---|
| 1 | Apply solution evenly |
| 2 | Use soft-bristled brush |
| 3 | Scrub in circular motions |
| 4 | Focus on small sections |
| 5 | Rinse brush frequently |
| 6 | Apply extra solution for tough spots |
Regularly checking the fabric’s condition while working ensures that I’m not causing damage. Once I’ve treated all sections thoroughly, I rinse the area with clean water, removing any residue left from the solution.
Rinse the Furniture Thoroughly with Water
I ensure all cleaning agents are completely removed by rinsing the fabric with clean water. Using a hose with a spray nozzle allows me to control the water flow effectively. I start from the top and work my way down, covering every part of the material. This method prevents soap residue from being trapped in the fibers.
If possible, I let the water run for a few minutes to guarantee a thorough cleanse. I check for any remaining spots or suds and focus on those areas, repeating the rinsing process until everything is clear. After rinsing, I allow the surface to air dry, ensuring it is free from moisture before using or covering the furniture again.
Dry the furniture properly to prevent mold
After washing the seating, ensuring they are thoroughly dried is crucial to prevent mold growth. I always position the items in an area with ample sunlight and good air circulation. Sunlight not only helps in moisture evaporation but also acts as a natural disinfectant.
If direct sunlight isn’t possible, placing the seating under a covered porch can provide protection while still allowing airflow. Using a fan to expedite drying is also a great option. I frequently check for any damp areas, focusing on seams and folds where moisture can linger.
For thorough drying, I often use absorbent towels to blot excess water before setting the items outside. If the weather is humid, I ensure the items stay inside until the air is drier.
If I notice any signs of moisture, I repeat the drying process until the fabric feels completely dry to touch. This diligence significantly reduces the risk of mold and mildew formation.
Finally, I store items in a dry spot away from moisture sources, ensuring they remain in good condition for future use.
Store or Protect Items When Not in Use
To prolong the life of your seating and lounging pieces, proper storage and protection is necessary. Here are some strategies I employ:
Covering Furniture
- Use breathable covers specifically designed for your types of furnishings. This prevents moisture buildup while keeping dust at bay.
- Make sure the covers fit snugly but allow air circulation, minimizing mold risk.
Indoor Storage Options
- If possible, bring the items indoors during extreme weather conditions–especially strong winds, rain, or snow–where damage is likely.
- For larger pieces, consider a dedicated storage shed or garage space where they can be stacked safely.
Organizing items horizontally and vertically maximizes storage space. If storing outside is unavoidable, elevate them off the ground on pallets to prevent contact with moisture.
Regular Maintenance
- Inspect items periodically for signs of wear and tear, addressing potential issues before they become significant problems.
- Ensure that any fading or discoloration is addressed with suitable protectants, reinforcing the fabric’s resilience against UV rays.
Taking these steps helps ensure that my seating and lounging pieces remain in great condition, ready for use whenever needed.


