Before diving into the task, gather all necessary tools: a screwdriver, a hammer, and perhaps a level. Clear a spacious area where you can lay out all components, ensuring easy access to every piece.
Next, carefully examine the instruction manual. Each step is crucial, even if the assembly appears straightforward. Following the sequence provided will prevent confusion and potential errors. Lay each part in order to facilitate your progress as you work.
Engage a friend or family member for assistance if needed. Some sections can be cumbersome and require extra hands to stabilize while attaching other components. Collaboration often speeds up the process and adds a bit of fun.


Finally, take your time. Rushing through the assembly can lead to mistakes or incomplete fittings. Once finished, inspect the entire structure for stability and alignment. This attention to detail will ensure that your assembled product not only looks great but functions well for years to come.
Assembly Tips for Your New Expanse
Ensure you have a designated workspace that’s clear and well-lit to streamline the process. Organizing components and tools before you start can save time. Familiarize yourself with the instruction manual and identify each part using the labels provided on the packaging.
Tool Selection
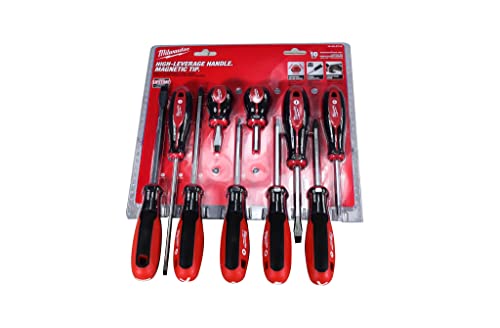
Utilize a screwdriver set with various heads, making sure to have a Phillips and flathead handy. A rubber mallet can assist in connecting parts without damaging them, and a level will help keep surfaces aligned. A measuring tape ensures accuracy as you piece everything together.
Step-by-Step Connection
Begin with larger sections and gradually integrate smaller components. Insert dowels or screws as indicated, securing them firmly but avoiding overtightening to prevent damage. Utilize brackets or anchors for stability in larger assemblies. Regularly check for alignment before committing to permanent connections. Keep a checklist of parts as you go to ensure nothing is overlooked.
Choosing the Right Tools for Assembly
First, ensure you have a quality screwdriver set, including both flathead and Phillips head options. A magnetic screwdriver can help prevent losing screws during assembly.
A reliable hammer or rubber mallet is necessary for securing dowels and fittings without damaging the surfaces. Opt for a lightweight hammer for better control.
Measuring and Leveling
Invest in a level and measuring tape. These tools help confirm that components align correctly, ensuring stability and aesthetics. A small square can also assist in achieving right angles.
Additional Handy Tools
A utility knife is beneficial for opening packaging and trimming edges if required. Consider a cordless drill for faster assembly, especially when dealing with multiple screws. Lastly, a pair of pliers can be useful for gripping and twisting when necessary.
Identifying and Organizing Parts Before Starting
Begin with laying out all components on a large, clean surface. This makes it easier to visualize the entire assembly and reduces the chance of losing any pieces.
- Check the instruction manual. Make sure all parts listed are present before proceeding.
- Group similar pieces together. For instance, categorize panels, hardware, and connectors separately.
- Use containers or bags to keep smaller items organized. Label them for quick access during the process.
Verification
Cross-reference the pieces with the parts list in the manual. Look out for unique identifiers such as numbers or letters that distinguish each element. This will help confirm you have everything you need.
Pre-Assembly Preparation
Once everything is sorted, do a quick assembly of certain sections if the design allows. This can give an insight into how the components fit together and help identify any potential issues early on. Ensure that you have all necessary tools on hand before you begin assembling.
Understanding the Assembly Instructions Thoroughly
Carefully studying the instructions is crucial for a smooth assembly process. Begin by reading through the entire document before touching any components. Missing a single step can lead to complications later on.
Familiarizing with Symbols and Terminology
Pay attention to the symbols and terminology used in the guide. Different manufacturers may employ unique symbols or terminology that can vary significantly, making it essential to comprehend each aspect clearly.
- Identify key symbols representing tools or fittings.
- Note any warnings or specific instructions that might indicate complexities in the assembly.
- Look for any visual cues that demonstrate the correct and incorrect assembly methods.
Following the Sequence
Each instruction second typically follows a specific sequence for a reason. Take care to follow the order precisely as indicated:
- Complete the foundational elements first to ensure stability.
- Assemble components in manageable sections, rather than trying to handle everything at once.
- Continuously verify alignment and connections at each stage to avoid major adjustments later.
Revisiting the instructions as needed during assembly ensures accuracy. If confusion arises, seek clarification by cross-referencing with diagrams. A thorough understanding of these guidelines will enhance the entire experience and lead to a successful outcome.
Preparing the Work Area for a Smooth Process
Clear an ample space for the assembly process. I usually choose a area with good lighting, ideally near a power source. A clean, flat surface, like a large table or the floor, is necessary to spread out all components without clutter.
Lay down a soft mat or blanket to prevent scratching surfaces and cushioning falls. This is especially important for delicate pieces that might break upon impact.
Keep frequently used tools within arm’s reach, such as screwdrivers, a hammer, and a measuring tape. Using a tool organizer or a small box can help to keep everything orderly.
Minimizing Distractions
Turn off distractions–such as the TV or radio. Silence notifications on your phone. This allows complete concentration on the task, reducing the chance of error.
Safety Precautions
Ensure to wear appropriate clothing, like tighter-fitting sleeves, to avoid any hazards while handling parts. If using power tools, safety goggles and gloves are a must to prevent injuries.
Step-by-Step Assembly Techniques for Stability
To ensure a sturdy outcome, I begin by carefully aligning all components before tightening screws. This initial adjustment allows for subtle shifts that can significantly impact overall stability.
Sequential Assembly Approach
Building in a strategic order is crucial. I always attach larger components first, as they provide a solid base. For instance, if working on a shelving unit, I secure the side panels before adding shelves. This step helps create a framework that is easier to level and adjust. I also tighten bolts and screws in a diagonal pattern, distributing force evenly across the structure, enhancing durability.
Utilizing Corner Braces
Incorporating corner braces can greatly enhance rigidity. I place these brackets at key junctions, particularly where weight distribution can strain connections. Attaching them diagonally supports against lateral movement and significantly minimizes wobble. Additionally, I opt for braces made from high-quality metal or sturdy plastic, ensuring a reliable strength-to-weight ratio.
| Step | Action |
|---|---|
| 1 | Align all pieces before securing. |
| 2 | Start with larger components. |
| 3 | Tighten screws in a diagonal pattern. |
| 4 | Add corner braces at critical points. |
After securing the structure, I perform a stability test by gently shaking the assembled item. If I notice any movement, I revisit the screws and braces, making necessary adjustments. This proactive approach ensures that the final piece withstands weight and use without compromising integrity.
Troubleshooting Common Assembly Issues
To tackle alignment problems, ensure that all dowels and pins are correctly seated in their respective holes. Gently adjust the panels to find the optimal positioning before tightening screws.
If components appear to be mismatched or incompatible, double-check the assembly instructions for potential oversights. Scrutinize each part against the provided list to ascertain if any items are misidentified or missing.
In case of wobbling or instability, re-evaluate the placement of each leg or support. Make sure they are fully inserted and that any adjustable feet are correctly set for uniform contact with the floor.
When dealing with difficult-to-fit parts, assess any warped edges. Use a clamp to hold pieces together while securing them. If warping is severe, consider applying heat to gently realign the material.
If screws won’t tighten properly, inspect for stripped holes. Utilizing a larger screw or adding wooden glue can help reinforce the joint and ensure a secure fit.
Lastly, if manual assembly proves too strenuous, employing a power drill with the appropriate bits can significantly ease the process, especially with larger or more complex pieces.
Final Touches: Securing and Maintaining Your Furniture
To ensure stability and longevity, I apply the included anchors or brackets to secure connections. I tighten screws and bolts, using a torque wrench for precision to avoid over-tightening, which can damage materials. Checking for any gaps between joints helps identify areas needing adjustment.
Regular maintenance includes cleaning surfaces with a soft cloth to remove dust and prevent scratches. I recommend using a gentle furniture polish periodically, which enhances the material and protects against wear. If the piece has drawers or sliding components, I apply a lubricant to keep them operating smoothly.
Inspection and Adjustments
After some use, I inspect the assembly for any loosened parts. It’s common for fittings to settle over time, so I reassess the tightness of screws and fittings every few months. If I notice any looseness, I re-tighten them to maintain structural integrity.
Protective Measures
To prevent damage from liquids or heat, I place coasters under beverages and avoid direct sunlight exposure. For pieces on hardwood floors, felt pads minimize scratches and make movement easier. In addition, I keep the environment humidity-controlled to prevent expansion or contraction of materials, especially woods.