To rejuvenate the color of woven items, I recommend creating a solution of equal parts water and a gentle cleaning agent. Apply this mixture with a soft brush, ensuring even coverage across the surface. This method successfully removes dirt and grime, preparing the material for the next step.
After cleaning, mixing water with a natural whitening agent can help restore the item’s original hue. Test this solution on a small, inconspicuous area to avoid any unexpected reactions. Once assured, apply it across the entire piece, allowing it to sit briefly before rinsing thoroughly.


For best results, consider deep cleaning regularly and protect your woven accents with a sealant after treatment. This will not only enhance their appearance but also prolong their lifespan.
How to Whiten Wicker Pieces
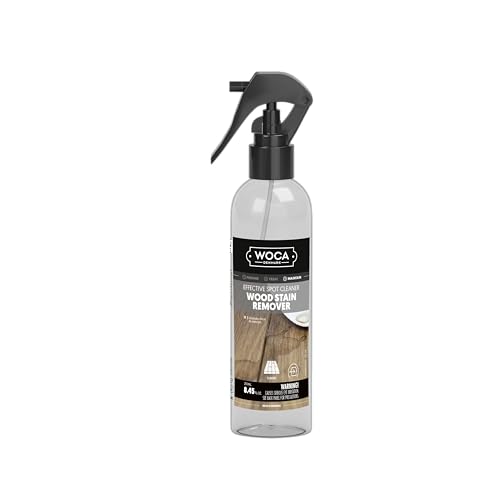
Combine equal parts water and hydrogen peroxide in a spray bottle. Spray the solution generously on the surfaces of the woven items. The hydrogen peroxide will help lift discoloration without damaging the material.
Application Techniques
Use a soft brush to gently scrub areas with tough stains, ensuring you are consistent with your movements to avoid uneven whitening. After application, allow the mixture to sit for approximately 30 minutes before rinsing with clean water. Ensure thorough drying to prevent mildew.
Maintenance Tips
To retain brightness, regularly clean with a mild soap solution and avoid exposing these pieces to direct sunlight for extended periods. Store in a shaded area during inclement weather to prolong their appearance.
Choosing the Right Bleach for Rattan
For lightening these woven pieces, I prioritize oxy-based options like hydrogen peroxide. This choice is less harsh than chlorine and helps maintain structural integrity. I typically use a solution of 1 part hydrogen peroxide to 3 parts water for effective results.
Choosing the right type involves understanding the nature of the item. For instance, while chlorine might provide immediate results, its potential to damage fibers makes it less suitable; it often leads to brittleness. I avoid it for any decorative or functional items.
I consider different products based on their application methods. Gel formulas often cling better to surfaces, allowing for controlled lightening without dripping. Liquid forms can be easier to apply but require careful handling to avoid uneven results.
| Type | Pros | Cons |
|---|---|---|
| Hydrogen Peroxide | Gentle, preserves integrity | Slower results |
| Chlorine | Fast acting | Can damage fibers |
| Oxy-based Gel | Clings well, controlled application | More difficult to rinse off |
| Liquid Bleach | Easy to apply | Risk of uneven lightening |
Lastly, I always wear gloves and protect surrounding areas with plastic to prevent unintentional staining. Testing on a small, inconspicuous section first ensures that I achieve the desired lightening effect without compromising the piece.
Preparing the Rattan Surface for Bleaching
Thoroughly clean the material with a soft brush or cloth to remove dust, dirt, and debris. Ensure no residues remain that could interfere with the brightening process.
Inspect the surface for any signs of wear or damage, such as cracks or loose strands. If I find any, repair them using a suitable adhesive to maintain the integrity of the item before proceeding.
Test a small, inconspicuous area to evaluate how the surface reacts to the agent. This step helps prevent potential discoloration or damage to the visible areas.
Once cleaned and tested, allow the material to dry completely. Moisture can hinder the effectiveness of the treatment, leading to uneven results.
Additionally, ensure I am working in a well-ventilated space to stay safe and reduce exposure to fumes from the chosen solution.
Applying Bleach: Techniques and Tips
Before application, ensure proper ventilation in the workspace. I always wear protective gloves and eyewear to avoid skin irritation and eye damage. Mixing the solution in a well-ventilated area eliminates harmful fumes.
For optimal results, I dilute the product with water, typically following a ratio of one part solution to three parts water. This concentration prevents excessive damage while achieving a lighter tone. Testing a small, inconspicuous area confirms the effect before proceeding.
I find using a spray bottle allows for even distribution, effectively saturating the intricate weave without over-soaking. When applying, I maintain a consistent distance of about 6-8 inches from the surface to control the flow.
For stubborn stains, a gentle scrubbing with a soft brush helps, but I avoid harsh scrubbing to prevent wear. Rinsing the surface with clean water immediately after application neutralizes the chemicals, protecting the material from prolonged exposure.
After treatment, I allow the piece to dry completely in a shaded area. Sunlight can alter the color prematurely, so I place it in a cool, dry location with good air circulation to maintain integrity.
Neutralizing and Rinsing the Bleached Rattan
After completing the whitening process, it’s crucial to neutralize any remaining chemicals. I first prepare a solution of water and white vinegar, using a ratio of about 1 part vinegar to 3 parts water. This mixture effectively neutralizes the bleaching agent.
With a soft cloth or sponge, I apply the vinegar solution to all surfaces that were treated. I take care to cover every area, ensuring that the neutralizer penetrates any spots that may still harbor product.
After applying the vinegar solution, I rinse thoroughly with clean water. Here, I use a garden hose or a bucket to pour clean water over the treated areas, eliminating any traces of the neutralizing mixture.
It’s important to allow the material to dry completely. I place everything in a well-ventilated area, which speeds up the drying process and prevents mold growth. Depending on humidity, this can take several hours to a full day.
Once dry, I inspect the surfaces for any remaining color imbalance or damage. If necessary, I repeat the neutralizing and rinsing procedure to achieve uniformity. Finally, applying a protective finish helps to enhance durability and maintain the new appearance for longer.
Post-Bleaching Care for Rattan Furniture
After the lightening process, I ensure to protect the natural fibers by applying a high-quality wood conditioner or protective finish. This not only adds a barrier against moisture but also enhances the surface’s durability. I wait at least 24 hours before applying any treatment to allow the material to completely dry.
Regular cleaning with a soft damp cloth helps to maintain the refreshed appearance. I avoid using harsh chemicals or abrasives that could damage the newly treated surface. Instead, I prefer mild soap and water for routine maintenance.
For outdoor pieces, I check the forecast before exposing them to elements, as sunshine and rain can affect longevity. If I need to store them, I make sure they are in a dry and well-ventilated area to prevent mold and mildew.
To prevent any future discoloration, I apply UV protection sprays formulated for natural fibers every few months. This step is critical, especially for furnishings used outdoors, as sunlight can fade colors over time.
Finally, I conduct periodic inspections for any signs of wear or damage. Early detection allows for prompt repairs, such as tightening loose strands or reinforcing any weak points. Consistent care extends the life of my braided decor significantly.
Common Mistakes to Avoid When Bleaching Rattan
Avoid using undiluted chemicals directly on the woven surface. This can lead to discoloration and structural damage to the material. Instead, always mix with water according to the manufacturer’s instructions.
Neglecting to test a small, inconspicuous area is also a misstep. A patch test helps assess the reaction and final hue before applying to the entire piece.
Rushing through the process can result in uneven coloration. I recommend applying the solution gradually and allowing adequate time for absorption for the best results.
Inadequate Ventilation
Working in poorly ventilated spaces can affect both safety and outcome. Ensure ample airflow to disperse fumes and allow the material to dry evenly post-treatment.
Ignoring Surface Preparation
Skimping on surface cleaning can impede the chemical action, leading to subpar results. Thoroughly clean and remove any dust or grease before proceeding for optimal effectiveness.
Overlooking post-treatment care can also lead to long-term issues. Conditioning the material after treatment restores moisture and maintains flexibility, preventing brittleness.
Lastly, disregarding protective gear during application exposes skin and respiratory systems to harsh substances. Wear gloves, goggles, and a mask to safeguard your health.