For optimal results, I recommend using acrylic latex coatings. These products offer excellent durability while providing a beautiful matte or satin finish. They dry quickly, allowing for efficient layering, and they are water-based, making clean-up simple.
If you prefer a glossy appearance, consider oil-based enamels. They create a strong, hard surface that withstands wear and tear, although they require longer drying times and proper ventilation during application.
When refinishing, sanding the surface is crucial, regardless of the coating selected. This prepares the wood effectively, ensuring adhesion and a smooth final appearance. Additionally, a primer can help stabilize the surface and prevent bleeding from darker woods.
For outdoor pieces, opt for marine-grade finishes specifically formulated to withstand harsh weather conditions. These products enhance UV protection and provide longevity, keeping your items looking new for years.


Recommended Finishes for Wooden Pieces
I prefer satin or semi-gloss options because they balance durability with aesthetic appeal. Satin provides a soft sheen, hiding imperfections while maintaining a rich look. Semi-gloss is more resilient, making it ideal for areas that experience higher wear, such as dining tables or frequently used surfaces.
Choosing the Right Base
For a natural feel, alkyd or oil-based solutions excel. They penetrate deep into the grain, enhancing the texture. Water-based choices are less aromatic, dry quickly, and offer easy cleanup, making them user-friendly. Both options provide effective sealing against moisture.
Application Techniques
Utilize a high-quality brush or foam applicator for a smooth finish. Spray application can also achieve an even coat but requires careful control to avoid overspray. Thin multiple layers rather than applying a single thick coat, ensuring durability and a polished outcome.
Choosing Between Water-Based and Oil-Based Options
I recommend considering water-based solutions for interior items. They dry quickly and have minimal odor, making application and cleanup easier. Additionally, these formulations are less harmful to the environment, and they offer excellent adhesion and durability when properly applied.
On the other hand, oil-based coatings provide a rich, deep finish that many find appealing. They excel in durability and resistance to wear, making them suitable for high-traffic pieces. Keep in mind that these products take longer to dry, require solvents for cleanup, and emit stronger fumes during the process.
If you prioritize a quicker project turnaround and a more environmentally friendly approach, select the water-based option. Conversely, if you seek robust protection and a classic aesthetic, oil-based formulations might suit your needs better.
Finally, consider the specific conditions of your space and the intended use of the item. This will guide your decision effectively.
Understanding the Importance of Primer for Wood Surfaces
Applying a primer before any color layer is key for optimal results on timber pieces. This base creates a strong bond, ensuring better adhesion and longevity of the subsequent layers.
Primers effectively seal the grain, reducing the porosity of the surface. This sealing reduces the amount of final coat needed, saving both time and resources.
When selecting a sealer, consider the following:
| Primer Category | Best For |
|---|---|
| Oil-Based Primer | Blocking stains, enhancing durability |
| Water-Based Primer | Quick drying, low odor, easy cleanup |
| Shellac Primer | Sealing knots and sap, excellent adhesion |
Application technique also matters. A smooth, even coat ensures proper coverage and performance. Different brushes or rollers can yield various finishes, affecting the final aesthetic of the project.
Skipping this step may lead to issues, such as uneven color distribution, peeling, and increased wear. Ensuring that a primer is utilized paves the way for a sturdy, appealing result.
Selecting Paint Finishes: Matte, Satin, or Gloss?
For a sophisticated appearance, I prefer satin sheen. It strikes a balance between subtlety and shine, providing a smooth finish that’s easy to clean. Ideal for surfaces that get frequent use, this option also minimizes blemishes and imperfections.
Matte Finish
Opting for a matte finish offers a natural look and feels inviting. It’s excellent for vintage or rustic pieces, as it can hide imperfections well. However, maintenance can be a concern since it’s less durable and difficult to clean without risking damage.
Glossy Finish
Choosing a high-gloss option delivers a striking and modern look. This finish reflects light beautifully and showcases the grain of the material effectively. While it’s highly durable and easy to wipe down, it may amplify imperfections, requiring precise application.
In summary, the choice between matte, satin, or glossy is influenced by the desired aesthetic and practical considerations. Assess your lifestyle and the intended use of the piece to determine the best option that matches your needs.
Color Considerations: How to Choose the Right Shade
My first tip is to assess the room’s existing color palette. Take note of wall hues, flooring, and any other significant elements that will interact with your chosen tone. Consider how the new shade will harmonize or contrast with these elements.
Next, I recommend exploring color psychology. Different shades evoke various emotions and perceptions. For instance:
- Blue: Promotes tranquility and calmness, ideal for a bedroom or study.
- Yellow: Conveys warmth and cheerfulness, suitable for kitchens or play areas.
- Green: Represents nature, creating a refreshing atmosphere, great for living spaces.
I also find it beneficial to create a mood board. Compile swatches, fabric samples, and images that inspire your vision. This visual aid can help clarify your preferences and guide your selections.
Lighting plays a crucial role in how colors appear. I often test samples in different lighting conditions–natural sunlight, fluorescent, and incandescent. This practice helps to determine how the hue shifts throughout the day.
Don’t hesitate to reflect on personal style and the theme you wish to convey. Whether classic, modern, or eclectic, the chosen shade should resonate with your tastes. Additionally, I advise considering trends, but always balance them with timeless choices to ensure longevity.
Lastly, remember to test! Apply samples on small sections of the surface to see how they look in your space. This trial helps confirm your choice before committing to larger applications.
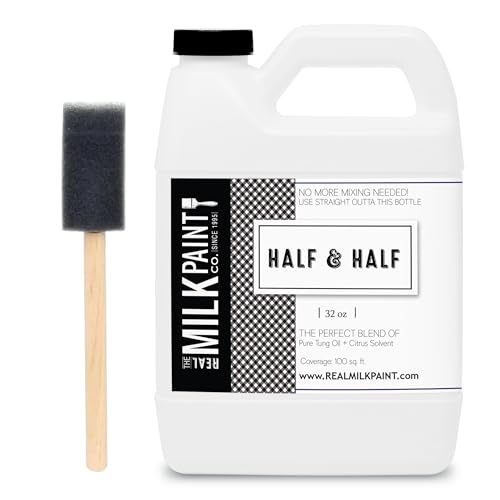
Explore Specialized Coatings: Chalk Coating vs. Milk Coating
For achieving a vintage appearance, I recommend chalk coatings. These formulations provide a matte finish with a soft texture, making surfaces feel inviting. They adhere well to various substrates without extensive preparation. A top coat is generally advisable for durability, especially on frequently used pieces.
In contrast, milk coatings derive from natural ingredients, offering a unique, matte finish that enhances the wood’s grain. This option dries quickly and boasts eco-friendly properties, making it a suitable choice for those seeking sustainable solutions. The application process is straightforward, but it may require a bit more attention to achieve an even finish.
When deciding between these two, consider the desired aesthetic and functionality. If a rustic charm is preferred, chalk coatings may be your best bet. Alternatively, if natural materials are a priority and you appreciate a uniquely textured look, milk coatings will serve well. Both options can transform your pieces while providing distinct characteristics that enrich their appeal.
Tools and Techniques for Achieving a Smooth Finish
I recommend investing in high-quality tools to ensure a flawless surface. A foam roller or fine-nap roller can provide an even application on larger areas, while a good brush–preferably synthetic–works wonders for corners and detailed sections. For small touch-ups, consider using a small, angled brush for precision work.
Sanding Essentials
Before you start applying your chosen coating, I advise sanding the piece thoroughly. Begin with a medium-grit sandpaper (around 120-grit) and finish with a fine-grit option (220-grit). Hand sanding or using a power sander–if appropriate–can greatly contribute to a smooth surface. Remember to sand in the direction of the grain to avoid scratches. Additionally, after sanding, clean the surface to remove any dust particles that may affect adhesion and finish.
Application Techniques
When it’s time to apply, I suggest working in thin, even layers. This reduces the chances of drips and can help achieve uniform coverage. If using a brush, dip only the tip into the coating and apply with light pressure to avoid excess buildup. For rollers, ensure even distribution and avoid overloading them. After the first coat dries, lightly sand the surface again with fine-grit paper to create a smoother texture before applying subsequent coats.
Always allow adequate drying time between coats, and consider using a tack cloth to wipe down the surface prior to each application to eliminate dust. Following these techniques will lead to a professional-looking finish that enhances the natural beauty of your piece.
Preparing Furniture: Sanding and Cleaning Tips
Before beginning the transformation of your piece, thorough preparation is crucial. I recommend starting with sanding, as this process removes any old finish and creates a smooth surface for adhesion.
- Select the appropriate grit sandpaper; I typically start with 80-grit and finish with 220-grit for a fine finish.
- Use a sanding block or an electric sander for even pressure. This prevents gouges or uneven spots.
- Always sand in the direction of the grain to avoid scratching the surface.
After sanding, remove all dust meticulously. I prefer using a vacuum followed by a damp cloth to ensure no particles remain.
- Let the surface dry completely after wiping to guarantee optimal adhesion later.
- If your item has intricate details, consider a small brush to reach crevices.
Cleaning is equally important. I suggest using a degreaser or a mixture of mild soap and water for thorough cleaning.
- Rinse well and dry to eliminate any residue that might interfere with finishes.
- A clean, dry surface is pivotal for achieving the best final result.
Taking these steps ensures the best foundation for further work on your cherished piece.
Understanding Curing Times and Maintenance Needs
I recommend allowing the finish to cure fully before subjecting the surface to heavy use or moisture. Most formulations require anywhere from a few days to several weeks for complete hardness, depending on the specific product and environmental conditions.
During the initial curing phase, avoid placing heavy objects on the surface or cleaning with water. Instead, a light dusting with a soft cloth is advisable. For oil-based options, the curing time is typically longer compared to their water-based counterparts.
To maintain the longevity of your refinished pieces, regularly check for signs of wear or damage. If scratches or scuffs appear, touch up those areas as needed rather than waiting for them to worsen. Using coasters and mats can significantly reduce wear and preserve the surface.
For ongoing upkeep, I suggest periodically applying furniture polish or wax to enhance the sheen and protect against everyday wear. This routine also helps in restoring the luster to surfaces that may appear dull over time.
In addition, consider the local climate. High humidity or fluctuating temperatures can affect curing times and protection. Ensure you store items in stable environments to prolong the finish’s integrity and performance.
FAQ:
What type of paint is best for furniture made of unfinished wood?
For unfinished wood furniture, the best choice is usually a water-based acrylic paint. This type of paint adheres well to porous surfaces and provides a smooth finish. It’s also low in VOCs (volatile organic compounds), which makes it a healthier option for indoor use. Before painting, ensure that the surface is clean and sanded to promote better adhesion.
Can I use chalk paint on wood furniture, and what are its advantages?
Yes, chalk paint is a great option for wood furniture. It provides a matte finish and is known for its excellent adherence to various surfaces without the need for extensive preparation. One of the main advantages is its ability to create a vintage or distressed look easily. Chalk paint is also easy to work with and often requires minimal tools for application.
What is the difference between oil-based and water-based paints for wood furniture?
Oil-based paints are known for their durability and rich finish. They take longer to dry and have a stronger odor, but they create a hard surface that resists stains and scratches well. On the other hand, water-based paints dry quickly, are low in odor, and clean up easily with soap and water. They are less durable than oil-based paints, but advancements have improved their resistance significantly.
Should I use primer before painting wood furniture?
Yes, using a primer is highly recommended for painting wood furniture, especially if you are making a significant color change or if the wood is porous. Primer helps to seal the wood, creating an even base for the paint, which enhances adhesion and provides a uniform finish. It can also prevent the paint from soaking into the wood, which can result in a less vibrant color.
How durable are acrylic paints on wood furniture, and how do they hold up over time?
Acrylic paints are quite durable when properly applied. They maintain their color well and are resistant to fading over time. However, to ensure maximum durability, it is crucial to apply a protective topcoat after the paint has dried. This additional layer helps guard against scratches, stains, and moisture, prolonging the life of your painted furniture.
What are the best types of paint for wood furniture?
When selecting paint for wood furniture, two popular types come to mind: latex and oil-based paints. Latex paint is water-based, making it easier to clean with soap and water. It’s also low in volatile organic compounds (VOCs), which means it’s safer for indoor use. Oil-based paints, on the other hand, provide a durable finish and are excellent for surfaces that require extra protection. They tend to dry slower, which can allow for a smoother application but requires solvents for cleanup. Ultimately, the choice between the two depends on the desired finish, durability required, and the working environment.


