For safeguarding my outdoor wooden items, I’ve consistently turned to high-quality marine varnishes. These products offer superior resistance against moisture, UV rays, and temperature fluctuations, ensuring long-lasting protection. When applied, they create a durable finish that not only enhances the beauty of the grain but also acts as a formidable barrier against the elements.
I also find that penetrating oils, such as teak or Danish oil, provide a natural look while enriching the color of the grain. These oils seep deep into the fibers, offering nourishment and protection from within. Reapplication is straightforward, and it maintains a more organic aesthetic compared to coatings that sit on top of the surface.
For those seeking environmentally friendly options, water-based polyurethane is an excellent choice. The low VOC content makes it safer for both users and the environment while still delivering robust defense against wear and tear. This type of finish dries quickly and cleans up easily, making maintenance less of a chore.
Regardless of the product I choose, proper surface preparation remains crucial. Sanding the surface ensures optimal adhesion, while cleaning thoroughly removes any dirt or grease. Each method I adopt enhances the lifespan and appearance of my wooden investment outdoors.


Choosing the Right Sealant for Different Wood Types
For cedar, opt for a penetrating oil-based finish. It enhances the natural grain and offers exceptional protection against moisture and UV rays, ensuring longevity.
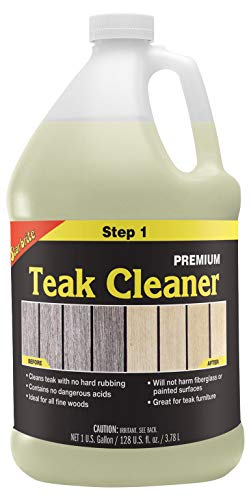
Teak requires a specialized teak oil that maintains its rich color and repels water effectively. This oil will nourish the fibers while providing resistance against the elements.
Pine and Fir Options
For pine and fir, a clear penetrating finish or water-repellent sealant is suitable. These products help reduce the risk of warping and cracking, preserving the wood’s integrity over time.
Hardwoods Considerations
If working with hardwoods like mahogany or oak, consider a polyurethane sealant. This type creates a tough, durable surface layer that withstands heavy use and environmental stresses.
Comparison of Oil-Based vs. Water-Based Sealants
For protecting exterior designs, I favor oil-based formulas due to their superior penetration and durability. They often create a richer, deeper finish that enhances natural grain. With resistance to moisture, these options prevent degradation over time, making them ideal for challenging climates. Regular maintenance is crucial, as reapplication may be necessary every few years.
Conversely, I find water-based alternatives easier to handle and clean up. They dry quickly, allowing for faster application and reduced wait times between coats. These products generally emit fewer odors and are less toxic, making them a safer choice for indoor projects or environments with limited ventilation. However, they may require more frequent applications and can show signs of wear sooner than oil-based counterparts.
For high-traffic or exposed items, opting for an oil-based product is usually my recommendation, given their resilience. On the other hand, for items less exposed to the elements, a water-based choice suits well, particularly for those concerned with environmental impact or sensitivity to chemical odors. Assessing your specific needs will guide you in selecting the appropriate option.
Step-by-Step Guide to Preparing Wood for Sealing
I recommend beginning with cleaning the surface thoroughly. Use a mixture of mild soap and water to remove dirt, grease, and other contaminants. A soft-bristled brush can help reach into grooves and crevices.
After cleaning, let the surface dry completely. This usually takes several hours, depending on the climate. Ensure that no moisture remains, as this can interfere with adhesion later.
Next, I suggest sanding the entire area with medium-grit sandpaper, typically around 120-grit. This process helps to smooth rough spots and opens up the pores of the material. Always sand in the direction of the grain to avoid scratches.
Once sanding is done, clean away any dust with a damp cloth or a vacuum. A clean surface is key to allowing the treatment to adhere properly. Wait for the material to dry again, ensuring no residue remains.
For finishing touches, consider applying a wood conditioner if the type of timber being treated is prone to blotching. This step is particularly beneficial for softer species. Allow the conditioner to penetrate for the recommended time before proceeding.
Finally, I recommend checking the forecast to ensure a dry, moderate day for application. Ideal conditions will lead to better results and longevity of the treatment.
Best Practices for Applying Sealant on Outdoor Furniture
Prior to application, ensure surfaces are clean and dry. Use a mild detergent and water solution to remove dirt, grease, and any previous coatings. Rinse thoroughly and allow for complete drying.
Choose the right tool for application. A high-quality brush provides even coverage, while a foam applicator can be great for intricate designs. For larger areas, a sprayer can efficiently distribute the product.
Apply a thin, even layer to avoid drips and puddles, which can create an undesirable finish. Work in manageable sections to maintain a wet edge, especially when using oil-based formulas that may dry quickly.
Follow the manufacturer’s instructions for drying times between coats. Typically, two or three layers are recommended for optimal protection. Light sanding between coats enhances adhesion and smoothness.
After the final coat, let the product cure in a well-ventilated area, away from direct sunlight. This helps the finish bond effectively and ensures longevity.
Regular maintenance is key. Inspect periodically for wear and reapply as necessary, especially in high-traffic areas or after extreme weather events to keep the surfaces looking fresh and protected.
Understanding Drying Times and Curing Processes
Drying times vary significantly based on the type of finish selected. For oil-based products, expect a longer drying period, often 6 to 24 hours before the surface feels dry to the touch. Conversely, water-based finishes typically dry within 1 to 3 hours, allowing for quicker application of additional coats.
Factors Affecting Drying Times
Temperature and humidity play a crucial role in drying. Warm, dry conditions will accelerate the process, while cold, damp environments will prolong it. Proper ventilation also aids in efficient drying.
Curing Process Overview
Curing is the chemical process that takes place after drying, where the finish hardens and bonds with the surface. This can take several days to weeks, with most oil-based products taking longer to fully cure. During this period, avoid exposing the item to moisture or heavy use to prevent damage. Testing the finish’s hardness with a fingernail after a week can indicate readiness for regular use.
Always check the manufacturer’s recommendations for specific products, as it can vary. Taking the time for both drying and curing ensures long-lasting protection and beauty for any surface.
How Often Should You Reseal Outdoor Furniture?
Every one to three years is the ideal timeframe for reapplying protective coatings on your exterior seating and tables, depending on environmental factors and material quality. Regular checks after harsh weather can help determine if an additional layer is necessary sooner.
Factors Influencing Resealing Frequency
Several elements impact how often you should refresh the protective layer:
| Factor | Impact on Resealing |
|---|---|
| Weather Conditions | More frequent resealing in areas with high humidity or heavy rainfall. |
| Sun Exposure | Direct sunlight accelerates wear, necessitating earlier application. |
| Type of Coating | Oil-based coatings may last longer than water-based ones, affecting timeline. |
| Usage Level | Frequent use leads to quicker degradation of the protective layer. |
Signs It’s Time to Reseal
Look for specific indicators to know when it’s time to refresh the coating:
- Fading or discoloration of the finish.
- Surface becoming rough or sticky.
- Visible water spots or stains.
- Peeling or cracking of the existing layer.
Maintaining the integrity of your outdoor pieces prolongs their lifespan and keeps them looking fresh. Regular assessments and timely applications are key to achieving this goal.
Tips for Maintaining Sealed Outdoor Wood Furniture
Regular inspection is key. I check for any signs of wear, such as peeling or discoloration, at least twice a year to catch issues early.
After heavy rainfall or snow, I wipe down the surfaces to remove excess moisture. This minimizes the risk of mildew and prevents prolonged exposure to wet conditions.
To extend longevity, I recommend storing items like cushions or accessories indoors during harsh weather. This practice reduces wear and keeps everything looking fresh.
- Use gentle, non-abrasive cleaners specifically designed for treated surfaces when cleaning.
- A soft-bristle brush helps remove dirt without damaging the finish.
- Rinse thoroughly with clean water after cleaning to remove any soap residue.
In addition to cleaning, applying a maintenance coat can rejuvenate the finish. I usually do this once a year to enhance the protective layer, especially after long periods of sun exposure.
Lastly, ensuring proper ventilation around items promotes drying and helps in maintaining an optimal environment, reducing moisture buildup.
Signs That Your Sealant Needs Reapplication
Look for these key indicators to determine if it’s time to refresh your protective layer:
Visible Wear and Tear
- Check for signs of fading or discoloration on the surface.
- Inspect for visible scratches, dents, or gouges.
Water Absorption
- Perform a water test by sprinkling a few drops on the surface. If the drops soak in rather than bead up, it indicates insufficient protection.
- Observe if water pools on the surface; this could mean the barrier is compromised.
Mildew or Mold Growth
- Inspect for mold or mildew spots. Their presence implies that moisture is trapped beneath the coating.
- Check for a musty smell, which can indicate mold buildup.
Cracking or Peeling
- Examine the edges and corners for peeling or cracking. These areas are prone to damage and may reveal the wood underneath.
- Look for blisters or bubbles in the coating, signaling a failure of the protective layer.
Texture Changes
- Run your hand over the surface. A roughness or grittiness could indicate that the protective layer is wearing thin.
- Notice if areas feel sticky or tacky, hinting at an issue with the coating’s integrity.
Regular checks for these signs will help maintain the longevity and appearance of your outdoor pieces. Being proactive can prevent more significant damage, ensuring your investment remains in excellent condition.
FAQ:
What types of sealants can be used on outdoor wood furniture?
There are several options for sealing outdoor wood furniture. The most commonly used sealants include oils like teak or tung oil, which penetrate the wood and provide a natural finish. Polyurethane and varnish offer a hard, protective layer on the surface, making them suitable for high-traffic areas. Water-resistant sealants, often acrylic or epoxy-based, are also popular for their durability against moisture. Choosing the right sealant depends on the look you desire and the conditions your furniture will face.
How often should I apply sealant to my outdoor wood furniture?
Typically, you should reapply sealant to outdoor wood furniture every one to three years, depending on the type of sealant used and the exposure to weather elements. For example, oil-based finishes may need more frequent applications, while high-quality polyurethane could last longer. Regular inspection for signs of wear, such as fading or water absorption, can help determine when it’s time to reseal.
Can I use indoor sealant on outdoor furniture?
Using indoor sealant on outdoor furniture is not recommended. Indoor sealants lack the necessary protection against moisture, UV rays, and temperature fluctuations, which are common outdoors. They may deteriorate quickly when exposed to the elements, resulting in damage to the wood. It’s best to select products specifically designed for outdoor use.
What preparation is needed before sealing outdoor wood furniture?
Before sealing outdoor wood furniture, proper preparation is crucial. Start by cleaning the surface thoroughly to remove dirt, grime, and any previous finishes. Sand the wood lightly to create a smooth surface for the sealant to adhere to. Ensure the furniture is completely dry before applying any sealant. Following these steps will help achieve better adherence and a more durable finish.
How can I determine if my wood furniture needs sealing?
You can check if your wood furniture needs sealing by performing a simple water test. Sprinkle a few drops of water on the surface. If the water beads up, the sealant is still intact. If the water soaks into the wood, it’s time to reseal. Other signs include visible wear, fading, or changes in texture. Regular maintenance helps prolong the life of your outdoor furniture.