
 Caleb Turner

Begin with a reliable moisture barrier to prevent dampness from reaching your new surface. Use polyethylene sheeting, ensuring it overlaps at the seams and extends up the wall for optimal protection.
Next, lay down a series of wooden beams or sleeper joists to create a sturdy framework. Ensure these supports rest evenly on the insulation, spaced properly to allow for adequate weight distribution. Utilize pressure-treated wood to enhance durability against potential moisture.
Cover the beams with plywood, selecting a thickness that suits your intended use. A minimum of ¾ inch is advisable for stability. Secure each sheet with screws, ensuring a tight fit to prevent any movement.
Finally, finish with your choice of flooring material, whether it’s laminate, carpet, or hardwood. Ensure that the floor covering adheres well to the plywood base, creating a seamless appearance while maintaining comfort and style.

Installation Techniques for a Raised Surface Above Thermal Barriers
Begin with a reliable vapor barrier directly on top of the thermal layer to prevent moisture issues. Next, secure wooden battens or sleepers to create a framework, ensuring adequate spacing to accommodate airflow. Use treated lumber to resist potential humidity effects.
Select appropriate paneling or boards that fit your desired aesthetic and durability requirements. Plywood is a strong choice due to its weight-bearing capacity and ease of installation. For a more refined look, consider engineered wood or laminate materials for the top layer.

Maintain a consistent leveling across the entire area by using shims where necessary. Regularly check with a level as adjustments are made. This prevents uneven surfaces and potential trip hazards.
Incorporate soundproofing materials if noise is a concern, especially in multi-level structures. Acoustic panels can be placed between the framework to absorb sound transmission.
Finish the surface with a suitable sealant or finish that complements the aesthetics while providing durability. Ensure that any coatings used allow for the necessary expansion and contraction in response to changing temperatures.
Choosing the Right Flooring Material for Elevated Insulation
I recommend considering engineered wood for its durability and aesthetic appeal. This material combines natural wood with plywood layers, providing stability and resistance to moisture, making it ideal for elevated spaces. Additionally, it works well with various heating systems, ensuring comfort throughout the year.
Cork as an Alternative
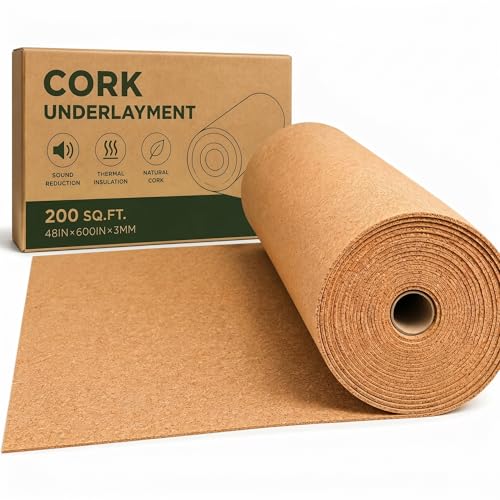
Cork is another excellent choice, featuring natural insulating properties that contribute to energy savings. Its unique texture provides a soft feel underfoot, while also reducing noise. The environmentally friendly aspect of cork, harvested sustainably, makes it appealing for those prioritizing green living.
Vinyl Options
If you’re looking for a budget-friendly yet stylish solution, luxury vinyl planks can offer a variety of designs and textures that mimic wood or stone. They are moisture-resistant, easy to install, and require minimal maintenance, making them practical for multiple environments.
Preparing the Loft Space Before Installation
I recommend beginning with a thorough inspection of the area. Clear out any debris, clutter, or items that may obstruct the workspace. This ensures a safe environment for installation.
Next, check for any signs of moisture or mold. Addressing these issues beforehand can prevent more significant problems later on. Consider utilizing a dehumidifier if the space feels damp.
Verify that the surrounding structure can support additional weight. Inspect beams, joists, and any existing installations. If there are doubts about structural integrity, consult a professional.
Examine the ventilation system. Adequate airflow is necessary to maintain a comfortable atmosphere. If vents are blocked or poorly positioned, adjust them as needed to enhance circulation.
Additionally, think about the finished appearance. Decide whether to install a level subfloor to create an even surface. This can help facilitate a more straightforward installation process for chosen materials.
Lastly, take measurements of the area precisely. Understanding the dimensions allows for accurate material selection and reduces the chance of waste. Utilize a level tool to ensure alignment throughout your project.
Measuring and Cutting Floor Panels Accurately
First, ensure you have precise measurements before proceeding with your panels. Use a reliable tape measure, preferably one that locks in place, to avoid any inaccuracies. Measure the length and width of each section where the panels will fit, taking notes for reference.
- Account for any irregularities in the structure, like beams or ducts, by measuring around them.
- Mark the measurements clearly on the panels with a pencil or chalk, using a straight edge for accuracy.
Next, cutting the panels requires the right tools. A circular saw is ideal for larger sheets, while a handsaw works well for smaller pieces. Ensure the cutting tool is sharp to achieve clean edges.
- Set the blade depth appropriately to match the thickness of the panel.
- Always cut with the finished side facing up to prevent splintering.
- Clamp the panel securely to a workbench to avoid movement during cutting.
After cutting, double-check that each piece fits snugly in its designated space. Minor adjustments can be made using a rasp or sandpaper to ensure a perfect fit.
Finally, take your time throughout this process. Rushed measurements or cuts can lead to errors that may compromise the overall installation.
Installing a Vapor Barrier Over Insulation
To ensure superior moisture control, I always recommend installing a vapor barrier directly above the thermal layer. This prevents moisture from penetrating the insulating material and causing mold or degradation over time. A polyethylene sheet, typically 6 mil thick, is ideal for this task.
Steps for Installation
1. Cut the Barrier: Measure the area accurately and cut the polyethylene to size, allowing for overlaps of at least 12 inches at seams.
2. Lay the Material: Place the barrier across the insulation, ensuring it lays flat without any folds or wrinkles.
3. Seal the Seams: Use high-quality tape to seal all seams and any punctures to maintain the integrity of the moisture barrier.
Maintenance Tips
Regularly inspect the vapor barrier for any signs of damage or moisture build-up. If issues are detected, repair them immediately to maintain the protective function.
| Material | Thickness | Recommended Use |
|---|---|---|
| Polyethylene | 6 mil | Vapor barrier installation |
| Reflective Foil | Various | Radiant barrier in warm climates |
| Spray Foam | N/A | Sealing gaps effectively |
Choosing the right vapor barrier is vital. Opt for materials with low permeability to maximize moisture control and protect your structure.
Securing the Flooring to Ensure Stability and Safety
I recommend beginning by examining the structural integrity of the supporting beams in your space. Reinforcing any weak areas can prevent potential hazards. Use metal brackets or connectors to secure beams and maintain alignment throughout the installation.
When laying down panels, utilize screws instead of nails for a more permanent hold. Space screws approximately 12 inches apart along the edges and 16 inches in the field. This approach enhances stability and reduces the risk of squeaking or shifting.
Employ a ply-to-ply fastening technique for layered surfaces. Align edges snugly and use construction adhesive between layers for added grip. This method establishes a solid foundation and combats shifting caused by temperature fluctuations.
Incorporate cross-bracing techniques if installing sheets across a larger area. This can minimize lateral movement and further elevate stability. Check local building codes for specific installation requirements that may apply to your project.
Ensure that any sharp edges are adequately covered to protect against injuries. Using edge banding can create a finished look while providing safety from splinters or cuts.
Lastly, install a level threshold transition strip at doorways. This minimizes trip hazards and ensures a smooth transition between different surfaces, contributing to an overall sense of safety and accessibility.
Finishing Touches: Trim and Maintenance Tips
Select baseboards that complement the existing design. I prefer using MDF for its smooth finish and ease of painting. Cut them to size, ensuring they fit snugly at corners. Secure them with adhesive and finish nails to achieve a clean look.
Sealing Gaps
- Apply caulk to any visible seams between the trim and the wall.
- This not only enhances aesthetics but also prevents drafts.
Regular Maintenance
Cleaning is paramount for longevity. Use a damp cloth to wipe surfaces regularly, avoiding harsh chemicals. Inspecting the area semi-annually for signs of wear is beneficial.
- Check for loose trim; retighten if necessary.
- Look out for moisture damage, especially in humid conditions.
Additionally, consider applying a protective finish on the trim if you opt for natural wood to prolong its life.



