

To achieve a smooth and polished finish on your crafted wooden pieces, I recommend waiting until the stain completely cures before proceeding with the next step. This can take anywhere from a few hours to a couple of days, depending on the product used and the environmental conditions. Patience here ensures that the result will be rewarding.
Select a high-quality compound for the job. I prefer natural options like beeswax or a blend of natural waxes. These products not only enhance the appearance of the wood but also provide a protective layer. Apply a thin coat using a soft, lint-free cloth, making sure to work it into the grain for maximum absorption.
After applying the product, allow time for it to set. A brief drying period of about 10 to 15 minutes is generally sufficient before buffing. Use a clean cloth to gently polish the surface in circular motions. This process not only brings out the shine but also ensures even coverage. Repeat the application and buffing if a deeper luster is desired.
For those looking for extra durability, a second layer can provide additional protection against wear and tear. Follow the same application and buffing steps to achieve a flawless finish. Regular maintenance, every few months, will keep your wooden pieces looking fresh and vibrant.
Applying a Finish for a Polished Look
Begin with a lint-free cloth or a natural bristle brush for an even application. Choose a high-quality compound designed for the specific type of surface you treated. Ensure the surface is clean and completely dry before proceeding.
Take a small amount of the product and apply it in a circular motion, focusing on one section at a time. This technique helps to avoid streaks and ensures uniform coverage. Allow it to set according to the manufacturer’s instructions, usually around 10 to 15 minutes.
Once the setting time has passed, buff the area with a clean cloth, using a light pressure to achieve a sheen. Adjust the motion to follow the wood grain for a more refined finish. Repeat the process on different sections until the entire piece receives the desired treatment.
After completing the application, let it cure for at least 24 hours before using the item. This waiting period ensures optimal durability and protection of the surface.
| Step | Action |
|---|---|
| 1 | Choose a lint-free cloth or brush |
| 2 | Apply the product in circles |
| 3 | Let it set for 10-15 minutes |
| 4 | Buff with a clean cloth |
| 5 | Allow 24 hours to cure |
Choosing the Right Wax for Your Furniture
Select a wax that complements the type of finish you applied to your item. Beeswax is excellent for most wood types, offering a natural luster and protection. It’s easy to apply and buff. For a more durable layer, consider a carnauba-based formula; it provides a harder finish and withstands wear effectively. If the piece has a heavy stain, opt for a colored wax to help conceal any imperfections while enhancing the appearance.
Consider the Finish Type
<p If you’ve used an oil-based stain, ensure the wax is compatible–many are specifically formulated for such finishes. For water-based stains, a corresponding wax type is crucial, as it can enhance adhesion and improve the overall finish. Testing on a small area is advisable to confirm compatibility.
Application Tools
<p Utilize a soft, lint-free cloth or a brush for even application. Avoid abrasive materials that may scratch the surface. Ensure the area is clean and free from dust before proceeding. For intricate designs or detailed carvings, a small brush can help reach every nook and cranny, ensuring every part of the surface receives proper protection.
Preparing Your Stained Furniture for Waxing
Before applying a protective layer, I ensure that the surface is smooth and clean. I begin by inspecting the stained area for any imperfections or dust particles, as these can affect the finish. A thorough clean is necessary; I use a microfiber cloth dampened with a mild soap solution to remove debris without damaging the stain.
Once the cleaning is done, I allow the piece to dry completely. This step is critical to ensure no moisture interferes with the finish. Typically, I wait at least 24 hours after staining before proceeding to the next stage.
If I notice any rough patches or inconsistencies in the stain, I gently sand the surface with fine-grit sandpaper (around 220 grit), following the grain to maintain the wood’s texture. This preparation not only flattens the surface but also encourages better adhesion of the finish.
After sanding, I remove any dust created during the process with a vacuum or compressed air, followed by another wipe down with a clean microfiber cloth. This ensures a dust-free environment, which is vital for achieving a brilliant final look.
| Step | Action |
|---|---|
| 1 | Inspect for imperfections |
| 2 | Clean with a mild soap solution |
| 3 | Allow to dry for 24 hours |
| 4 | Sand the surface if necessary |
| 5 | Remove dust with vacuum or compressed air |
| 6 | Wipe down with a clean cloth |
This meticulous preparation process guarantees that the subsequent application yields the best possible results. I pay attention to this stage to enhance the final appearance and durability of the finish.
Tools Needed for Wax Application
Investing in the right supplies is crucial for a successful finish. Here’s a list of items that I find indispensable:
Application Tools
A soft, lint-free cloth is my go-to for applying the finish evenly. An applicator pad also works well if you prefer a bit more control. Avoid using brushes, as they can leave streaks.

Buffing Equipment
For buffing, I recommend a clean microfiber cloth. It helps achieve a polished look without scratching the surface. A soft buffing pad attached to a power sander can be handy for larger areas, but be cautious with the speed to avoid damage.
Additional items include a clean, flat surface to work on, and if the piece is particularly intricate, having a smaller, detail-oriented applicator will enhance precision in the corners and crevices.
Collect these tools before beginning, ensuring a smooth and efficient application process.
Applying Wax Evenly on Stained Surfaces
I always use a clean, soft cloth for this task, ensuring there are no lint residues. Dampen the cloth lightly before applying the coating, which helps in achieving a smoother finish. I start in a corner and work my way across the surface in small circular motions, maintaining even pressure to avoid streaks or uneven patches.
<p_I regularly check for excess product buildup, especially in corners and crevices. If I notice any accumulation, I gently buff those areas with a separate, dry cloth to remove the excess. It's crucial to apply a thin layer initially; I prefer allowing it to dry slightly before applying a second coat if needed.
<p_I ensure that the room is well-ventilated. Working in a bright space helps me identify any areas that need more attention or correction. Consistency in application is key; I often pause to assess my progress and ensure uniform coverage as I move along.
Techniques for Buffing to a Shine
Begin by allowing the applied finish to cure for the recommended time, typically 24 hours. Use a soft, lint-free cloth for buffing – microfiber works exceptionally well. I find that circular motions yield the best results; start in a small section and gradually cover the entire surface. Apply light pressure to avoid damaging the finish.
If you prefer a more refined sheen, consider using a buffer or a rotating tool with a soft polishing pad. Keep the speed moderate to prevent overheating the finish. Always test in an inconspicuous area first to ensure it doesn’t alter the appearance adversely.
For best results, let the surface rest for about 10 minutes after application before starting the buffing process. This brief wait allows the surface to settle, which enhances end results. I also recommend buffing in sections, allowing each area to shine before moving on.
If any streaks remain post-buffing, lightly re-buff with a clean cloth to eliminate them. For a glossy finish, follow up with a light touch of furniture oil, using the cloth to blend it into the surface. This step can amplify the shine dramatically.
Identifying and Fixing Common Waxing Mistakes
Watch out for uneven application. If you notice splotches, use a clean cloth to gently buff the area until it blends. You may need to apply another thin layer to achieve consistency.
Recognizing Insufficient Coverage
If the surface feels rough or looks dull, you might not have covered all areas adequately. Reapply a thin layer, ensuring it reaches every corner and crevice.
Avoiding Over-application
Excess product can lead to a sticky surface. If this occurs, let it dry completely, then buff vigorously with a soft cloth to remove any residue.
- Choose a high-quality applicator to prevent streaks.
- Avoid applying in overly humid environments, which can affect drying.
- Store leftover material properly to maintain its quality for future use.
Tests for durability can help identify weak spots. Scratching lightly helps to see if the finish remains intact; if not, consider reapplication.
Misjudging drying time can also lead to mistakes. If the treatment hasn’t cured properly, it may smear when buffed. Always adhere to manufacturer instructions regarding waiting periods.
Finally, maintaining consistent tools and accessories ensures a seamless finish and reduces chances of mishaps.
Maintaining Waxed Furniture: Cleaning and Care Tips
Regularly dusting surfaces with a soft, lint-free cloth prevents buildup. For deeper cleaning, dampen the cloth with water or a mild soap solution. Avoid harsh chemicals, as they can damage the protective coating.
Handling Spills and Stains
Immediately blot spills with a clean, dry cloth to prevent absorption. For stubborn stains, use a mixture of water and vinegar, gently applying it with a cloth. Rinse with clean water to remove residue and dry thoroughly.
Reapplying the Finishing Coating
Every six months to a year, I lightly buff the surface to maintain its sheen. If it appears dull, a thin layer of finishing compound can be reapplied. Always test in an inconspicuous area before full application.
Allowing Stain to Cure Before Waxing
It is crucial to let the stain dry thoroughly before applying any finishing coat. Curing time can vary based on temperature, humidity, and the type of product used. Typically, a waiting period of 24 to 48 hours should suffice for most oil-based stains, while water-based options might require up to 72 hours.
Recommended Curing Practices
- Check the manufacturer’s instructions for specific drying times.
- Perform a touch test: lightly touch an inconspicuous area to feel for tackiness.
- Ensure good ventilation; this aids in the drying process.
Rushing this step could lead to issues like uneven application or a lack of adhesion, compromising the overall finish. Waiting allows the pigments and solvents in the stain to settle, resulting in a more stable and resilient surface for subsequent treatments.
Signs That Stain is Ready for Finishing
- No stickiness upon touch.
- Even color without blotches.
- An absence of any smell, indicating that solvents have evaporated.
Being patient pays off in longevity and appearance of the surface, ensuring a professional look that stands the test of time.
Understanding Different Types of Wax Finishes
Choosing the right type of finish can significantly impact the appearance and durability of your project. Here are several popular options:
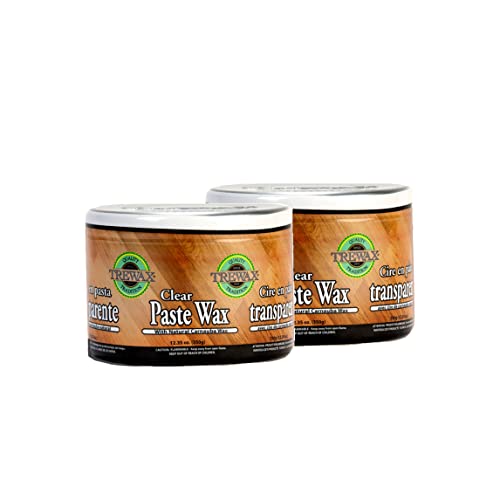
1. Paste Waxes
These are thick formulations that provide a rich luster and a strong barrier against moisture. Ideal for high-traffic areas, paste waxes generally take longer to apply but result in a robust protective coating. I prefer paste wax for its easy application and longevity.
2. Liquid Waxes
Liquid varieties are easier to apply, often requiring just a cloth for distribution. They absorb quickly but may need more frequent reapplication. This option is suitable for quick touch-ups and occasional maintenance.
3. Beeswax
This natural choice not only offers excellent protection but also enriches the wood’s natural beauty. It’s often blended with other oils for enhanced performance. I like beeswax for its eco-friendly attributes and its ability to give a warm finish.
4. Carnauba Wax
Derived from Brazilian palm trees, carnauba is known for its hard, glossy finish. It creates a protective layer that shines beautifully and can withstand wear. While harder to work with, its durability makes it worth the effort.
5. Hybrid Waxes
Combining various waxes and oils, hybrid options strive for the best of both worlds, offering ease of application while maintaining a robust finish. I often use hybrids for their versatility and balanced protection.
Conclusion
Understanding my options allows me to make informed decisions regarding care and maintenance, ensuring longevity and aesthetics of my projects.


