Begin with measuring the surfaces of your items accurately. This ensures that you purchase the right quantity of decorative paper. I usually recommend adding a few extra inches to account for errors during application.
Next, clean the surfaces thoroughly to remove dust and grease. A simple solution of water and mild detergent will do the trick. Be sure to dry the areas completely before proceeding, as moisture can affect adhesion.
Using a cutting tool, carefully trim the decorative material to fit each section of the unit. I find that using a sharp craft knife and a straight edge leads to better edges and a cleaner finish. Plan the layout before sticking anything down to achieve a seamless look.
When applying the material, start from one edge and work your way across, smoothing as you go to eliminate air bubbles. A plastic smoothing tool is helpful here, providing a smooth finish without damaging the surface beneath.
Once you’ve covered the entire area, use a blade to trim off any excess at the edges. Allow everything to cure properly for a lasting effect. I usually let it set for at least 24 hours before using the items again.
Applying Decorative Paper on Flat-Pack Items
Measure the surface area of the piece precisely. This step ensures you cut your decorative paper correctly without any waste. Take into account any drawers, doors, or shelves that will be covered.
Select high-quality adhesive that is suitable for your chosen material. This choice plays a significant role in the durability of the application. Test the adhesive on a small section to check for any reactions or damage to the surface.
Cut the decorative paper according to your earlier measurements, leaving a small excess along the edges for trimming. Use a sharp utility knife or scissors for clean cuts.
Before applying, clean the surfaces. Dust, grease, or moisture will undermine adhesion. A damp cloth will help, but ensure everything is dry before proceeding.
Begin from one edge and apply the adhesive evenly. Press the paper lightly onto the surface and adjust for alignment. Utilize a smoothing tool or a credit card to eliminate any air bubbles, working from the center toward the edges.
If there are intricate areas, such as corners or curves, you might need to make small cuts in the paper to allow it to lay flat without wrinkles.
| Step | Tool/Material | Tip |
|---|---|---|
| Measure | Measuring tape | Include all surfaces |
| Cut | Utility knife | Leave extra for trimming |
| Clean | Damp cloth | Ensure it’s completely dry |
| Adhere | Quality adhesive | Test on a hidden area first |
| Smooth | Smoothing tool | Work from the center outwards |
Trim excess edges once the paper is securely in place. A sharp blade ensures crisp lines. Finish with a sealant if desired to enhance longevity.
Selecting the Right Wallpaper for Furniture
Consider patterns that complement the overall design of your spaces. Floral designs or geometric shapes can add visual interest, but they should harmonize with existing decor.
Types of Patterns
- Solid Colors: Ideal for a minimalist approach, solid shades can create a sleek, modern look.
- Textured Finishes: Choices like linen or embossed options can enhance tactile experience and depth.
- Bold Prints: Striking designs work well as statement pieces, but ensure they don’t overwhelm the area.
Color Selection
Opt for hues that resonate with the mood you want to create. For example:
- Soft pastels for a calming vibe
- Bright colors to energize the space
- Neutral tones to maintain versatility
Samples are crucial. Test small pieces on surfaces to assess how lighting changes their appearance throughout the day. This ensures the final choice aligns perfectly with your vision.
Finally, consider the durability of the material. Washable options are practical for items that see regular use. Quality matters, as it influences both longevity and ease of maintenance.
Preparing the Surface of Furniture
I begin with thorough cleaning to remove dust, grease, and any residues. A mixture of warm water and mild detergent works well. After wiping down the surfaces, I allow them to dry completely before proceeding.
Next, I check for any imperfections like scratches or dents. If found, I fill them with wood filler or putty, then sand the area smooth once it dries. For best results, I use fine-grit sandpaper to ensure a seamless finish.
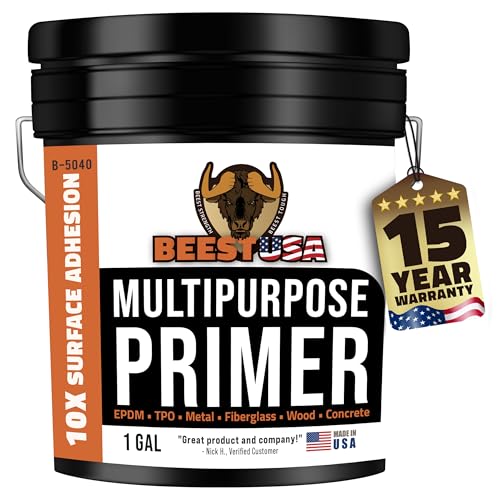
To enhance adhesion, I then apply a primer suitable for the material of the piece. I ensure even coverage using a foam roller or brush, focusing on edges and corners. After the primer dries, I lightly sand the surface again to create a smooth base.
Ensuring Smooth Edges
When edges are involved, I take extra care. I use painter’s tape to mask off areas where I don’t want adhesive to seep. This helps maintain clean lines and prevents peeling later on. After taping, I run my hand over the surface to ensure it’s ready for the next steps.
Final Inspection
Before applying the decorative layer, I inspect everything one last time. Ensuring the surface is dust-free and dry guarantees optimal results. This preparation phase is crucial for achieving a polished look.
Choosing the Proper Tools for Wallpapering
First, gather a sharp utility knife for precise cutting and trimming. A straight edge or ruler will ensure clean lines, while a wallpaper brush or squeegee helps eliminate air bubbles during application.
A sturdy work surface, like a clean table, is necessary for measuring and cutting the decorative material. Don’t forget a tape measure for accurate sizing, and a pencil for marking measurements.
For adhesive, select a type specifically designed for your chosen material. Applying it evenly with a brush or roller is crucial. A seam roller helps press seams tightly for a seamless finish.
Additional Tools
If you’re applying thicker materials, consider a heat gun to soften the adhesive for easier manipulation. A level ensures everything is hung straight, which is key for visual appeal. Lastly, protective gear like gloves will keep hands clean and safe from adhesive.
Cleanup Supplies
Keep damp cloths handy for immediate cleanup of excess adhesive. A bucket of water and a sponge will be useful for soaking and removing any stubborn remnants left on surfaces.
Applying Wallpaper to Flat Surfaces
For optimal adhesion, I make sure the surface is perfectly clean, dry, and smooth before applying any adhesive film. I often use a mild cleaner to remove dust and grease, followed by wiping with a damp cloth.
Next, I measure the dimensions of the flat area accurately. This helps in cutting the wallpaper to the right size, reducing waste and ensuring a snug fit. I typically add an extra inch on all sides for adjustments.
Once the pieces are cut, I mix the adhesive according to the product instructions. I use a roller for applying the adhesive evenly across the surface. I pay special attention to the edges to ensure they are adequately coated.
Then, I carefully position the patterned film, starting from one edge and gradually smoothing it outwards to avoid air bubbles. For this, I use a plastic smoothing tool, which helps in pushing out air and ensuring good contact with the underlying surface.
After placement, I trim the excess material at the edges using a sharp utility knife. I always ensure my cuts are clean for a professional finish.
Lastly, I check for any air pockets or raised edges. I gently press those areas down with the smoothing tool, ensuring a perfect seal. Once done, I wipe off any excess adhesive immediately with a damp sponge to prevent residue from forming.
Dealing with Edges and Corners
For a seamless finish, pay close attention to the edges and corners during application. Cutting and shaping are essential steps that demand precision.
1. Preparation of the Edges: Ensure the edges are clean and smooth. Use sandpaper to gently buff any rough spots where the decoration will meet the surface.
2. Measuring and Cutting: Measure the height and length of each section, adding extra material for overlaps. Use a sharp utility knife for clean cuts. It’s helpful to make straight cuts from the back to maintain control.
3. Corner Application Techniques:
- Internal Corners: Apply the material straight across the corner, then fold it into the corner gently. Ensure the overlap adheres well.
- External Corners: Cut the piece at a 45-degree angle. Overlap the edge slightly for a neat finish.
4. Using a Smoothing Tool: Utilize a smoothing tool to firmly press the material into corners. This reduces air bubbles and ensures a tight seal.
5. Final Trimming and Sealing: After applying to the corners, trim the excess with precision. A clean edge makes a significant difference in the final look.
By focusing on these specific techniques and tips, the end result will be a professional appearance that enhances the overall design.
Finishing Touches and Maintenance Tips
After completing the application process, I always ensure to trim any excess material carefully. For a neat finish, I use a sharp knife and a straight edge to avoid any ragged edges. This step makes a significant difference in the overall appearance.
Sealing the Edges
To prevent lifting and peeling, I apply a clear adhesive at the edges. This creates a smooth, clean seal that keeps everything in place. I’ve noticed this simple technique helps maintain the integrity of the surface over time, especially in high-use areas.
Regular Cleaning and Care
Maintaining a freshly decorated surface is straightforward. I recommend using a damp cloth for light cleaning. For stubborn stains, a gentle cleaner works wonders without damaging the design. Always test any cleaning solution on an inconspicuous area first to ensure compatibility.
Over time, if I notice any wear, I can easily replace individual sections without needing a full redo. Carefully peeling away damaged areas, I can measure and cut new pieces to fit, keeping the overall aesthetic cohesive.
Storing any leftover material is also a good practice. This way, I can address future repairs or touch-ups efficiently.