For a refreshing update on your home decor, consider incorporating textile coatings into your design routine. I recommend selecting a high-quality spray version that allows for smooth application on various surfaces.
Prioritize surface preparation by ensuring each item is clean and free of dust. A quick wipe with a damp cloth helps achieve maximum adherence. If the piece has a glossy finish, lightly sand it to encourage better bonding.
Test your technique on a small, inconspicuous area to refine your skills. Using a stencil can create captivating patterns, while freehand designs provide a more personal touch. Layer colors for depth and visual interest, but allow adequate drying time between applications.
Remember to seal your work with a suitable protective layer after the final touch-up. This step enhances durability and makes cleaning effortless. Lastly, enjoy the satisfaction of transforming ordinary items into unique expressions of your style.
Selecting the Right Fabric Paint for Your Project
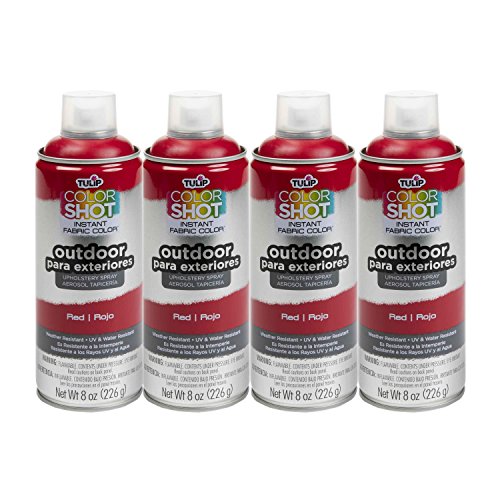
Choose the type that suits your surface, such as an acrylic-based option for its durability and flexibility. For outdoor items, opt for products labeled as weather-resistant to ensure longevity under varying conditions.
Finish and Texture
The finish plays a significant role in the final appearance. A matte finish suppresses shine, offering a modern look. Conversely, a glossy variant enhances colors and adds a polished touch. Experiment with samples to determine the desired end effect.
Color Fastness and Mixing
Evaluate the pigment quality for fade resistance. For custom shades, blend colors carefully, keeping in mind that mixing different brands may result in unexpected results. Test on a small area to assure compatibility and the strength of the hues.
Preparing Furniture Surface for Painting
Clean the surface thoroughly. I typically use a mixture of warm water and mild detergent to remove dirt and oils. After rinsing with clean water, I let it dry completely.
Next, I assess the material. For smooth surfaces, I lightly sand the area using fine-grit sandpaper. This helps the coating adhere better. If I’m working with a textured finish, I ensure that the fabric is still intact and firmly attached.
Removing Old Finish
If there is an existing finish, like varnish or stain, I apply a chemical stripper as per the manufacturer’s instructions. Afterward, I carefully scrape off the residue. I make sure to wash the surface again to eliminate any leftover chemicals.
Priming the Surface
Applying a primer is a step that I find makes a significant difference. I choose a primer suitable for the material, ensuring it bonds well with the subsequent coats. Once the primer dries, I gently sand it to create a smoother surface for application.
After completing these steps, the surface is ready for the application, ensuring better adherence and a smoother finish for the outcome.
Choosing and Creating Stencils for Designs
For precise designs, laser-cut stencils work wonders. Alternatively, craft your own from heavy cardstock or mylar sheets. Select an image or pattern that complements your piece, then resize it as needed. Use a craft knife to carefully cut out your design, ensuring clean edges for sharp lines.
Before applying the stencil, temporarily secure it using painter’s tape; this prevents shifting and ensures alignment. Always test the stencil on scrap material to adjust paint thickness and application technique. This practice helps avoid blunders on your main piece.
Layering stencils can create intricate designs. Start with the base layer, let it dry, then apply subsequent layers with different colors or patterns. Allow adequate drying time between applications to prevent smudging.
For larger surfaces, consider creating a repeating pattern. Break your design into sections, drawing a grid on the surface to aid alignment. This technique simplifies the process and maintains consistency across the piece.
Remember to clean your stencil between colors and designs to ensure they remain crisp. Spraying a light mist of water or applying a thin layer of adhesive to the back can help minimize paint bleed. Choose colors that harmonize with your overall aesthetic, balancing bold and subtle tones as desired.
Techniques for Applying Fabric Paint to Furniture
For achieving clean lines and detailed designs, I prefer using a fine tip brush. This allows for precision, especially around edges and cutouts. I opt for single strokes rather than going over areas repeatedly, which helps in maintaining a smooth finish.
Spraying Method
A spray approach delivers an even finish across larger surfaces. I ensure to shake the can well and keep it 6-12 inches from the surface. Quick, light coats are my go-to, allowing adequate drying time in between to prevent runs. Always work in a well-ventilated space to avoid inhaling fumes.
Sponge Application
This technique creates textures and blends colors seamlessly. I use a natural sponge, dipping it lightly into the color, then applying with a tapping motion. Layering is essential; I let the first coat dry before adding another for depth and richness.
| Technique | Best For | Tips |
|---|---|---|
| Brush | Detailed work | Use fine tip for edges |
| Spray | Larger areas | Maintain distance; multiple light coats |
| Sponge | Textured effects | Tap for blend; layer after drying |
Before starting any technique, I always test on a scrap piece or hidden area to see how the surface reacts. This allows me to adjust my method according to the material’s response during the application process.
Setting and Curing the Fabric Paint Properly
Always allow adequate drying time between coats to achieve the best results. After applying the initial layer, let it dry completely, usually around 2-4 hours, before adding additional layers. Follow the manufacturer’s instructions for specific drying times, as they can vary based on the product used.
Once all layers are applied, the curing process begins. This generally requires the item to sit undisturbed for 24-48 hours at room temperature. Avoid any contact with water during this time to ensure the color sets firmly.
For enhanced durability, consider heat setting the design. Use an iron on a low or medium setting, placing a cloth between the iron and the surface. Move the iron gently without pressing down too hard for about 30 seconds to a minute over the painted areas. This step helps the pigments bond with the fibers, enhancing longevity.
After heat setting, allow the piece to cool down completely before using it. Avoid exposing the item to moisture or harsh cleaning agents for at least one week post-curing to maximize the lifespan of your design.
Maintenance Tips for Painted Furniture
To keep your newly adorned surfaces looking fresh, regularly dust them with a soft, dry cloth. Avoid using abrasive materials, as they can damage the finish.
Cleaning Your Surfaces
For deeper cleaning, mix mild soap with water. Dampen a cloth with the soapy solution, wipe down the area, and then immediately dry it with another cloth to prevent moisture damage.
Protective Measures
Consider applying a sealant or topcoat specifically designed for the type of surface you’ve transformed. This step enhances durability and adds a layer of protection against scratches and stains.
Avoid placing heavy objects on the newly treated surfaces for a few weeks to allow the treatment to fully cure. Be mindful of direct sunlight exposure, as it can fade colors over time.
For touch-ups, keep a small amount of your color mixture handy. This makes it easier to blend in any minor scratches or blemishes without having to repaint an entire section.
Removing Mistakes and Touching Up Paint
For correction of errors, quick action is key. If you notice a smudge or uneven application, it’s best to address it as soon as possible. Gently dab the area with a barely damp cloth to lift any excess material without spreading it further.
If the mishap requires more than just blotting, let the finish dry completely before initiating any touch-ups. Use a fine brush or sponge to apply a small amount of your chosen color directly over the imperfection. Always test this on a hidden spot first to ensure color matching.
For more substantial errors, you may need to remove the flawed section. Carefully scrape the unwanted material with a plastic scraper, taking care not to damage the underlying surface. After removal, clean the area thoroughly and allow it to dry before reapplying.
Consider these steps for effective touch-ups:
- Ensure the area is clean and dry before proceeding.
- Use a brush that offers precision for small repairs.
- Apply thin layers to build up coverage gradually.
- Blend edges carefully to avoid harsh lines.
Patience is vital. Allow each layer ample time to dry before adding additional coats, ensuring a smooth and cohesive finish. If you find the touch-up is still visible after several attempts, it may be necessary to repaint the entire section for a seamless look.
FAQ:
What type of fabric paint is best for furniture?
When selecting fabric paint for furniture, look for paints that are specifically designed for upholstery and textiles. Acrylic fabric paints or textile medium mixed with regular acrylic paint are good options. These types of paint provide flexibility and durability, ensuring that the finish won’t crack or peel over time. It’s also recommended to check if the paint is machine washable and suitable for the fabric type you’re working with.
Can I use fabric paint on leather furniture?
Using fabric paint on leather is generally not recommended, as leather requires special materials designed for its specific texture and properties. However, there are leather paints available that can achieve a similar effect. If you want to customize a leather item, use these specialized paints to ensure adherence and a lasting finish. Always perform a patch test in an inconspicuous area before applying it to the entire piece.
How do I prepare furniture for painting with fabric paint?
Preparing your furniture is crucial for a successful painting project. Start by cleaning the surface thoroughly to remove dust, dirt, and oils. If the furniture has a shiny finish, lightly sand the surface to help the paint adhere better. For upholstery, spot clean any stains and ensure it’s completely dry before painting. Using a fabric primer can also help the paint adhere and provide a smoother finish.
What techniques can I use to apply fabric paint to furniture?
There are several techniques you can use to apply fabric paint, depending on the desired effect. Brush painting offers control for detailed work, while spray painting can cover larger areas quickly. Stenciling allows for creative patterns, and sponge application can produce interesting textures. Whichever method you choose, make sure to use even strokes and layers, allowing adequate drying time between each layer for the best result.
How do I maintain furniture painted with fabric paint?
Maintaining furniture painted with fabric paint involves gentle cleaning and careful handling. Avoid harsh chemicals and opt for mild soap and water for cleaning. If the fabric becomes stained, treat it as soon as possible. Avoid prolonged exposure to direct sunlight to prevent fading. Lastly, consider using a fabric protector spray to help safeguard the paint from spills and stains.


