Caleb Turner
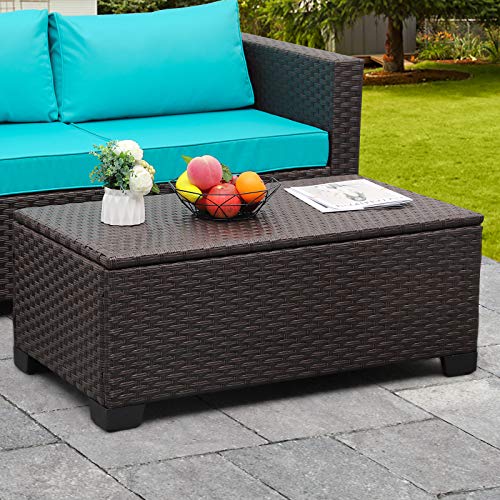
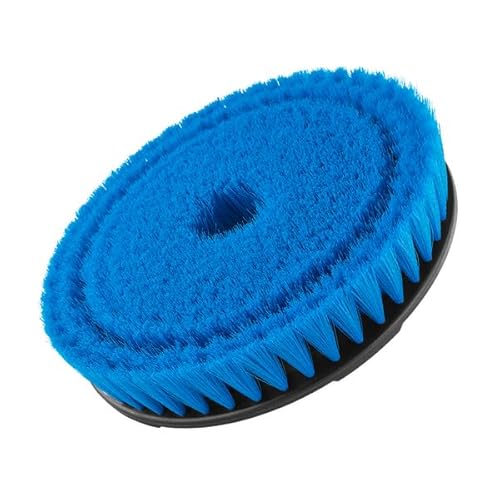
Begin by thoroughly cleaning your pieces to remove dirt, grime, and any residues. Use a mild soap solution with a soft brush to avoid any damage. Rinse everything well and allow it to dry completely to prevent mold growth during storage.
Once dry, consider utilizing protective covers specifically designed for furniture pieces. Choose breathable materials to prevent moisture buildup. Secure these covers tightly to protect against dust and potential rodents.


If possible, relocating the seating to a sheltered location can be beneficial. Garages, basements, or storage sheds offer a controlled environment that mitigates exposure to harsh conditions. Ensure the space is dry and ventilated to maintain the integrity of the materials.
For items that remain outside, elevate them off the ground using pallets or platforms to avoid direct contact with moisture. This simple step can significantly prolong their lifespan. Regular checks throughout the colder months will help identify any early signs of wear or damage.
Storage Tips for Seasonal Protection
Begin by cleaning thoroughly; use mild soap and water to remove dirt and grime. Rinse well and allow to dry completely to prevent mold and mildew during storage.
Next, disassemble items if possible. Separating larger pieces makes them more manageable and allows for efficient use of space.
Ideal Environment for Safekeeping
Choose a dry, temperature-controlled area to minimize the risk of damage. Avoid basements with high humidity or garages that experience extreme temperature fluctuations. A shed or dedicated storage unit works well.
Protective Measures
Wrap each piece in breathable fabric or bubble wrap to guard against scratches and dust. Use furniture covers designed for outdoor products; look for moisture-resistant materials.
| Step | Description |
|---|---|
| Cleaning | Wash with mild soap, rinse, and dry completely. |
| Disassembly | Take apart larger pieces to save space. |
| Location | Store in a dry, temperature-controlled environment. |
| Wrapping | Use breathable fabrics or bubble wrap for protection. |
By following these steps, I ensure that my items remain in excellent condition until the warmer months return.
Assessing Your Wicker Furniture for Winter Storage
Begin with a thorough inspection of each piece for any signs of damage, such as cracks, loose weaves, or broken frames. This will help determine if repairs are needed before the items are stored.
1. Check for stains or dirt accumulation:
- Use mild soap and water to clean your items, avoiding harsh chemicals that could damage the finish.
- Ensure everything is completely dry to prevent mold growth during storage.
2. Examine the hardware:
- Look for rust or rusted screws; replace any damaged hardware to maintain structural integrity.
- Tighten loose fittings to ensure stability.
3. Evaluate the cushions:
- If removable, assess the cushions for wear and tear. Consider replacing any that are excessively worn.
- Store them in a dry, breathable material to protect against moisture.
4. Assess the overall condition:
- Consider the longevity of your pieces. If they show significant wear, it may be time to invest in new items.
- Keep track of any repairs made to ensure proper care in the future.
Careful examination ahead of storage will not only prolong the lifespan of your items but also make the transition easier when the seasons change again.
Cleaning Wicker Pieces Before Storage
Begin with a thorough dusting using a soft brush or a microfiber cloth to remove loose dirt and debris. Ensure every nook and cranny is addressed.
Next, prepare a cleaning solution by mixing warm water with a mild dish soap. Dampen a cloth in this mixture and gently wipe down all surfaces. Avoid soaking the material to prevent damage.
For stubborn stains, a paste of baking soda and water can be applied directly to the affected area. Let it sit for a few minutes before gently scrubbing with a soft brush, then wipe clean with a damp cloth.
After cleaning, rinse with a cloth moistened in plain water to remove any soap residue. It’s crucial to dry completely; use a dry towel for quick absorption, then allow them to air dry in a well-ventilated space, away from direct sunlight.
To maintain the integrity of your items, consider applying a specialized protective spray designed for your particular materials. This adds a layer of defense against mold and mildew during the storage period.
Inspect all pieces for any signs of wear or damage. Repair as necessary to avoid larger issues in the future.
Finally, ensure everything is completely dry before placing your items in storage. This helps prevent unwanted moisture buildup.
Choosing the Right Storage Location
I recommend selecting a dry, climate-controlled area for your items. A basement, attic, or garage can work well, provided they’re free from moisture and pests. Avoid outdoor sheds or uninsulated spaces to prevent weather-related damage.
Ensure the location has proper ventilation. Stagnant air increases humidity, leading to potential mold and mildew issues. If possible, place dehumidifiers in the area to maintain optimal humidity levels.
Assess accessibility. You’ll want a location that allows easy entry, enabling you to retrieve and return items with minimal effort. Avoid cramped spaces where you risk damaging your pieces when moving them.
Prioritize safety from potential hazards. Store items away from sharp tools, chemicals, and other materials that could cause damage. Elevating pieces off the ground can also help prevent water damage in case of flooding.
If sharing space with other belongings, utilize protective covers or containers for extra protection. This reduces the risk of scratches or other damages during the retrieval process.
Considering these factors will help ensure your items remain in excellent condition, ready for use when warmer weather returns.
Best Practices for Covering Wicker Furniture
Choosing the right cover is paramount. Opt for breathable, waterproof materials to prevent mold while allowing moisture to escape. Custom-fit covers prevent shifting and ensure complete protection.
Before covering the pieces, ensure they are completely dry. This will mitigate the risk of mildew forming beneath the cover. Avoid plastic or non-breathable materials, as these trap moisture and can cause damage over time.
Securing the covers can greatly enhance their effectiveness. Use straps or elastic edges to keep them in place against the wind. This also prevents lifting or shifting, which can expose areas to the elements.
| Cover Material | Pros | Cons |
|---|---|---|
| Polyester | Durable, water-resistant, breathable | Can fade in harsh sunlight |
| Vinyl | Waterproof, easy to clean | Non-breathable, can trap moisture |
| Canvas | Breathable, sturdy | Less water-resistant without treatment |
| Custom-fit | Perfect coverage, tailored protection | Usually more expensive |
Regularly check covered items to ensure no unwanted moisture or pests are present. This simple maintenance can prolong the lifespan of these pieces significantly. If any covers show signs of wear, replace them promptly to maintain optimal protection.
Consider adding protective cushions or pads beneath covers for extra padding. This can help keep the furniture’s shape intact and prevent any cracking or damage from shifting.
Using Outdoor Furniture Storage Bags
Investing in high-quality protective covers is a game changer for prolonging the life of your pieces. I prioritize using storage bags specifically designed for exterior items, as they provide a solid barrier against moisture, dust, and pests.
When selecting these bags, I consider the material. Waterproof options are ideal, ensuring that rain or snow doesn’t seep through. I also look for breathability to prevent condensation from accumulating inside, which can lead to mildew.
Proper sizing is crucial; bags should fit snugly without being excessively tight. Loose bags can move around in the wind, leading to wear. Velcro straps or drawstrings that secure the covers in place are highly beneficial.
Regularly inspecting these storage solutions helps me catch any damage early. I make it a point to check for rips or tears that could compromise their protective functions.
Storing accessories like cushions in these bags also protects them during colder months. I keep an organized approach by labeling each bag, making it easy to identify the contents when needed.
Stacking and Arranging Wicker Pieces
To maximize space, I recommend stacking smaller items inside larger ones, placing cushions or lightweight pieces at the base, and securing them with straps or bungee cords to prevent shifting. Ensure that heavier elements are at the bottom to maintain stability during the stacking process.
When organizing larger sections, position them side by side or at right angles to avoid direct contact. This prevents damage to the woven material over time. If possible, elevate items slightly off the ground using pallets or blocks to allow for airflow and prevent moisture accumulation.
Group similar pieces together–such as chairs with chairs or tables with tables. This not only streamlines retrieval but also helps observe any potential wear or damage during the off-season. Labeling stacks or sections can further simplify access in the future.
Consider using protective covers on each piece before stacking. This additional layer can help shield against dust and moisture, further preserving the integrity of the materials. When arranged thoughtfully, my items remain safe and in great condition until they are ready for use again.
Protecting Against Moisture and Mold
To combat moisture and prevent mold growth, I wrap each piece in breathable covers that allow air circulation. This reduces the chances of condensation buildup, which is a prime environment for mold.
Placing silica gel packs or activated charcoal bags near the items also helps absorb excess moisture. I ensure these are checked and replaced as needed throughout the off-season.
Before wrapping, I thoroughly dry items, especially any areas that might retain water. This step is crucial as it minimizes initial moisture levels. I also recommend using an antifungal spray specifically designed for natural materials, applying it before sealing everything up.
If possible, I elevate the pieces off the ground using pallets or spacers to improve airflow underneath. Keeping them away from direct contact with floors further reduces moisture retention.
Regular inspections during the storage period are beneficial. I take a quick look every month, ensuring that no dampness is present, and quickly address any signs of mildew before they escalate.
Ultimately, maintaining an environment where ventilation and dryness are priorities effectively safeguards against moisture and mold issues.
Checking for Damage and Repairs
Inspect every piece thoroughly for signs of wear or structural issues before proceeding to the next steps in preparation for hibernation. A quick assessment helps identify any necessary repairs that can prolong the life of your items.
Steps for Damage Assessment
- Examine all surfaces for cracks, splinters, or visible breaks in the material.
- Check joints and connections to confirm they are secure and not loose.
- Look for signs of discoloration or fading that might indicate prolonged exposure to elements.
- Inspect for signs of insect infestations or mold growth that may have developed over the season.
Repair Options
-
Loose joints: Apply wood glue to re-secure any loose connections, and clamp until dry.
-
Surface damage: Use a soft cloth with a mild cleaner to polish and restore the finish, followed by a protective coating if necessary.
-
Cracks and splits: Fill small cracks with a suitable filler and sand smooth; for larger cracks, consider replacing affected areas.
-
Mold removal: Clean with a mixture of vinegar and water, then let dry completely to prevent future growth.
Act swiftly to carry out repairs while assessing, as this ensures all items remain in optimal condition for the next use. Prioritize attention to detail during this process to enhance durability.
Preparing for Next Season’s Use
Inspect each piece thoroughly for any signs of wear or damage before the next sunny days arrive. Pay special attention to the joints and weaves, as they may need reinforcement or repair. If any sections seem loose or frayed, consider re-gluing or replacing them with new materials.
Once I’ve assessed the condition, I prioritize a deep clean. A mild soap solution and soft brushes work wonders, ensuring all dirt and debris are removed. After cleaning, I let everything dry completely to prevent moisture-related issues. I often use a soft cloth to apply a protective spray to extend longevity and enhance appearance.
Preparing for future use also involves organizing the storage area. I ensure that the space is clean, dry, and away from direct sunlight, as excessive exposure can fade colors over time. I also leave enough room between pieces to allow for air circulation, reducing humidity and the risk of mold.
Before the new season arrives, I recommend re-evaluating the location of my furniture. If I used covers last season, I check their condition and replace them as necessary. Investing in quality protective coverings significantly protects against the elements and dust buildup.
Finally, I keep a checklist of what I’ve done for each item. This way, I stay on track and ensure that all items are optimized for use when the season begins again.
FAQ:
What are the best practices for cleaning outdoor wicker furniture before storing it for winter?
To clean outdoor wicker furniture, first, remove any loose dirt or debris using a soft brush or cloth. Then, mix mild soap with warm water and use a soft sponge to gently scrub the surfaces. Pay attention to any crevices where dirt may collect. For stubborn stains, a mixture of vinegar and water can be effective. After cleaning, rinse the furniture thoroughly with a hose and allow it to dry completely in a sheltered area to prevent moisture buildup before storage.
How should outdoor wicker furniture be stored during the winter months to avoid damage?
Outdoor wicker furniture should be stored in a dry, temperature-controlled environment if possible. Ideal storage places include garages, basements, or sheds. If indoor storage isn’t an option, use high-quality covers specifically designed for outdoor furniture to protect against moisture, snow, and dirt. It’s advisable to elevate the furniture off the ground using pallets to prevent contact with cold surfaces and potential moisture absorption. Additionally, ensure the pieces are adequately ventilated to prevent mildew growth.
Can I leave my wicker furniture outside during winter if I use a cover?
While using a cover can provide some protection, it is still advisable to bring wicker furniture indoors during winter. Covers can trap moisture, leading to mildew or mold issues, especially in damp conditions. If indoor storage isn’t feasible, opt for waterproof and breathable covers to allow airflow while keeping out rain and snow. However, regular inspection of the covered furniture is important to ensure no moisture is accumulating underneath.
What kind of materials should I avoid using while cleaning wicker furniture?
Avoid using harsh chemicals or abrasive cleaners on wicker furniture, as these can damage the finish and weaken the weave. Products containing bleach or ammonia can also lead to discoloration. Instead, stick with mild soap and water for cleaning. Additionally, rough scrubbing pads or brushes should be avoided to prevent scratching the wicker. Soft cloths and gentle sponges are the best choices for maintaining the integrity of the furniture’s surface.
Should I disassemble my wicker furniture before winter storage, and why?
Disassembling wicker furniture before winter storage is not always necessary, but it can be beneficial for certain pieces. If the furniture is modular or can be taken apart easily, doing so can save space and make it easier to store in tight areas. Furthermore, separating components can prevent them from being damaged by the weight or pressure of other items. Always refer to the manufacturer’s instructions on disassembly, as some pieces may require special care to avoid damaging connections.
What is the best way to clean wicker furniture before storing it for winter?
Cleaning your outdoor wicker furniture before winter storage is important to maintain its condition. Begin by removing any loose dirt or debris with a soft brush or vacuum. Then, mix a solution of mild soap and water. Use a soft cloth or sponge to gently wipe down the furniture, ensuring that you reach all the crevices. After cleaning, rinse with a damp cloth to remove any soap residue. Allow the furniture to dry completely in a shaded area before storing it away. This process helps prevent mold and mildew during the winter months.