Begin with a thorough examination. Inspect each piece for rust, peeling paint, and structural damage. Use a soft brush or cloth to remove loose dirt and debris. For rusted areas, a wire brush or sandpaper will be your best friend; aim for a clean surface before proceeding.
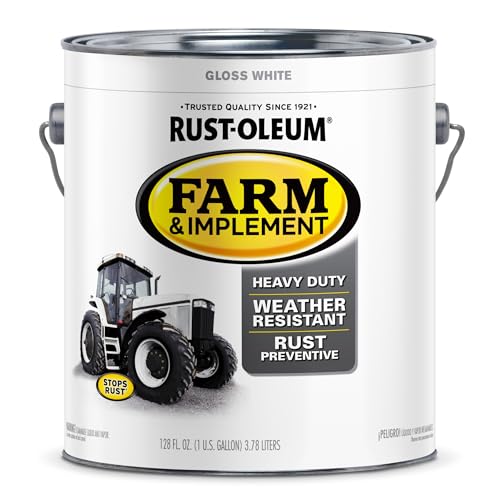
Next, apply a rust-inhibiting primer. This step is crucial, as it prepares the surface for paint and protects against future corrosion. Choose a primer that adheres well to metal and is designed for outdoor use, ensuring durability against the elements.
After priming, select a high-quality exterior paint. Consider colors that complement your garden or patio style. Use a spray can for an even finish or a brush for more control over application. Multiple thin coats will yield the best results, allowing for proper drying time between each layer.
Finally, add a protective sealant to enhance longevity. This clear coat will safeguard against moisture and UV damage, preserving the beauty of your revitalized pieces for seasons to come. Regular maintenance, such as cleaning and touch-ups, will keep your garden seating looking fresh.
Steps to Revitalize Your Rusty Patio Items
Begin with a thorough cleaning. Use a mixture of warm water and dish soap, scrubbing with a non-abrasive sponge to remove dirt and grime.
Assess the condition carefully. Look for rust spots. If any are present, sand them down with medium-grit sandpaper until the surface is smooth and free of corrosion.
Consider applying a rust-inhibiting primer. Selecting a product designated for metal surfaces ensures durable protection against future oxidation. Allow it to dry as per manufacturer recommendations.
Choose an outdoor paint that is compatible with metal and suitable for the climate. Use a spray can or a brush for applying even coats. Multiple thin layers are preferable, allowing adequate drying time between each application.
Inspect joints and structural areas for weaknesses. If any parts are loose, tighten them or replace screws as necessary to ensure stability.
Finally, apply a clear sealer to enhance longevity. This extra layer protects against moisture and UV exposure, ultimately preserving the newly freshened look.
Assessing the Condition of Your Metal Furniture
I examine each piece carefully, looking for signs of rust or corrosion. A quick visual inspection reveals areas where the finish has faded or chipped. I run my fingers over the surface to feel for rough spots or inconsistencies. If the piece is severely damaged, I take note of any structural issues, such as bent or wobbly legs.
Next, I test the stability by gently applying pressure to various parts of the item. If there is excessive movement or creaking sounds, it indicates a need for reinforcement. I check joints and connections for wear and tear, ensuring they are secure. If necessary, I document the condition using photos for reference during the restoration process.
I also consider the type of metal used. Understanding whether it’s aluminum, wrought iron, or another alloy helps determine the best approach for further maintenance. Each material has unique characteristics that influence how it ages and withstands the elements.
If I detect any signs of previous repairs, I evaluate their durability and effectiveness. Old paint layers might need to be tested for adhesion by scratching lightly. This will tell me if I need to strip down to the bare metal.
<pFinally, I assess the overall charm of the piece. Unique characteristics may include intricate designs or vintage appeal that I want to preserve or highlight during the upcoming project. This initial evaluation shapes the strategy for bringing the item back to life.
Gathering Necessary Tools and Materials
To achieve the best results, I gather the following tools and materials:
Tools
Wire brush is essential for removing rust, dirt, and loose paint. I prefer a durable version that can withstand tough surfaces.
Sandpaper or a sanding block helps to smooth any rough areas after scrubbing. A range of grits from medium to fine works well.
Paint scraper allows me to efficiently remove peeling paint and clean edges.
Safety gear is non-negotiable, including gloves, goggles, and a dust mask to protect myself from particles.
Primer and paint are crucial when applying a new finish. I choose rust-inhibiting options for longevity.
Materials
Drop cloths protect the surrounding area from paint splatters. I always use a few layers for better coverage.
Cleaning solution helps in prepping the surface. I typically mix water with mild detergent or use a specialized metal cleaner.
Masks and tape ensure clean lines when painting, preventing any overlap on undesired areas.
By assembling these specific items, I’m equipped to effectively revive my yard pieces with a polished finish.
Removing Loose Rust and Old Paint
Begin with a wire brush to scrub away any loose rust and chipped paint. Focus on areas where corrosion is visible, applying firm pressure to dislodge flakes. For stubborn paint, use a putty knife to scrape gently without damaging the surface beneath.
Next, consider a rust remover solution for tougher spots. Apply it as directed, allowing it to penetrate for optimal effect. Afterward, use the wire brush again to ensure all loosened material is clear.
Utilizing Power Tools
If the surface area is large, an angle grinder with a wire cup brush attachment can expedite the process. Always wear safety goggles and a mask to protect against debris. For precision work, a detail sander can effectively remove paint from intricate designs while minimizing damage.
Final Steps
After achieving a smooth surface, wipe down the furniture with a damp cloth to remove dust and residue. Let it dry completely before applying a primer or paint.
Cleaning the Metal Surface Thoroughly
I recommend beginning the cleaning process with a stiff brush to remove dirt and debris. Ensure you target crevices where grime tends to accumulate. A mixture of warm water and mild detergent works well; apply this with a sponge to the entire surface, scrubbing gently to avoid scratches.
For stubborn stains or localized corrosion, consider using a paste made from baking soda and water. Apply it to the affected areas, allowing it to sit for about 15 minutes before scrubbing with a brush. This method is effective in lifting the grime without damaging the underlying material.
If grease or oil is present, utilize a degreaser. Spray it onto the area, letting it penetrate for a few minutes. Wipe it away with a clean cloth while ensuring that no residue is left behind.
After cleaning, rinse thoroughly with clean water to eliminate any cleaning agents. I prefer using a hose for this step, as it allows for better coverage and can reach into tight spots.
Finally, dry the surface using a microfiber cloth to prevent water spots and further oxidation. This preparation is essential before proceeding with any protective treatments or refinishing tasks.
Applying Rust Inhibitor and Primer
Once the surface is clean and free of debris, I apply a rust inhibitor to prevent further oxidation. This step is crucial; it forms a protective layer over the exposed metal. I prefer using aerosol or spray-on inhibitors for even coverage. Make sure to follow the product instructions carefully, applying in a thin, even layer. Allow adequate drying time before proceeding.
Choosing the Right Primer
For optimum adhesion and protection, selecting a compatible primer is key. I opt for a rust-resistant primer specifically designed for metal. It’s critical to match the primer type with the final paint finish to ensure bonding.
Application Process
Using a clean brush or spray gun, I apply the primer in a smooth, even coat. I keep the application light to avoid runs or uneven spots. Typically, I aim for two thin coats, allowing each layer to dry completely before adding the next.
| Step | Description |
|---|---|
| 1. Apply Rust Inhibitor | Evenly coat the surface for protection. |
| 2. Choose Primer | Select rust-resistant formula matching final paint. |
| 3. Apply Primer | Use a brush or spray for even coats. |
| 4. Drying Time | Ensure complete drying between coats. |
Choosing the Right Paint for Metal Furniture
For achieving a durable finish, I select a high-quality exterior paint specifically formulated for metal surfaces. Acrylic enamel is an excellent choice due to its resistance to fading and chipping, making it ideal for items exposed to varying weather conditions.
Types of Paint to Consider
Crafting a lasting look requires thoughtful consideration of the paint type. Water-based acrylic paints dry quickly, allowing for multiple coats in a single day. Alternatively, oil-based paints provide a hard finish, perfect for heavy-duty applications, but they have a longer drying time and require mineral spirits for cleanup.
Color and Finish Options
I often choose a color that complements the surroundings while also providing sufficient contrast. For a sleek appearance, satin or semi-gloss finishes are ideal, as they offer a subtle shine without being overly reflective. Matte finishes can also be appealing, though they may require more maintenance over time.
Techniques for Spraying or Brushing Paint
For applying a fresh coat to your aged cast, I prefer the spray technique for hard-to-reach areas, while brushing works well for more controlled applications. Here’s how I approach each method:
Spraying Method
- Use a high-quality spray paint designed specifically for metal. This ensures excellent adhesion and durability.
- Keep the nozzle a consistent distance from the surface, typically 8 to 12 inches, to create an even coat.
- Apply multiple thin layers rather than one thick layer to avoid drips and runs.
- Spray in a well-ventilated area, and use a mask to avoid inhaling fumes.
- Start with the edges and then move to flat surfaces, allowing each coat to dry as instructed on the product label.
Brushing Technique
- Select a quality brush with synthetic bristles for smooth application.
- Dip the brush in paint, ensuring it’s well-coated but not overloaded.
- Use long, even strokes following the direction of the grain or shape of the piece for uniform coverage.
- Brush paint into crevices and corners for thorough coverage.
- After applying the first coat, inspect for any missed spots and retouch as necessary.
Whichever method I choose, thorough preparation of the surface and patience with the drying process both contribute significantly to the final appearance. I always allow adequate drying time between coats to prevent issues down the line.
Sealing and Protecting the Finish
I recommend using a high-quality clear sealant to ensure the longevity of your newly painted surfaces. Look for products specifically designed for use on metal surfaces, as they offer better adhesion and protection against moisture and UV rays.
Application Techniques
Apply the sealant with a spray can for an even coat; however, if you prefer a brush, use one that is suitable for the sealant type. Ensure the painted surface is completely dry before sealing. Follow the manufacturer’s instructions regarding application thickness and drying times to achieve optimal results.
Regular Maintenance
To maintain the protective layer, inspect the finish every couple of months. Clean the surface with mild soap and water, avoiding harsh chemicals that can degrade the seal. Reapply the sealant as needed, typically every one to two years, depending on exposure to the elements. This routine will help preserve the beauty and integrity of your outdoor seating arrangements.
Regular Maintenance Tips for Longevity
Regular cleaning is crucial. I wipe down surfaces with warm soapy water every few weeks to remove dirt and grime.
Inspect for rust spots frequently. Addressing small areas before they grow ensures durability. I use a fine sandpaper or wire brush to keep surfaces smooth.
Apply a protective coating annually. A clear sealant acts as a barrier against moisture. This step significantly extends the life of the finish.
Store items indoors during harsh weather. Cover them with breathable fabric if storage isn’t possible. This minimizes exposure to extreme temperatures.
Use furniture pads when placing items on hard surfaces. They prevent scratches and damage, maintaining the furniture’s aesthetic and functionality.
Keep an eye on any joints or connections. Tightening loose bolts prevents instability and potential breakage. Regular checks ensure everything remains secure.
Consider using a rust-inhibiting spray during seasonal maintenance. It adds an extra layer of protection against deterioration, particularly in humid climates.
Finally, avoid using abrasive cleaners or scrubbing pads, which can scratch and damage finishes. Gentle cleaning preserves the surface integrity.


