


To restore your beloved items, gather wood glue and clamps. Applying glue to the broken areas, align the pieces carefully and secure them with clamps. Allow them to set for several hours or overnight for a strong bond.
Should you encounter scratches or scuffs on the surface, a touch-up marker in a matching color can work wonders. Simply fill in the blemishes and wipe away any excess gently with a soft cloth.
For chips in laminate finishes, consider using a laminate repair paste. Apply the paste with a small spatula, smoothing it to blend with the surrounding area. After it dries, sand lightly and apply a sealant for a polished look.
Loose screws are easily managed; use a screwdriver to tighten them. If the threaded holes are stripped, wooden dowels can be inserted with wood glue to create a new hole for secure attachment.
Replacing damaged hardware is straightforward. Measure the existing components, purchase replacements from a local store or online, and simply swap them out for a fresh start.
Repair Techniques for IKEA Pieces
For small scratches on surfaces, I recommend using a wood touch-up marker that matches the finish. Apply it directly to the scratch and blend it gently with a soft cloth.
In case of wobbly legs, check the screws and tighten them. If they are stripped, use wood glue or a wooden dowel to reinforce the joint.
For broken panels, I typically use epoxy to bond the pieces together. Ensure the surfaces are clean, apply the epoxy, and clamp the panel until it sets.
If the finish is worn or damage is extensive, sanding the area lightly and applying a matching stain can rejuvenate its appearance.
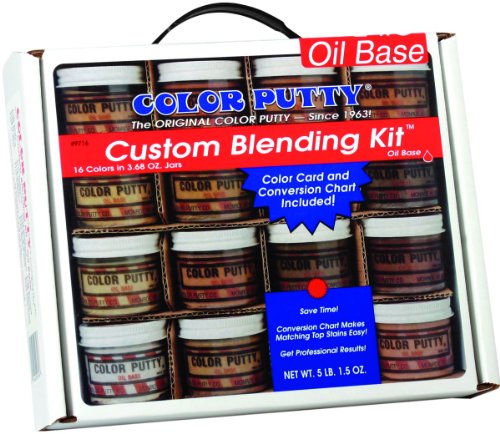
Chips in the laminate can be filled with colored putty. Choose one that closely matches the laminate, then sand it smooth after it dries.
Loose joints are common in certain models; using furniture glue can remedy this. Disassemble the joint, apply glue, and reassemble while ensuring adequate pressure is maintained.
For upholstery issues, patching with fabric remnants or using a slipcover can refresh the look while minimizing further damage.
Always keep spare screws and hardware on hand. This helps in quickly addressing minor issues when they arise.
When reassembling, pay attention to the instructions. Missing any step can lead to a lack of stability or function.
Identifying Common Issues in IKEA Furniture
I often find that the first step in addressing issues with ready-to-assemble items is to observe for stability and structural integrity. Wobbly chairs or tables signal loose connections; check for any missing screws or dowels. Tightening these components can significantly enhance stability.
Scratches and dents are frequent, especially on surfaces. For minor marks, I utilize furniture polish or a wood marker that matches the finish. Deeper gouges might require a touch-up kit with color-matched wax or filler to conceal imperfections.

Uneven legs can cause frustration, leading to instability. To remedy this, I assess each leg’s length. If one leg is shorter, using self-adhesive felt pads can create a temporary fix until a more permanent solution is determined, such as sanding or adjusting the leg itself.
For damaged laminate surfaces, I apply contact paper as a quick solution. This method not only improves aesthetics but also provides a protective layer over the damaged area.
Checking for squeaks often provides clues about loose joints. Tightening the screws or applying a lubricant can usually resolve this noise annoyance.
Lastly, no matter the issue, ensuring that the pieces are assembled per the instructions is key to avoiding future problems. Regularly revisiting assembly guidelines helps maintain the integrity of the product.
Materials Needed for DIY Repairs
Begin with wood glue or epoxy for structural fixes; these adhesives offer strong bonds for repairing joints. Clamp the pieces securely until the adhesive sets for optimal strength.

For scratches, consider touch-up markers or wood stain; these help restore the original finish. Choose a shade that closely matches the piece’s color for seamless blending.
If you face dents or gouges, putty fillers can be a lifesaver. Apply it neatly into the affected area, then sand it down once dry for a smooth surface.
For surface restoration, fine sandpaper is essential. Use a soft touch to avoid damaging the finish. After sanding, a quality furniture polish or mineral oil can rejuvenate the wood, giving it a fresh look.
When addressing loose hardware, keep a set of screwdrivers and replacement screws handy. This allows efficient tightening or replacement of fasteners that may have come loose over time.
In cases of peeling veneer, craft glue or specific veneer adhesive can assist in reattaching the pieces. Use a small brush for precise application, and weigh down the area until it bonds completely.
For assembling parts that lack complete instructions, a power drill with appropriate bits can speed up the process. Ensure you have the correct sizes to avoid stripping screws.
Lastly, a clean, soft cloth is a must for cleaning surfaces before starting any restorative tasks. This prevents dust and debris from interfering with the adhesives and finishes used.
Step-by-Step Guide to Fixing Scratches and Dents
To address scratches and dents on surfaces, I follow these steps:
-
Identify the Finish:
Determine if the surface is laminate, veneer, or solid wood. Each material requires a different approach.
-
Clean the Area:
Use a soft cloth and mild soap solution to remove dust and debris from the affected area. A clean surface allows for better treatment results.
-
Use a Wood Marker:
If the scratch is shallow, I apply a wood stain marker that matches the color of the item. This effectively masks the imperfection.
-
For Deeper Scratches:
I fill the scratch with wood filler. First, I choose a filler that matches the hue of the material, then apply it with a putty knife. After it dries, I sand it smooth with fine-grit sandpaper.
-
Heat Method for Dents:
For minor dents in wood, I place a damp cloth over the dent and apply a hot iron briefly. The steam helps the fibers swell back into place.
-
Sanding and Finishing:
After filling dents or applying markers, I lightly sand the area to ensure it’s flush. I then reapply any necessary finish–such as varnish or lacquer–using a brush or spray.
-
Prevent Future Issues:
I place felt pads under any items that may scratch surfaces and avoid placing hot items directly on the surface.
These steps have consistently helped me restore the look of my pieces effectively.
Repairing Loose Joints and Wobbly Legs
If I notice that a piece shifts or creaks, I immediately check the joints for signs of wear. First, I tighten any visible screws or bolts with a screwdriver or wrench. This simple step often resolves the issue.
If the connection still feels loose, I apply wood glue to the joint. I separate the pieces, apply a thin layer of glue, and reassemble them tightly. I wipe away any excess with a damp cloth. To ensure a strong bond, I secure the joint with clamps and leave it to dry as per the glue instructions.
For wobbly legs, I assess the leg attachment points. If there’s movement, I loosen the screws, apply additional wood glue, and retighten everything. If the legs are simply uneven, using furniture pads can stabilize them on the floor.
In cases where a leg is cracked, I opt for a wood filler. I fill the crack, smooth the surface, and let it cure fully before sanding and applying touch-up paint if necessary.
Should the frame or leg connector break, replacement parts can be obtained from a hardware store or custom-made. Relying on sturdy materials guarantees longevity.
After addressing these areas, I ensure the piece is stable by gently shaking it to test for any remaining movement. This way, I enjoy my furnishings with peace of mind.
Restoring Finishes on Wood Surfaces
To revive the sheen on wood surfaces, gather a few supplies: wood cleaner, microfiber cloths, furniture polish, and a fine-grit sandpaper or steel wool. Begin by cleaning the surface to remove any dust or grime. This ensures that the restore process adheres properly and looks smooth.
For light scratches, I recommend using fine-grit sandpaper. Gently sand the area in the direction of the grain to blend the scratch into the surrounding finish. Wipe off the dust with a damp cloth to prepare for polishing.
Next, apply furniture polish using a clean microfiber cloth. Use circular motions, which helps evenly distribute the product and brings out the grain. Allow the polish to dry according to the manufacturer’s instructions, typically about 10–15 minutes.
For deeper blemishes, consider using a wood stain that matches your piece. Apply it sparingly with a cloth, ensuring it’s not over-applied. After it dries, follow with your chosen finish to maintain uniformity.
If a complete refresh is needed, clear varnish can be applied. Sand lightly for adhesion, clean again, and apply varnish evenly with a brush. Multiple thin coats yield best results, allowing each to dry fully between applications.
| Finish Type | Application Method | Drying Time |
|---|---|---|
| Furniture Polish | Apply with a microfiber cloth | 10-15 minutes |
| Wood Stain | Apply with a cloth, wiping off excess | 1-2 hours |
| Clear Varnish | Brush on in thin layers | 2-4 hours per coat |
Consistency is key. Regular maintenance will keep wood surfaces looking pristine, and a touch-up whenever needed helps preserve their appeal for the long term.
When to Seek Professional Help for Furniture Repair
If the structural integrity of a piece is compromised, it’s wise to consult an expert. Cracks in components or severe damage to joints can lead to further issues if not properly addressed. When dealing with pieces that require advanced woodworking skills or intricate finishes, a professional’s touch can save time and enhance quality.
In cases of extensive water damage or serious staining, specialized treatment may be necessary. A skilled restoration expert can assess and mitigate underlying issues that I may overlook. If a project seems overwhelming or the necessary tools aren’t on hand, it’s beneficial to seek assistance to avoid frustration.
For vintage or valuable items, professional care preserves what may be irreplaceable. Their expertise ensures materials are treated in ways that maintain longevity and appearance. Additionally, when in doubt about safety–especially with items that support weight–it’s better to call in someone with experience.
Sometimes, the final result needs to meet a specific aesthetic standard. An expert can diagnose and resolve problems that DIY methods might not fully address. By collaborating with a specialist, I can achieve a finish that complements my space flawlessly.


