For best results, I recommend using a gentle solvent like mineral spirits or a natural alternative such as vinegar. These solutions effectively lift the old coating without damaging the delicate wood fibers.
Before proceeding, ensure to test your chosen product on a small, inconspicuous area. This step allows you to assess the compatibility of the solution with the surface, preventing any unwanted damage to the finish.
Utilizing a soft cloth or a fine-grit sandpaper, apply the solvent with gentle pressure. This technique helps to lift the existing layer gradually, revealing the beautiful natural texture beneath. Regularly wipe away the residue to monitor your progress.
Once the layer has been adequately cleared, I suggest giving the surface a light treatment with a wood conditioner. This step restores moisture and prepares the material for a new finish, enhancing its longevity and appearance.
Bamboo Refinishing Techniques
I recommend using a combination of heat and scraping to tackle the finish on your bamboo items. Begin with a heat gun, holding it a few inches away from the surface. Heat small sections until the coating becomes pliable. This makes it easier to scrape away with a plastic putty knife, minimizing the risk of scratching the bamboo.
Once an area is sufficiently heated, gently angle the putty knife and slide it under the softened coating. Apply even pressure to lift the material without damaging the underlying structure. Wipe the area with a cloth as you go to keep track of progress. Repeat this process methodically until the entire surface is stripped.
For any stubborn patches left behind, consider using fine-grit sandpaper. Lightly sand these areas in the direction of the grain, ensuring you maintain the integrity of the bamboo. Finish by cleaning the surface thoroughly to remove any dust or residue from the sanding.
Finally, ensure the piece is completely dry before applying a new finish or sealant. This optimal approach not only revives the aesthetic of the bamboo, but also prolongs its life and durability.
Assessing the Type of Finish on Bamboo Items
Identifying the specific type of coating on your wooden pieces is crucial for a successful restoration project. I recommend performing a simple test to determine the finish: apply a small amount of denatured alcohol onto a cotton ball and rub it on an inconspicuous area. If the surface softens or becomes sticky, it indicates a shellac or lacquer finish. If there’s no reaction, it’s likely a polyurethane or oil-based finish.
Types of Finishes and Their Characteristics
| Finish Type | Characteristics |
|---|---|
| Shellac | Quick-drying, can be dissolved with alcohol, often has a warm tone. |
| Lacquer | Fast-drying, durable, provides a hard finish, also dissolves with alcohol. |
| Polyurethane | High-gloss, very durable, resistant to water, typically requires solvents for removal. |
| Oil-based | Creates a rich finish, absorbed into the wood, can be cleaned with mineral spirits or turpentine. |
After identifying the type, prepare your materials accordingly. Each type requires different solvents or methods for effective treatment. Always test in a hidden area first to avoid damaging your possessions.
Choosing the Right Tools for Varnish Removal
Selecting appropriate instruments is crucial for an efficient process. Here’s a list of essential tools that will help achieve desired results:
- Sanding Block: A handheld device made of wood or foam, covered with sandpaper. Ideal for removing surface layers gently.
- Orbital Sander: Excellent for larger areas, offering a quicker alternative to manual sanding while maintaining a smooth finish.
- Scraper: Use a plastic or metal scraper to carefully lift off stubborn remnants without damaging the surface underneath.
- Heat Gun: This tool safely softens the coating, allowing for easier elimination. Use on low settings to prevent scorching.
- Chemical Stripper: Opt for a biodegradable option to protect the environment. Follow instructions for safe application and removal.
- Steel Wool: Fine steel wool can help in achieving an even finish after sanding. It works well with wood conditioning substances.
- Protective Gear: Always wear gloves, goggles, and a mask. Safety cannot be overlooked during the restoration process.
Additional Considerations
Quality over quantity matters. Investing in durable and effective tools can enhance the process significantly. Ensure each tool is suitable for the type of surface you are addressing.
Before starting, gather all necessary equipment to streamline the workflow and minimize interruptions. Organize your workspace for optimal efficiency.
Applying Chemical Strippers Safely and Correctly
Before proceeding with the application of chemical stripping agents, I ensure to gather necessary protective gear. This includes gloves, safety goggles, and a mask to prevent inhalation of fumes.
Next, I work in a well-ventilated area. Opening windows or using a fan helps maintain airflow, reducing exposure to harmful chemicals. I always read the label and safety data sheet of the product to understand the specifics regarding usage and precautions.
When I prepare the surface, I clear away any dust or dirt using a damp cloth. This ensures that the stripping solution adheres properly and works effectively. If the piece has intricate details, I use a soft brush to clean delicate areas.
I apply the chemical stripper with a synthetic brush or a sponge, ensuring an even coat across the entire surface. Working in small sections helps manage the process more effectively. I follow the manufacturer’s instructions regarding the dwell time to allow the agent to penetrate and loosen the finish.
After the allotted time, I use a plastic scraper to gently lift the softened material away. I avoid metal scrapers as they can damage the surface underneath. For stubborn areas, I may need to reapply the stripper.
Once I’ve removed the finish, I neutralize the stripper as advised. This usually involves cleaning the surface with water or a specific product recommended by the manufacturer. Ensuring no residue remains is vital as it can interfere with subsequent treatments.
Finally, I dispose of any used materials, such as rags and brushes, in accordance with local regulations. I store remaining chemical strippers safely, keeping them out of reach of children and pets.
Utilizing Sanding Techniques for Varnish Removal
Begin with coarse-grit sandpaper, ideally 80-100 grit, to tackle the finish effectively. I find a sanding block or orbital sander helps maintain an even pressure across the surface. Work with the grain to prevent damage and minimize scratches. Adjust your technique to avoid oversanding, especially on thinner sections of the material.
Once the majority of the finish is gone, switch to medium-grit sandpaper, around 120-150 grit. This stage refines the surface, smoothing out any rough patches left by coarser sanding. Continue to follow the grain; this is crucial for a uniform appearance. Regularly check your work to ensure even consistency.
Finally, use fine-grit sandpaper, such as 220 grit, to achieve a smooth, polished finish. This step is vital for preparing for any new finish or treatment. After sanding, wipe down the surface with a damp cloth to remove dust, ensuring optimal adherence for whatever comes next.
Always wear a mask and goggles during the process to protect your lungs and eyes from dust and debris. If you notice excessive heat build-up while sanding, pause to allow the material to cool down, preventing burns or damage to the bamboo. Proper sanding not only aids in finish removal but also enhances the aesthetic appeal of the piece.
Cleaning the Surface After Varnish Removal
Thoroughly wipe the surface with a clean, damp cloth to eliminate any residue left behind after stripping. I prefer using distilled water mixed with a small amount of mild soap for effective cleansing. This helps in breaking down leftover materials without damaging the natural finish of the wood.
Next, I follow up with a second wipe using plain water to remove any soap remnants. This step is critical to prevent any interference during refinishing.
For more stubborn residues, I use a solution of vinegar and water in equal parts. I apply it with a soft cloth, allowing it to sit for a minute before wiping it off. This solution is gentle yet effective in lifting any remaining substances.
After cleaning, I allow the surface to dry completely. I ensure proper ventilation during this stage, as it helps in speeding up the drying process. A dry and clean surface is primed for the next phase of refinishing.
Finally, I lightly sand the surface with a fine-grit sandpaper to even out any imperfections and prepare for the application of new finish. This technique not only smooths the surface but also enhances adhesion for whatever finish I choose next.
Protecting Bamboo Furniture After Stripping Varnish
Applying a high-quality wood finish is critical after stripping the protective coating. I prefer to use a clear polyurethane sealant or a natural oil, depending on the desired look and level of protection. Make sure the surface is fully dry before proceeding.
Using a Clear Sealant
If choosing a polyurethane sealant, I opt for a water-based formula for ease of application and quick drying. I apply it with a synthetic brush, ensuring even coverage. Two to three coats enhance both the durability and aesthetic of the surface. Lightly sanding between coats with fine-grit paper improves adhesion.
Applying Natural Oils
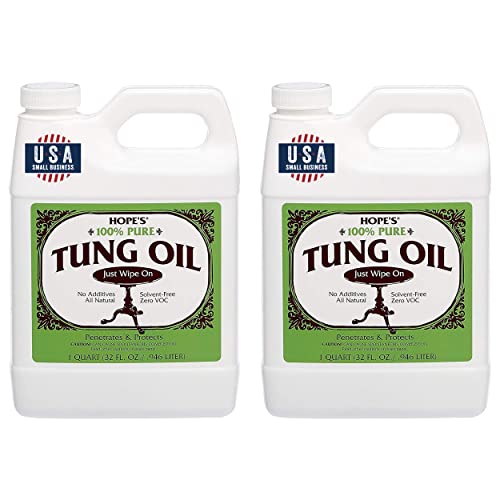
For a more natural look, I like using oils such as tung or linseed. These penetrate deeply and provide a rich finish while allowing the grain to show through. I typically use a soft cloth to apply the oil, working it into the wood in circular motions. After an initial coat, I let it sit for a few hours and then wipe off any excess. Reapplication every few months maintains the sheen and protection.
Addressing Common Issues During Varnish Removal
Ensure adequate ventilation in your workspace to avoid inhalation of harmful fumes. If I notice strong odors, I take breaks and allow fresh air to circulate.
Difficult patches may arise, especially if multiple coats were applied. Applying a fresh layer of chemical stripper can loosen stubborn areas for easier extraction. I find using a plastic scraper effective to prevent damage to the surface underneath.
Over-sanding can lead to marks or uneven surfaces. I opt for fine-grit sandpaper and work carefully, gradually building up pressure only where necessary.
Color discrepancies post-removal can occur due to the original finish seeping into the material. In such cases, I apply a wood conditioner, which helps in evening out the tone before applying new finish.
Cleanup is crucial; using mineral spirits or warm, soapy water immediately after the stripping process ensures that all residues are removed, preventing any potential reactions with subsequent treatments.
Lastly, if I encounter sticky residue remaining after the process, a solution of vinegar and water effectively cuts through and simplifies the cleanup, leaving a clean surface ready for new protective applications.


