Begin by gathering necessary tools: a flathead screwdriver, pliers, and safety goggles. These will ensure both effectiveness and safety while tackling your seating piece.
Carefully turn the item upside down to access the underside where the fasteners are located. Use the flathead screwdriver to gently pry the edges of the staples. Avoid excessive force; the goal is to loosen them without damaging the fabric.
Once loosened, switch to pliers for better grip. Firmly grasp each fastener and pull it out in a straight motion. This technique minimizes the risk of tearing the material. If some stubborn pieces remain, repeat the prying method with the screwdriver.
After successfully extracting all fasteners, inspect the surface for any remaining debris or damage. If needed, clean the area and make any necessary repairs before proceeding with reupholstery or refinishing.
Removing Fasteners from Soft Seating
Begin with a flathead screwdriver. Insert the blade into the gap between the fabric and the fastener. Gently wiggle the tool to lift the fastener up and out of the material. Apply minimal pressure to avoid damaging the upholstery.
If the fasteners are stubborn, utilize pliers for better grip. Clamp the pliers onto the fastener and twist while pulling out. Keep an eye on the surrounding fabric for any signs of tearing.
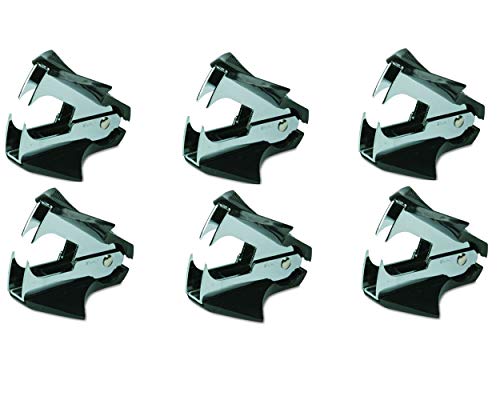
Alternative methods involve the use of a staple remover, which can be highly effective. Position the remover’s claws under the fastener and squeeze handles to extract it without harming the upholstered surface.
Ensure hands are protected. Consider wearing gloves to avoid cuts or pinches when handling sharp edges of the fasteners. If multiple fasteners need attention, work in small sections to maintain fabric integrity.
Dispose of the fasteners responsibly afterward. Keep the workspace organized to prevent any accidents. Regularly check for any protruding remnants that may still be attached to the soft seating.
Gather Necessary Tools for Staple Removal
First, ensure you have a flathead screwdriver at hand; this tool is useful for prying out embedded metal pieces gently. A pair of pliers is essential too, allowing for a firm grip when pulling out stubborn items. Add a staple remover if available; it simplifies the extraction process significantly.
Consider having a utility knife for cutting around any fabric if it’s tightly secured; this can help in accessing hidden fasteners without damaging the upholstery. A pair of safety goggles will protect your eyes from any unexpected splinters or debris during the task.
Keep a small container nearby for collecting removed pieces, preventing a messy workspace. Gloves can also be beneficial; they provide protection for your hands and improve grip on the tools. If necessary, a flashlight will help illuminate darker areas, ensuring I don’t miss any hidden clips.
Identify the Type of Staples Used
Before initiating the extraction process, I assess the kind of fasteners embedded in the material. Common types include heavy-duty staples, which are thicker and often used for robust applications, and lighter, standard staples, which are suitable for less demanding tasks. Recognizing the specific type allows me to select the right tools for a smoother extraction.
I check for the length and width of the staple legs. Heavy-duty options typically have longer legs, while standard ones tend to be shorter and narrower. If the material feels dense and resilient, heavy-duty staples are likely present. For more delicate fabrics, standard staples are the norm.
Observation of the staple heads also aids in identification. Flat heads are typical for heavy-duty use; they create a more secure fit. Round heads, on the other hand, might indicate lighter holding power. This distinction is crucial for deciding how to approach the extraction process effectively.
Furthermore, I examine the manufacturer’s recommendations or product details if available. Knowing whether the upholstery was crafted for durability or everyday use helps predict the sturdiness of the fasteners involved. This insight can inform my decisions and reduce the risk of damaging the underlying surface.
Choose the Right Method for Removing Staples
Selecting a suitable technique hinges on various factors, including staple type and placement. For simple extraction, a flathead screwdriver or a specifically designed staple puller works effectively. On the other hand, for deeper staples, pliers may be required to grasp and pull them out with more leverage.
Consider the Surface and Material
Assessing the surface is crucial. Delicate fabrics demand gentler methods, like using a plastic staple remover, to avoid damage.
- For thicker materials, metal tools can manage aggressive staples.
- Ensure the tool fits snugly to prevent ripping or tearing.
Evaluate Your Comfort and Skill
Your familiarity with different tools can influence the choice of method. If using a claw hammer or pliers, exercise caution. A more straightforward approach, such as a basic staple puller, is appropriate for beginners.
- If unsure, practice on scrap material.
- Always opt for a method that feels manageable and safe.
Carefully Pry Up Staples Without Damaging Fabric
I use a flathead screwdriver or a dedicated staple remover tool to lift the ends of the fasteners gently. Starting from an edge, I insert the tool under the staple, ensuring the fabric is not caught. A slight twist helps to elevate the staple without snagging the surrounding material.
For tougher cases, I apply a little pressure while prying, but avoid excessive force, which can cause tears. If I encounter resistance, I reposition the tool and try again from a different angle, maintaining caution. Once one side is lifted, I can often pull the staple out easily with my fingers or pliers, minimizing any risk of fabric damage.
Utilize Protective Layers
Placing a thin cloth between the tool and the upholstery offers additional protection. This simple method prevents scratches or abrasions. I ensure the fabric is taut but not overly strained, allowing for easier manipulation of the fasteners.
Take Your Time
I find that being patient is key. Rushing can lead to mistakes, causing unsightly marks or damage. By working carefully and methodically, I can ensure a clean extraction of the fasteners, preserving the integrity and appearance of the upholstery.
Using Pliers for Staple Extraction
With pliers in hand, I carefully grip the exposed portion of the fastener. I ensure a firm hold to avoid slipping. A gentle, steady pull allows me to lift it from the surface without causing excessive wear to the surrounding fabric.
If the fastener is stubborn, I apply a slight rocking motion while pulling. This can help loosen it from its original position. In cases where I encounter difficulty, using needle-nose pliers can provide better precision, especially in tight spots.
After extracting the fastener, I inspect the area for any remaining fragments. If pieces remain, I utilize the pliers to dig them out gently, being mindful of the fabric’s integrity. This method not only aids in efficient extraction but also minimizes the chance of damage during the process.
Completing the task, I wipe down the area to remove any debris left behind. The careful approach ensures that my upholstered piece retains its overall appearance and durability.
Removing Staples with a Flathead Screwdriver
A flathead screwdriver serves as an excellent tool to extract metal fasteners securely anchored in a fabric surface. Start by gently inserting the tip beneath the edge of the metal fastener, ensuring not to damage the surrounding material.
Technique for Extraction
Apply a slight upward pressure on the handle while leveraging the blade for an efficient extraction. It may require a few attempts to loosen tightly embedded fasteners. If resistance occurs, reposition the screwdriver and angle it differently for a better grip.
Safety Precautions
Maintain a steady hand to avoid slipping, which might cause accidental punctures or tears in the upholstery. Wearing safety glasses can protect your eyes from any small debris that may dislodge during the process.
| Action | Description |
|---|---|
| Insert Flathead | Place the screwdriver tip under the edge of the metal fastener. |
| Apply Pressure | Gently pull up on the handle while using the blade to pry. |
| Adjust Position | If resistance is encountered, reposition the screwdriver for optimal leverage. |
| Check Surrounding Area | Ensure no damage to the fabric occurs during extraction. |
Inspecting the Area for Residual Staples
After extraction, I meticulously examine the surrounding fabric to spot any residual fasteners. Using a strong flashlight helps illuminate darker areas, making it easier to identify remnants that may be hidden within the upholstery. I often run my fingers along the surface to feel for any unevenness or protrusions. An organized approach ensures I don’t miss any remaining pieces that could pose a risk to the fabric or skin.
I systematically check corners and seams, as these are common spots for leftover metal. If I find any, I gently pull them out using the same tools employed for initial extraction, always cautious not to cause further damage. This careful inspection contributes to a smooth and professional finish for the restoration work.
Lastly, I clean the area thoroughly once I’m confident all remnants are gone. A vacuum with a narrow attachment can help eliminate small particles and ensure the fabric is pristine and ready for use.
Repairing Any Damage After Staple Removal
I recommend assessing any imperfections immediately after taking out the fasteners. Look for frayed edges, punctures, or areas where the fabric might have come loose. It’s crucial to address these issues promptly to maintain the integrity and appearance of your item.
Patch Small Tears
For minor tears, a fabric patch can efficiently restore the surface. Cut a piece of matching fabric slightly larger than the tear. Use a fabric adhesive or needle and thread to secure the patch in place, ensuring it is bonded well to prevent further damage.
Reinforce Loose Fabric
If the material has become loose or shifted, gently pull it back into place. Employ a hot glue gun or fabric adhesive to reattach it securely. For areas that require extra support, consider using upholstery tacks strategically to hold the fabric and enhance its appearance.
Preventing Future Staple Issues in Upholstered Furniture
To avoid future complications with fasteners in your seating options, consider these specific strategies:
- Inspect material and structure regularly for signs of wear or damage.
- Choose high-quality coverings that are less prone to punctures or tears.
- Use adhesive tape or fabric glue for repairs instead of relying solely on metallic fasteners.
- Utilize furniture pads and felt protectors to minimize contact with rough surfaces.
- Store items in a controlled environment to prevent moisture from degrading both the fabric and the structural integrity.
By maintaining vigilance over the condition of your items and opting for superior materials and methods, you can significantly diminish the likelihood of encountering troublesome fasteners in the future.


