
 Caleb Turner

Begin the transformation of your outdoor metal seating with a thorough cleaning using a solution of mild soap and warm water. A gentle scrub with a soft-bristled brush will help remove dirt and grime, ensuring a clean surface for subsequent treatments.
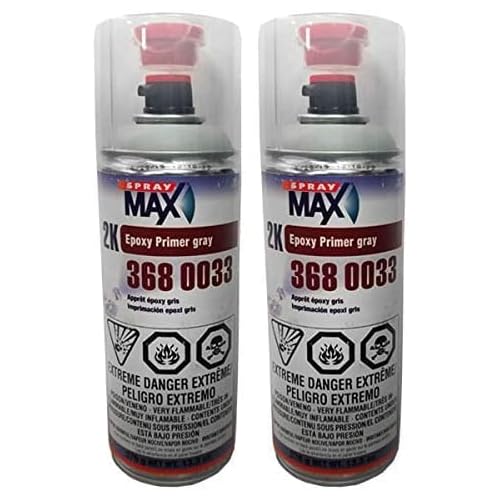
Next, inspect the pieces for rust or damage. Address any rust spots with sandpaper or a wire brush, being cautious not to damage the surrounding finish. Once the rust is removed, apply a rust-inhibiting primer to prevent future corrosion. A spray primer can provide an even coat, making the process quicker and more efficient.
Choose a high-quality outdoor paint in your preferred color to refresh the look. A paint designed specifically for metal surfaces will adhere better and provide a durable finish. Apply several thin coats, allowing adequate drying time between applications for the best results.



Finally, consider adding cushions or fabric covers to enhance comfort and aesthetics. Make sure to select materials that are weather-resistant to prolong their life and maintain their appearance throughout various seasons.
Assessing the Condition of Your Wrought Iron Furniture
I evaluate the surface thoroughly for any rust spots. A small wire brush helps to gently scrub away any loose rust. It’s essential to follow up with a damp cloth to remove dust and debris after brushing. If I notice pitting or deep corrosion, I plan to address these areas specifically with a rust converter before continuing any further treatments.
Checking for Structural Integrity
Next, I inspect for any signs of structural compromise. I look for cracks, bends, or loose joints. Pushing on chair legs or table corners can reveal weakness. If I find a significant structural issue, I consider reinforcing those areas with additional welding. Ensuring stability is crucial before proceeding to any cosmetic refinishing.
Evaluating the Finish
I then assess the existing paint or finish. Peeling paint indicates a need for complete removal, while a few scratches can be touched up with matching paint. A small test area is useful for checking compatibility with new coatings. Conducting a solvent test can help determine if the existing finish is intact or needs stripping entirely.
Gathering Necessary Tools and Materials for Refurbishing
For this project, I ensure I have all the right tools and materials at hand. First, I grab a wire brush or a power sander to remove old paint and rust. These remove debris effectively and prepare the surface for painting.
I also need a quality rust-inhibiting primer. Selecting a good primer ensures adhesion and longevity. A spray primer works well for even coverage.
Next, I choose a durable finish paint suitable for outdoor use. A spray paint specifically designed for metal offers a smooth application and corrosion resistance. I often opt for a color that complements my garden or outdoor area.
Protective gear is essential. I wear gloves to shield my hands from chemicals and dust, and I always put on safety goggles to protect my eyes when sanding or spraying.
A drop cloth or tarp helps me protect the surrounding area from paint overspray and debris. I lay this down before starting to keep the workspace tidy.
Lastly, I keep a clean cloth and some touch-up paint handy for any necessary corrections during the process. With these tools and materials, I feel prepared to transform my outdoor seating into a fresh, inviting space.
Removing Rust and Old Paint from Wrought Iron
Begin with a thorough inspection to identify areas affected by rust or peeling paint. For effective treatment, here are the specific steps I follow:
Tools and Materials
- Wire brush or steel wool
- Sanding block or orbital sander
- Rust remover (chemical or natural)
- Protective gear (gloves, goggles, mask)
- Hot water and mild detergent
- Paint stripper (if necessary)
Process Steps
- Put on protective gear to shield against debris and chemicals.
- Use a wire brush or steel wool to scrub away loose rust and flaking paint. Apply consistent pressure to remove stubborn areas.
- If rust persists, apply a rust remover according to the manufacturer’s instructions. Let it sit for the recommended time before scrubbing.
- Utilize a sanding block or orbital sander for a smoother finish, especially on flat surfaces. Sand until you reach bare metal.
- If paint remains, apply a paint stripper, allowing it to penetrate before scraping off the loosened layers. Follow instructions carefully.
- Once all rust and paint are removed, wash the metal with hot water and mild detergent to eliminate dust and residue. Rinse thoroughly.
- Dry completely to prevent new rust from forming.
Following this precise method ensures a clean surface, ready for further treatment or finishing touches.
Choosing the Right Primer and Paint for Metal Surfaces
For achieving a durable and attractive finish on metallic pieces, I opt for a good quality primer designed for metal. Epoxy primers are particularly effective as they provide strong adhesion and corrosion resistance. Here are some alternatives:
- Rust-inhibiting primers
- Self-etching primers
- Spray-on metal primers for easy application
Once the primer sets, selecting the right topcoat is crucial. I prefer oil-based or acrylic paints for their superior durability and weather resistance. Some key options include:
- Oil-based enamel paint for a high-gloss finish
- Acrylic latex paint that is breathable and offers UV protection
- Specialized outdoor metal paints formulated for longevity
Regardless of choice, I always read the manufacturer’s instructions regarding compatibility between primer and paint, ensuring maximum performance. Proper preparation and application will yield the best results, enhancing both appearance and lifespan of these metallic items.
Applying Primer: Techniques and Tips for Optimal Coverage
Before applying primer, ensure the surface is clean and dry. I prefer using a pressure washer or a stiff brush to remove any lingering dust or debris.
Best Application Techniques
A spray application is effective for reaching intricate designs and ensuring an even layer. I recommend using a spray primer specifically formulated for metal. For larger flat areas, a paint roller may offer quicker coverage. If you choose to roll, use a foam roller for a smoother finish.
For detailed spots or corners, a high-quality brush is invaluable. Use a brush with synthetic bristles to maintain control and precision.
Tips for Optimal Coverage
Apply primer in thin coats rather than one thick layer. This practice minimizes drips and allows for faster drying. I typically wait about 30-60 minutes between coats, checking the manufacturer’s instructions for specific drying times.
Always remember to apply primer in a well-ventilated area, ideally in temperatures between 50°F and 90°F. Humidity levels should also be considered since excessive moisture can affect the primer’s adhesion.
| Application Method | Use Case | Advantages |
|---|---|---|
| Spray | Intricate designs | Even coverage, quick application |
| Roller | Large flat areas | Speed and efficiency |
| Brush | Detailed spots | Precision and control |
After priming, check for any missed spots before moving on to the next steps. A smooth, well-prepared surface will lead to a more polished final result.
Painting Your Metal Seating: Best Practices
Prioritize a high-quality metal paint for durability and finish. Choose either a spray paint designed for metal or a brush-on option, depending on your comfort level and the intricacies of your pieces.
Before application, ensure the surface is clean, dry, and free from dust or contaminants. This ensures the paint adheres properly and the finish looks smooth.
Apply paint in thin, even coats. This technique avoids drips and allows for faster drying times. Wait for each coat to cure fully before adding another; typically, an hour between coats is sufficient for most paint types.
Maintain a consistent spray distance if using spray paint–usually around 6-12 inches. This helps achieve an even layer without excess buildup in one area.
When tackling intricate designs, a small brush may provide better control. Take your time to cover all areas, ensuring no spots are missed. For corners and detailed sections, a sponge or small roller can also be helpful.
Use a clear sealant after the final coat dries for added protection. This step enhances durability against the elements, extending the life of your painted pieces.
Consider the weather when painting. Ideal conditions usually mean a dry and slightly warm day with no wind. Dry conditions help prevent dust from settling on the wet paint, preserving a clean finish.
Following these guidelines will help achieve a professional-looking result that makes your seating visually appealing and resilient against natural wear.
Sealing and Protecting Your Refurbished Furniture
After applying the final coat of paint, sealing is a critical step. I use a clear sealant specifically designed for exterior metal surfaces to enhance durability and resist moisture. Ensure that the paint has fully cured before applying the sealant–generally, this takes about 24 hours, but check the manufacturer’s recommendations.
Selecting the Right Sealant
For my projects, I prefer acrylic or polyurethane-based sealants. Acrylic sealants are easy to apply and dry clear, while polyurethane options offer additional hardness and chemical resistance. I apply a thin, even coat using a spray nozzle for an ultra-smooth finish. It’s essential to follow the directions regarding the number of layers required.
<h3.Caring for Your Furniture
To keep everything looking fresh, I recommend regular maintenance. A gentle wash with soap and water every few months helps remove dirt and grime. Inspecting for any signs of chips or scratches lets me address issues before they worsen. Touching up these areas with additional paint and sealant extends the life of my revitalized pieces.
Maintaining Your Refurbished Metal Outdoor Pieces
Regular cleaning with a damp cloth helps eliminate dust and debris. For deeper cleans, use a mild soap solution; rinse well to prevent residue buildup. Ensure that no moisture remains in crevices to avoid corrosion.
Routine Inspections
Schedule biannual inspections to check for any signs of wear, such as scratches, chips, or rust spots. Addressing these issues immediately can prevent further damage. Reapply protective coatings or paints as needed based on the severity of the wear.
Seasonal Care
During winter, store the items in a sheltered area or cover them with breathable tarps to guard against snow and ice. In summer, consider using furniture covers or applying a UV-resistant sealant to protect against sun damage. Regular touch-ups will keep them looking fresh.
FAQ:
What are the first steps to take before refurbishing wrought iron patio furniture?
Before starting the refurbishment process, it’s important to clean the furniture thoroughly. Use a mixture of soap and water to remove dirt, grease, and grime. A wire brush can help in removing rust and peeling paint. Once cleaned, rinse the furniture and let it dry completely. Assess the condition of the furniture to determine what repairs or paint updates are necessary.
How can I remove rust from my wrought iron patio furniture?
To effectively remove rust, use a wire brush or sandpaper to scrub away the rusted areas. For more advanced rust, consider using a rust remover product. After removing the rust, rinse the area and dry it. Apply a rust-inhibiting primer before painting to ensure the metal is protected from future rusting.
What type of paint should I use for wrought iron patio furniture?
Acrylic or oil-based paints formulated for metal surfaces are ideal for wrought iron furniture. These types of paint provide durability and weather resistance. Always choose a paint that includes a rust-preventive feature. Spray paint can offer a smooth finish and is easy to apply, while brush-on paint may provide more control for detailed areas.
Do I need to apply a primer before painting my patio furniture?
Yes, applying a primer is advisable, especially if the original paint has been stripped away or if you are working with bare metal. A primer helps create a solid foundation for the paint and improves adhesion, which can ultimately extend the life of your paint job. Choose a primer specifically designed for metal surfaces for the best results.
How can I protect my refurbished wrought iron furniture from the elements?
To protect your refurbished furniture, consider applying a clear sealant designed for outdoor metal furniture. Regularly inspect the furniture for any signs of wear or rust and address any issues immediately. Additionally, storing the furniture in a dry place during extreme weather conditions or using furniture covers can further enhance its durability.