Begin with a thorough cleaning. Use a mixture of warm water and mild detergent to scrub down all surfaces. A soft brush works well for intricate designs. For tougher stains or mildew, a solution of water and vinegar can be quite effective. After scrubbing, rinse everything with clean water to ensure no soap residue remains.
Once clean and dry, inspect each piece for damage. Look for cracks, rust, or any loose fittings. Small cracks can be repaired using an appropriate wood filler or adhesive for metal components. Sand down any rough areas to create a smooth finish and prepare the surface for refinishing.
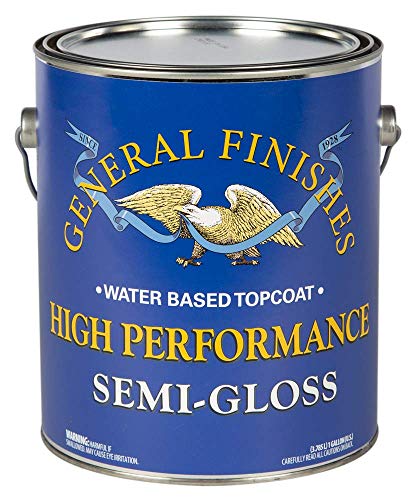
Next, choose the right paint or stain to rejuvenate the appearance. Select a product that offers UV protection to withstand sun exposure. Apply at least two coats, allowing adequate drying time between applications. This not only enhances the aesthetic but also adds a layer of protection against the elements.
Finally, consider adding cushions or protective covers to prolong the lifespan of your updated pieces. Opt for outdoor fabrics that are weather-resistant to maintain comfort and style. With these steps, your outdoor seating won’t just look refreshed but will also last through many seasons.
Refurbishing Techniques for Outdoor Seating
The first step I take with outdoor seating is a thorough cleaning using a mixture of warm water and mild detergent. This removes dirt, mold, and other contaminants. I usually utilize a soft-bristled brush for effective scrubbing without damaging the surface.
Next, I inspect for rust or damage. For metal pieces, sanding any rust spots is crucial. After sanding, I apply a rust-inhibiting primer followed by a weather-resistant paint or spray for a durable finish.
If the pieces are wooden, I assess for splinters or cracks. I carefully sand rough areas and fill any cracks with wood filler. Once dry, I sand again, followed by applying a wood stain or sealant to protect against moisture and UV rays.
Upholstery also may need attention. I often replace old cushions with new foam and weather-resistant fabric, ensuring comfort and resilience against the elements.
After completing these steps, I always wipe down all surfaces with a soft cloth to remove any remaining dust or debris, ensuring a polished final look.
Assessing the Condition of Your Outdoor Seating
Begin with a thorough examination. Inspect for structural integrity, checking for any wobbly legs or loose joints. Gently shake each piece to identify instability. Listen for creaks or sounds that might indicate damage.
Next, look for visible signs of wear. Scratches, dents, or chips can significantly affect appearance. Focus on areas exposed to the elements; sun damage and moisture can lead to discoloration and rot. For wooden items, examine for splits or signs of mold and mildew.
Evaluate the upholstery or cushions. Check for stains, fading, or fraying. Push down on cushions; if they lack resilience, consider them for replacement. Ensure zippers or fastenings function properly, as broken hardware can lead to additional repairs.
If your pieces are metal, inspect for rust. Pay special attention to joints and seams, where moisture typically accumulates. Determine if this surface corrosion is superficial or indicative of deeper issues.
Document findings, as this will guide your renovation approach. Taking photographs may also help track improvements throughout the process. Knowing the extent of damage will aid in planning for repairs or replacements systematically.
Choosing the Right Materials for Refinishing
For a successful overhaul, I recommend selecting products tailored to the specific type of surface you’re enhancing. Here’s what I found effective:
- Wood: Opt for high-quality outdoor wood sealer or varnish. Look for formulations that provide UV protection and water resistance to ensure longevity.
- Metal: Use rust-inhibiting primer and weather-resistant paint. Galvanized metal pieces might require a specific type of primer to enhance adhesion.
- Plastic: Choose paint designed for plastic surfaces. Some require special adhesion promoters to prevent peeling.
- Cushions: Consider outdoor fabrics that are water-repellent and UV-resistant. This will help maintain their colors and integrity when exposed to the elements.
Before making a purchase, I compare several brands, focusing on user reviews and durability ratings. Avoid discount materials; they often don’t hold up against outdoor conditions.

Test material compatibility on a small area whenever possible. This step will help avoid unwanted reactions between products and ensure a successful finish.
Lastly, prioritize eco-friendly options whenever I can. Many sustainable products offer excellent performance without harmful chemicals, making them suitable for both outdoor spaces and the environment.
Steps for Cleaning and Preparing Surfaces
Thoroughly inspect and clean all surfaces before proceeding with any updates. Remove all dirt, mildew, and old finishes to ensure a smooth base for any enhancements.

Cleaning Process
- Gather necessary supplies: warm water, mild detergent, soft brushes, and a garden hose.
- Mix the detergent with warm water in a bucket.
- Using a soft brush, scrub the surfaces vigorously to eliminate grime and mildew.
- Rinse thoroughly with a garden hose, ensuring all soap residue is cleared away.
- If there are stubborn stains, consider a diluted bleach solution for tough areas. Test this on a small hidden spot first.
- Allow pieces to dry completely before moving on to the next step.
Preparing for Refinishing
- Sand the surfaces lightly with fine-grit sandpaper to smooth out any imperfections.
- Pay special attention to edges and corners where wear is most noticeable.
- Wipe down all surfaces again to remove any dust created from sanding.
- If required, apply a wood conditioner to promote even absorption of new finishes.
After completing these steps, the surfaces should be clean and primed for further enhancements or new applications. Be meticulous as this ensures longevity and a polished look post-refinishing.
Techniques for Sanding Different Types of Wood
Softwoods like pine and cedar require a finer grit paper, typically starting at 120 grit and progressing to 220 grit for a smooth finish. I use a random orbital sander for efficiency, but hand sanding with a sanding block also helps maintain control, especially on edges.
For hardwoods, such as oak or maple, I begin with a coarser grit, around 80 or 100, to remove any old finish effectively. Then, I proceed to 150 grit and finish with 220 grit for a polished surface. Slow, even strokes prevent gouges.
Teak and other dense woods benefit from specialized sanders or pads to manage their oily nature. I prefer to use a palm sander with 120 grit paper, followed by a fine 240 grit to avoid clogging and ensure that the surface absorbs sealer or oil properly.
When working with plywood or laminated materials, sanding gently is crucial to avoid damaging the surface layers. I typically use a 150-grit paper and avoid heavy pressure. A detail sander fits well in corners and helps achieve a consistent finish.
For intricate carvings or detailed surfaces, hand sanding is necessary. I wrap sandpaper around a thin piece of wood or use sanding sponges to reach tight spots without damaging the design.
Always sand with the grain to prevent scratches and ensure a uniform appearance. I keep a vacuum nearby to clear dust between grits, optimizing adhesion for the subsequent finish. Regularly change sandpaper to maintain effectiveness and avoid dulling the finish.
Applying Paint or Stain for a Fresh Look
Choose a high-quality outdoor paint or wood stain specifically designed for exterior surfaces. These products offer better protection against UV rays and moisture. Make sure to select a color that complements your outdoor space.
Preparation Before Applying
Before applying paint or stain, ensure all surfaces are completely dry and free from dust and debris. Apply a primer if you chose paint; it enhances adhesion and longevity.
| Material | Recommended Product | Finish Type |
|---|---|---|
| Wood | Exterior Wood Stain | Semi-Transparent |
| Metal | Rust-Resistant Paint | Glossy |
| Plastic | Plastic-Friendly Spray Paint | Matte |
Application Techniques
Use a high-quality brush or roller for even application. For intricate areas, a small brush may be necessary. Apply multiple thin coats rather than one thick layer to avoid drips and ensure uniformity. Let each coat dry completely before adding the next.
Keep an eye on the weather conditions, as trying to paint or stain during high humidity can slow down drying times and affect the final result. Consider a day with mild temperatures and low humidity for optimal application.
Protecting Your Furniture from Weather Damage
Apply a high-quality sealant designed for outdoor materials to prevent moisture absorption. This protects against rot and extends longevity. Reapply yearly, focusing on exposed areas.
Consider using covers specifically designed for outdoor seating. These shields guard against UV rays, rain, and debris. Ensure the covers are breathable to prevent mold buildup.
Position items strategically to minimize direct exposure to harsh elements. Where possible, keep wooden pieces under awnings or in a sheltered area during adverse weather.
Utilize outdoor cushions made from weather-resistant fabrics for additional comfort. Store these indoors during inclement weather to prevent water damage and mildew.
Inspect for signs of wear regularly. Address any issues like cracks or peeling finishes immediately to avoid larger repairs in the future.
Consider using a wax finish after treatment; it creates a protective barrier against moisture and enhances appearance. Choose a wax that suits the specific material for optimal results.
Maintaining Refurbished Outdoor Seating Over Time
Regular cleaning is key. I use a mild soap and warm water solution to wipe down the surfaces, ensuring that dirt and debris don’t accumulate. A soft cloth or sponge works best to avoid scratches.
Every few months, I inspect for any signs of wear. If I notice fading or chipping, I promptly touch up the areas with the same paint or stain used during the restoration process. This keeps the appearance consistent and protects the underlying material.
Applying a weatherproof sealant once a year is advisable. This helps fend off moisture and UV rays, extending the lifespan of the seating. I find that a water-based sealant is easier to work with and dries more quickly.
To prevent rust on metal elements, I periodically apply a rust inhibitor. This is especially important if the items are exposed to harsh weather conditions or salt air.
For pieces made from treated wood, maintaining the finish is crucial. I avoid using harsh chemicals or abrasive tools, which can damage the protective coating. Instead, I rely on natural oils specifically designed for outdoor wood to periodically nourish the fibers.
Finally, storing items indoors during off-seasons or severe weather can significantly prolong their lifespan. If that’s not possible, using protective covers is my go-to solution to shield them from the elements.