Begin with thorough cleaning using a soft cloth and a mixture of water and mild soap. This removes dust and residues without harming the original finish. Ensure the surface is completely dry before proceeding.
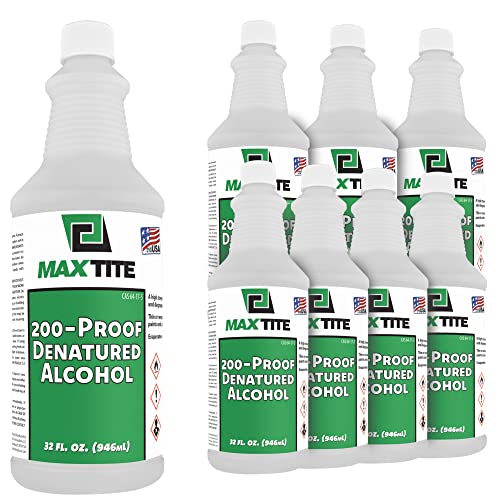
For deeper restoration, consider using a mix of denatured alcohol and a clean cloth. This method gently removes any worn layers, preparing the wood for a fresh application. Test the solution on an inconspicuous area first to see how it reacts with the material.
Next, apply a new coat of the same finish, ensuring even coverage. Utilize a high-quality brush or a clean pad for a smooth application. Always work in long, even strokes to avoid streaks and drips. Allow adequate drying time between coats to ensure a durable finish.

Finally, polish the surface with a soft cloth once fully dry. This step enhances the shine and provides a protective layer to the wood, ensuring your cherished items maintain their beauty for years to come.
Refinishing Techniques for Antique Woodworks
Begin with a thorough cleaning using a soft cloth dampened with denatured alcohol to remove any built-up grime. Next, assess the surface for any damaged areas that may require attention; minor scratches can usually be minimized with fine steel wool or a suitable abrasive pad.
Repairing Imperfections
For deeper scratches or dents, consider using a wax filler stick that matches the color of your piece. Melt the stick into the damaged area and level it off. Once dried, lightly sand the area with fine-grit sandpaper until smooth, and follow up with a gentle buffing to blend it into the surrounding finish.
Applying New Finish
Select a high-quality alcohol-based topcoat. Apply it using a padded applicator or a high-quality brush, always in the direction of the wood grain. Allow sufficient drying time between coats, typically around 30 minutes to an hour, before lightly sanding with fine grit in between to achieve a seamless finish. A minimum of two coats is recommended for optimal durability and luster.
Assessing the Condition of Shellac Finish
Begin by closely inspecting the surface for any signs of damage. Look for scratches, chips, or areas where the finish appears cloudy. Use your fingers to gently run over the surface to feel for uneven textures or sticky spots that may indicate deterioration.
- Identify areas with significant wear; these may require focused attention.
- Check for a yellowing effect, which can suggest age or environmental exposure.
- Assess the luster; a dull appearance indicates the need for rejuvenation efforts.
Next, test the finish with a small application of denatured alcohol in an inconspicuous area to confirm the type of finish. If the alcohol dissolves the surface, original material may be intact and able to be salvaged.
- Use a soft cloth to dab the alcohol.
- Observe the reaction; if the finish disappears, additional work is necessary.
Document all findings, making note of areas that will require different treatments. This initial assessment is key to planning the next phases efficiently.
Lastly, consider environmental factors such as moisture and light exposure that could have contributed to the condition. These aspects will guide your decision-making on how to best restore the aesthetics and integrity of the piece.
Preparing the Workspace and Tools Needed
I lay down a drop cloth over the floor to protect it from dust and any stray materials. This simple step saves time during cleanup. Ensure the area is well-ventilated, as fumes from products may be present. Open windows or use a fan to circulate air.
Tools I’ve found essential for this task include:
- Sandpaper in various grits (120, 220, and 320) for leveling the surface.
- Rags or lint-free cloths to avoid leaving fibers behind.
- Brushes specifically designed for applying finishes without shedding bristles.
- Putty knife for filling any gaps or scratches with a suitable filler.
- Vacuum cleaner or shop vac to remove dust after sanding for a clean surface.
- Sealing container for mixing products, such as a disposable cup or jar.
- Protective gear, including gloves and a mask, to safeguard against exposure to chemicals.
Before starting, ensure all items are within reach, minimizing disruption during the process. A clean and organized space will help maintain focus and achieve better results. Taking the time to prepare correctly contributes significantly to the final look of the piece.
Removing Old Shellac Without Damaging Wood
I found that the safest method for removing the old finish involves the use of denatured alcohol. Using a clean, lint-free cloth, I soaked it lightly in the alcohol and gently rubbed the surface in a circular motion. This technique effectively dissolves the shellac while minimizing the risk of harming the underlying wood.
Another approach involves using a scraper. I always choose a plastic scraper, as it is less likely to gouge the wood. Carefully angle the scraper against the finish and slide it along the surface. Any stubborn spots might require a little more pressure, but I keep it gentle to protect the grain.
Before I start, I ensure the area is well-ventilated and I wear gloves to protect my skin. If the surface has multiple layers, I repeatedly apply the alcohol and let it sit for a brief time before scraping. This allows the solvent to penetrate, making removal easier.
In cases of intricate carvings or detailed sections, I utilize a soft brush dipped in alcohol. This allows me to reach tight spots without damaging the surrounding wood. I continuously wipe the brush on a cloth to keep the process neat.
After the bulk of the finish is stripped away, I gently sand the surface with fine-grit sandpaper. I take care to follow the wood grain to avoid scratches, which could mar the final result. Once satisfied, I clean the surface with a damp cloth to remove any dust or residue before proceeding with the new finish.
Choosing the Right Shellac for Refinishing
For my projects, I thoroughly analyze available options by selecting between dewaxed and waxed finishes. Dewaxed formulas are preferable, offering better adhesion with subsequent topcoats like varnish or polyurethane. Waxed types create a soft, shiny effect but aren’t suitable if planning to apply additional layers.
I pay particular attention to the color and type. The most common choices are clear, blonde, and amber. Clear varieties maintain the wood’s natural hue, while blonde adds a light touch, and amber deepens the warmth and richness of the grain. The choice depends on the desired aesthetic outcome.
Additionally, I opt for either premixed options or flakes that require mixing with alcohol. Premixed products save time, while flakes allow for customization of the mixture strength based on personal preference. For versatility, I often keep both on hand for different tasks.
Considering the application method is also key. I favor shellac in a spray format for large surfaces, achieving an even coat with minimal brush marks. For smaller areas or detailed work, using a brush or a pad provides better control.
Lastly, I ensure that whatever shellac I choose is fresh. Old or improperly stored products can lead to poor results. I prefer to check the shelf life before starting any refinishing work.
Applying New Shellac: Techniques and Tips
For optimal results, always use a high-quality brush, preferably a natural bristle one. This will help in achieving a smooth, even application. Dip the brush in the finish and tap off excess, ensuring not to overload it. Work in long, overlapping strokes to distribute the product evenly.
Layering and Drying Times
Apply thin coats, allowing ample drying time between each. I find that about an hour is sufficient for shellac to dry, but checking for a tack-free finish ensures readiness for the next layer. Generally, two to three coats are adequate for a durable sheen, but personal preference will dictate the final number.
Finishing Touches
Once satisfied with the sheen, I lightly sand with a very fine grit (around 320-grit) after the final coat has dried. This enhances smoothness and prepares the surface for polishing. For a final touch, use a soft cloth with a little mineral oil to buff the surface. This provides a subtle glow and protective layer.
Final Touches: Buffing and Restoring Shine
To achieve a glossy finish on your restored piece, I’ll buff the surface using fine-grade steel wool or a soft cloth. It’s advisable to protect the surrounding areas with a drop cloth to avoid any accidental scratches or smudges. I use gentle, circular motions; this helps in evenly distributing the sheen across the wood.
After buffing, it’s crucial to assess the shine. If it’s insufficient, I recommend applying a small amount of wax specifically designed for polished surfaces. This will enhance the gloss and add a layer of protection. I apply wax with a clean, lint-free cloth, ensuring that it’s worked into the grain of the wood for an even finish.
For the final buffing, I switch to a clean section of the cloth, working the wax until it creates a soft glow. This technique often helps remove any streaks left from the previous application. If the shine still isn’t what I’d envisioned, I may consider a second light application of wax, repeating the buffing process until satisfactory results are achieved.
| Step | Activity | Tools Needed |
|---|---|---|
| 1 | Buff the surface | Fine-grade steel wool or soft cloth |
| 2 | Apply wax | Wax and lint-free cloth |
| 3 | Final buffing | Clean, lint-free cloth |
After achieving the desired gloss, I allow the finish to cure for a few days before placing any items on the surface. This ensures that the new finish sets properly and extends the longevity of the work. Patience in the curing process pays off with a beautiful, lasting appearance.


