Begin with a thorough cleaning using warm, soapy water to remove dirt and grime. For delicate areas, a soft cloth is preferable, while stubborn spots may require a gentle scrubbing. Once clean, allow the item to dry completely before proceeding.
Next, assess the surface condition. For minor scratches, applying a filler or wood wax can enhance the appearance significantly. When dealing with deeper gouges, consider sanding the affected area lightly, followed by refinishing with paint or a wood stain that matches the original hue.
To restore hardware like knobs and hinges, soak them in vinegar or a mixture of baking soda and water, then scrub gently with a brush. This simple step can breathe new life into otherwise dull and tarnished fixtures.
If the piece has upholstery, inspect it for tears or stains. Spot cleaning with an appropriate fabric cleaner can work wonders, or you might opt to reupholster if the damage is extensive. Choosing a modern fabric can add a fresh twist to a classic design.
Finally, don’t underestimate the power of new accessories. Adding complementary decor can highlight your refurbished find and enhance its charm in your living space.
How to Restore Vintage Pieces
Select a detailed approach to revitalizing your vintage items using the right materials. Begin by examining the current condition thoroughly. Identify areas requiring reinforcement or restoration. Use wood glue to repair any structural damage, ensuring it’s clamped for a secure hold.
<p.For upholstered items, remove the existing fabric carefully. This allows you to replace it with fresh material that suits your style. When reupholstering, opt for high-quality foam and batting to enhance comfort and longevity.
<p.Conduct a meticulous cleaning process prior to refinishing wooden surfaces. Utilize a mixture of vinegar and water for a gentle clean, then sand the surface down to bare wood if necessary. Choose a stain or paint that complements the original design, applying it evenly for a polished look.
<p.Don’t overlook hardware; replace or polish knobs and hinges for a complete transformation. Use a metal cleaner or polish to restore luster to tarnished finishes. A small detail can greatly impact the overall appearance, so pay close attention to these elements.
<p.Finally, consider applying a protective finish to your revamped items, whether it’s a sealant for wooden surfaces or a stain repellent for fabrics. This step enhances durability and preserves your efforts for years to come.
Assessing the Condition of Your Item
To accurately evaluate the state of your piece, inspect every section for clear signs of damage. Check for scratches, dents, or peeling finishes that may indicate deeper issues beneath the surface. Pay attention to joints; loose or wobbly aspects could signal structural problems that need addressing.
Surface Examination
Run your hand over the surface to detect uneven areas and identify any peeling or cracking. Use a soft cloth to wipe away dust and reveal any underlying flaws that may be hidden. Make a note of all imperfections to plan necessary fixes.
Structural Integrity
Test the stability by applying gentle pressure on different areas. Open and close drawers to ensure they function smoothly. Check if the legs or supports are sturdy by lightly shaking the item. If any movement occurs, reinforce or replace components as needed.
Choosing the Right Materials for Recovery
For upholstery projects, select durable fabrics such as cotton, linen, or synthetic blends that resist wear and stains. Velvet offers a touch of luxury but requires more maintenance. Consider the weight and thickness to ensure the fabric complements the piece’s form and function.
Wood Selections
When it comes to restoring wooden elements, use high-quality wood stains and finishes. Opt for water-based products for a low odor and easy cleanup. Oil-based options provide a rich finish but take longer to dry. Test any stain on an inconspicuous area to achieve your desired color.
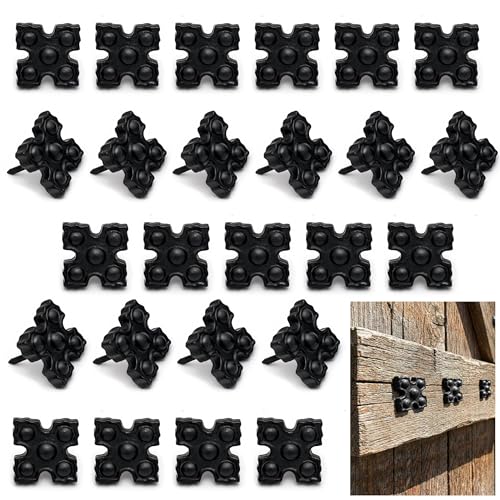
Hardware and Fasteners
Revitalizing metal parts involves sourcing reliable hardware like knobs and hinges. Choose materials that withstand corrosion, such as stainless steel or brass. Ensure the fastening elements complement the style and era of the item you’re refreshing.
Using these materials thoughtfully will enhance the integrity and appearance of your vintage pieces, providing longevity for years to come.
Preparing the Surface for Recovery
I always prioritize cleaning the surface thoroughly. A mixture of warm water and mild soap helps to remove dirt and grime without damaging the finish. A soft cloth or sponge works best for this task, ensuring that I avoid harsh scrubbing that could cause scratches.
If the piece has any paint or finish that is flaking or peeling, I carefully scrape it off using a putty knife. I find that working gently allows me to preserve as much of the underlying material as possible.
After that, I sand the surfaces to create a smooth texture. I start with coarse sandpaper (around 80-grit) to remove old finishes and then switch to finer grits (up to 220-grit) to achieve a sleek, refined surface. This step is vital; it enhances adhesion when applying new treatments.
Before I proceed with any further treatment, I wipe down the surfaces with a damp cloth to remove any dust generated from sanding. Ensuring the area is clean prevents imperfections in the final application.
I take extra care to address any significant imperfections or damages at this stage. For dents and scratches, I use wood filler, applying it with a putty knife and smoothing it out for evenness. After it dries, I sand it lightly to blend with the surrounding area.
Finally, I bestow a thorough inspection. I look for any areas that need more attention or touch-ups before moving forward. Adequate preparation ensures a successful transformation, making the next stages of enhancement far more effective.
Techniques for Upholstering Vintage Pieces
Choose a high-quality fabric that suits the piece’s character. For a classic chair, look for materials like velvet or damask that speak to its history.
Follow these steps for effective application:
- Remove the old covering carefully using a staple puller or flathead screwdriver.
- Inspect the padding. If it’s worn out, replace it with new foam or batting to ensure comfort.
- Cut your new fabric, allowing for an additional 3 inches to wrap around the edges. This excess will help secure the material neatly.
- Place the fabric over the padding and align it properly. Start at the center of one side, pulling the material tight.
- Use a staple gun to secure the fabric, working from the center outwards. Staple every few inches to distribute tension evenly.
- Finish by folding and securing corners neatly, ensuring a clean finish.
It might be useful to add a batting layer between the foam and the fabric for a softer look.
Experiment with decorative elements such as piping or buttons to enhance aesthetics and personalize your creation.
Restoring Wood Finishes and Repairing Damage
Remove surface dirt with a gentle cleanser and a soft cloth. For deeper cleaning, use a mixture of equal parts vinegar and olive oil. Test the solution on a hidden section first to avoid discoloration.
When addressing scratches or dents, utilize a wood filler that matches the furniture type. Apply the filler with a putty knife, ensuring it fills the affected area completely. Once dry, sand the area lightly until smooth.
To restore finishes, begin by sanding the surface lightly with fine-grit sandpaper. This process removes the old finish and opens the wood’s pores for better absorption of new products. Wipe away the dust with a damp cloth before applying any restoration products.
Choose a stain or finish that complements the original color while providing a protective layer. Experiment with samples to ensure the right match. Apply the stain using a brush or cloth, allowing it to penetrate for several minutes before wiping off excess with a clean cloth.
For a glossy finish, consider using polyurethane. Apply thin, even coats with a brush or foam applicator, allowing sufficient drying time between coats. Sand lightly between each application to avoid imperfections.
Repair cracks or loose parts using appropriate adhesives or clamps. For significant damage, consider inserting a wooden dowel or spline to reinforce structural integrity. Allow ample time for adhesives to cure before resume regular use.
| Action | Material | Tips |
|---|---|---|
| Cleaning | Vinegar, olive oil | Test on hidden areas first |
| Filling | Wood filler | Match the wood type |
| Restoring | Stain | Use samples to test colors |
| Finishing | Polyurethane | Thin coats, sand between applications |
| Repairing | Adhesives | Use clamps for stability |
Adding Decorative Elements and Details
Incorporating decorative features can significantly enhance the visual appeal of revived pieces. I recommend starting with trim and molding; adding a fresh layer of decorative molding around the edges or as accents can transform the aesthetics. Choose materials that complement the existing style–use wood for a classic look or metal for a more modern twist.
Choosing Fabrics Wisely
For upholstery, selecting fabrics with interesting patterns or textures can breathe new life into seating. Velvet, linen, or even outdoor fabrics can provide unique visuals and durability. Consider using contrasting colors for cushions or throw pillows to create focal points that draw the eye.
Accessorizing with Hardware
Investing in distinctive hardware, such as knobs or handles, can also make a substantial difference. Antique brass or colorful ceramic options can add character and link modern elements with traditional undertones. Opt for details that reflect a personal style and enhance overall cohesion.
Don’t underestimate the impact of paint or finishes. Stenciling designs or applying a distressed finish can add depth and interest, while a high-gloss lacquer can provide a sleek, contemporary look. Using metallic paints or glazes for subtle highlights can also enrich textures and elevate the overall design.
Integrating personal items or artwork as part of the arrangement can complete the transformation. Hanging small frames, decorative plates, or unique objects from travels can create storytelling elements within the space. Each detail adds to the charm and reflects individuality.
Maintaining Your Recovered Furniture
To ensure longevity after restoration, regular maintenance is key. Here are specific steps I follow to keep my revitalized pieces in excellent condition:
- Cleaning: I use a soft cloth for dusting and a gentle cleaner for deeper cleans. For upholstered pieces, a vacuum with an upholstery attachment helps remove debris.
- Protection: Employ slipcovers or fabric protectors for upholstery. These can shield against stains and wear, especially in high-traffic areas.
- Conditioning: For wooden elements, I apply a high-quality wood conditioner every few months to maintain luster and prevent cracks.
- Repairs: I address minor scratches and dents immediately. Using a touch-up marker for wood finishes or a needle and thread for fabric can prevent further damage.
- Humidity Control: I maintain stable humidity levels in my home, as excessive moisture or dryness can damage both wood and upholstery. A dehumidifier or humidifier can be beneficial.
- Rotation: For upholstered seating, I rotate cushions regularly. This helps distribute wear evenly and prolongs the comfort of the piece.
Implementing these methods ensures that my cherished items remain functional and aesthetically pleasing for years. Each detail counts in preserving the character and integrity of the work I have lovingly done.
Finding Inspiration and Ideas for Your Project
To spark creativity, I often explore design websites, social media platforms, and Pinterest boards filled with DIY projects and home decor. Searching for keywords like “reupholstery ideas” or “refinishing tips” yields a plethora of images showcasing various styles and techniques. Browsing these visuals can ignite ideas for color palettes and fabric choices that resonate with my personal taste.
Visiting Local Antique Shops
Walking through antique shops is a treasure hunt. Each piece tells a story, and I often find inspiration in the textures and styles of vintage items. Observing how certain pieces complement each other can provide insight into how to combine my chosen materials and finishes. Talking with shop owners or fellow enthusiasts often leads to discovering unique restoration tips and tricks.
Community Workshops and Classes
Participating in workshops offers practical knowledge and firsthand experience. I learn directly from skilled artisans who share their wisdom on various recovery techniques. It’s also a chance to network with like-minded individuals, exchanging ideas and discovering new projects. Many local maker spaces also host classes focused on specific restoration methods, which further enrich my skill set.


