If you’re looking to breathe new life into mass-produced home accents, choosing the right materials is non-negotiable. Opt for high-quality acrylic or chalk-based mixtures that adhere well to various surfaces. These options not only guarantee durability but also allow for flexibility in design, catering to both matte and glossy finishes.
Prioritize thorough preparation before applying any products. Remove hardware, clean surfaces meticulously, and lightly sand where necessary. This ensures a smooth application, enhancing the overall finish and longevity of your project. Using a primer designed for the specific material is advisable, as it aids in adhesion and provides a uniform base color.
Select the right tools for a seamless application. A combination of brushes and rollers will allow you to reach intricate areas while providing a consistent coat over larger surfaces. Thin coats are key; multiple applications with drying time in between yield the best results.
Lastly, consider sealing your masterpiece once it’s fully dried. A protective topcoat will guard against wear and tear, making your revamped pieces not only aesthetically pleasing but also practical for everyday use.
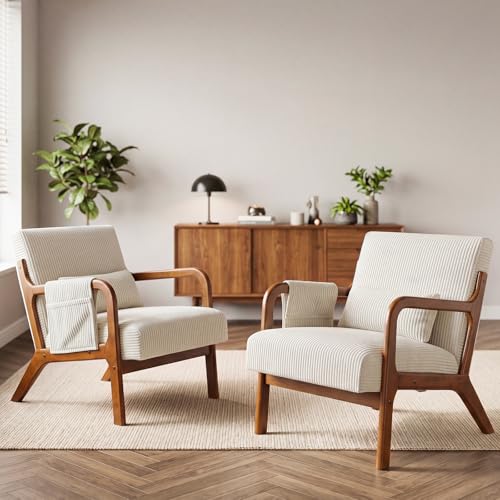
Transforming Pre-made Items
Begin with proper cleaning. Use a degreaser or mild soap to remove any dirt and oils. This ensures the surface is free from contaminants that could affect adhesion.
Surface Preparation
- Sand the entire area lightly with fine-grit sandpaper to create a texture for better grip.
- Wipe down with a damp cloth to remove dust particles after sanding.
- Consider applying a primer suited for the material of the piece, especially if it’s glossy or laminate.
Application Process
Use a high-quality brush or roller for application. For detailed areas, a smaller brush will provide better control. Apply thin coats to avoid drips and ensure an even finish. Allow each coat to dry completely before adding another layer.
- Opt for water-based products for ease of cleanup and lower odor.
- An alternative is spray paint, which can offer a smooth, even layer, ideal for intricate designs.
Finally, seal the finish with a clear topcoat to enhance durability and ease of cleaning.
Choosing the Right Type of Paint for Furniture
I recommend using acrylic latex for indoor items due to its low odor and quick drying time. For outdoor pieces, opt for exterior acrylic, which offers better resistance to weather elements.
Consider Your Surface Material
The type of material greatly influences paint selection:
- Wood: Should be primed first. Use semi-gloss for durability.
- Metal: Requires metal-specific formulas, usually with rust protection.
- Plastic: Look for products designed specifically for synthetic surfaces, as standard types may not adhere properly.
Finish Matters
Choosing the right finish impacts appearance and maintenance:
- Matte: Offers a subtle look, but can be harder to clean.
- Satin: Balance between gloss and matte, easy to maintain.
- Gloss: Highly reflective, provides excellent durability but may show imperfections.
Always test paint on a small area to ensure compatibility and achieve the desired result.
Preparing Your Furniture for Painting
First, I ensure the piece is clean by wiping it down with a damp cloth to remove any dust or residue. This step is crucial for adhesion, so I avoid skipping it. If the item has an existing finish, I lightly sand the surface to create a better grip for the new layer. I use fine-grit sandpaper, moving in the direction of the grain.
Next, I check for any imperfections such as scratches or dents. I fill these with wood filler, allowing it to dry completely before sanding it smooth. This enhances the overall finish and longevity of my project.
For highly polished surfaces, I use a de-glosser to diminish shine, ensuring the subsequent layers adhere properly. I apply it according to the manufacturer’s instructions, providing a key surface for the new coat.
To protect areas I don’t want to alter, I cover them with painter’s tape. Taking the time to do this prevents unwanted marks and saves time on touch-ups later. I carefully press the tape down, smoothing out bubbles or creases.
Prior to starting my project, I make sure to select a suitable work environment. Adequate ventilation is key; I often find a well-ventilated area to work in, minimizing exposure to fumes and enhancing the drying process.
Lastly, I gather all necessary supplies, including brushes, rollers, and trays. Having everything on hand streamlines the process and keeps me focused on creating the desired outcome without interruptions.
Best Tools and Supplies for Painting
For a successful refresh of your items, having the right tools is imperative. I recommend gathering the following essentials:
Painting Tools
| Tool | Purpose |
|---|---|
| Brushes | Use high-quality synthetic bristle brushes for smooth finishes on intricate details. |
| Rollers | Consider foam rollers for even coverage on flat surfaces. |
| Sprayer | An airless paint sprayer can save time and deliver a flawless finish for larger areas. |
| Sandpaper | Choose 120-220 grit for surface preparation and smoothening before applying any coats. |
| Drop Cloths | Protect your space from spills with fabric or plastic drop cloths. |
Supplies
Having the right paints and accessories is equally crucial. My top picks include:
| Supply | Details |
|---|---|
| Primer | Use a stain-blocking primer for a uniform base and enhanced adhesion. |
| Finishing Products | A clear coat or sealer will add durability and shine after the final layer dries. |
| Masking Tape | Utilize painter’s tape to achieve clean lines and prevent overspill. |
| Ladder | A sturdy ladder ensures safe access to high areas, enhancing your reach. |
| Containers | Mix and keep your selected colors in suitable paint containers for easy access. |
Equipping myself with these tools and supplies guarantees a smooth and effective process for transforming my pieces into something new and desirable.
Techniques for Painting Different Furniture Materials
For wooden surfaces, sand lightly to create a smooth texture, then apply a primer suited for wood to enhance adhesion. Two to three coats of high-quality acrylic latex or chalk-based hue provide a durable and appealing finish.
Metal Surfaces
Begin with thorough cleaning to remove dust and grease. Use a rust-inhibiting spray or enamel designed for metal. Multiple thin layers yield a smooth appearance. A clear topcoat can also be applied for additional protection.
Plastic and Laminate
Focus on cleaning to eliminate any residues. Utilizing a specialized primer for plastic will aid in paint adherence. Choose spray paint formulated for plastic; it allows for an even finish without drips. Two lighter layers work better than one thick application.
Remember to always consult the manufacturer’s guidelines when selecting materials and paints, as some surfaces may require specific methods for optimal results.
Tips for Achieving a Smooth Paint Finish
Begin with a thorough sanding of the surface. I use a fine-grit sandpaper to eliminate any imperfections and create a surface receptive to the new coating. After sanding, I always wipe down the piece with a damp cloth to remove dust particles that could affect adhesion.
Invest in high-quality materials. A quality primer is essential for a flawless finish. I opt for a primer specifically designed for the material of my item, ensuring better coverage and durability.
Application Techniques
When applying the color, I prefer using a foam roller or a high-density brush to minimize brush strokes. I apply thin layers, allowing each coat to dry completely before adding another layer. This not only enhances the smoothness of the finish but also prevents drips and runs.
Final Touches
After the final coat has dried, I consider a light sanding with very fine sandpaper or a sanding block to achieve an ultra-smooth feel. A topcoat, such as a clear sealer or varnish, offers additional protection, enhancing the look while safeguarding against wear and tear.
Using Primer: When and Why It’s Necessary
I recommend using primer on surfaces that are glossy or slick, like laminate and certain types of wood. Priming creates a textured base that helps subsequent coats adhere effectively. If the item has stains, a primer can block these from bleeding through your final layers, ensuring a clean finish.
It’s particularly beneficial when transitioning from dark to light colors, as it enhances the opacity of lighter hues applied over darker surfaces. In circumstances where the surface is porous or has uneven textures, a primer will level things out and provide a uniform backdrop for application.
If you’re tackling an item previously finished with a non-compatible type of coating, applying a primer will promote better bonding with your new color. Always opt for a primer that suits your chosen coating; for instance, if you plan to use an oil-based finish, select an oil-based primer for the best results.
Before applying your chosen base coat, allow the primer to dry thoroughly as recommended by the manufacturer. This care ensures a strong foundation, ultimately leading to more durable results.
Ideas for Painting Patterns and Designs
I created a geometric pattern using painter’s tape, which gave my pieces a modern feel. Simply tape off sections of the surface, apply contrasting colors, and remove the tape once dry for crisp lines.
For a softer look, a floral motif can add charm. I sketched simple flowers with a pencil and filled them in with a brush, using pastel shades for a delicate touch that suits various styles.
Stripes are a classic choice. I opted for vertical lines in alternating colors, which not only add height but also make the item look updated. Ensure consistent and even spacing with tape for the best results.
For something unique, I experimented with a sponge technique. I dabbed a sponge into paint and randomly pressed it onto the surface, creating a speckled effect that adds texture and depth to my decor.
A stencil can be an effective tool for more complex designs. Whether it’s a damask pattern or a simple animal silhouette, placing a stencil allows for precise application and stunning results.
Ombre effects are visually striking. I blended two colors by using a wet brush to create a gradient, seamlessly transitioning from light to dark, giving the piece a contemporary flair.
Rustic charm can be achieved with a distressed finish. After applying a base coat, I lightly sanded edges to expose the underlying color, lending an authentic vintage feel to bookshelves or side tables.
Lastly, chalkboard paint can transform a simple item into a functional piece. I applied it to a small section, turning part of a console into a writable surface for notes or reminders, making it practical as well as appealing.
Sealing and Protecting Your Painted Furniture
After completing the transformation of your item, sealing is the next critical step. I recommend using a clear topcoat to safeguard the surface from scratches and stains. Choose between water-based or oil-based options depending on the desired finish; water-based sealers dry quickly and have less odor, while oil-based alternatives provide a robust layer of protection.
Apply the sealer using a high-quality brush or roller for an even application. Allow each coat to dry thoroughly before adding additional layers for optimal durability. I typically apply at least two coats for furniture that will see heavy use.
For surfaces that may come into contact with moisture, a polyurethane sealer is a great choice, as it offers waterproofing properties. Ensure that I lightly sand between coats with fine-grit sandpaper to achieve a smooth finish and enhance adhesion.
Consider adding a wax finish for less trafficked items. This option offers a soft sheen and easy touch-ups. Simply apply a thin layer with a soft cloth, buffing it for a polished look. Regular maintenance, such as reapplying wax every few months, will keep the surface looking fresh.
Finally, remember to place coasters and pads under objects to further protect the finish. Taking these extra steps will ensure that the beauty of your meticulously updated piece lasts for years to come.
Maintaining Your Newly Painted Furniture
To preserve the allure of your freshly treated pieces, I recommend regular cleaning with a soft, damp cloth. Avoid abrasive materials that can scratch the surface. For stubborn stains, a mild soap solution works wonders without damaging the finish.
Routine checking for chips or scratches is essential. If I notice any imperfections, I apply a quick touch-up using the same color for consistency. Always allow adequate drying time between layers for seamless repair.
Direct sunlight can fade vibrant hues. Position your items away from intense sunlight or use sheer curtains to filter light. Similarly, avoiding placement near heat sources can prevent warping or cracking.
Using coasters or placemats for items that may scratch or stain is advisable. A protective barrier helps in maintaining the integrity of the surface. For added protection, consider applying a furniture wax or sealer that enhances durability.
If my pieces are subject to heavy use, I schedule periodic maintenance every few months. This includes re-evaluating the protective sealers and reapplying as necessary to ensure ongoing preservation of the color and finish.
Lastly, I find it beneficial to keep the environment consistent. Fluctuating humidity levels can impact the quality. Using a dehumidifier in damp areas contributes to the longevity of my revitalized items.