First, ensure the surface is clean and free of dust. I typically use a damp cloth to wipe down my pieces thoroughly. This step prevents any debris from interfering with adhesion and ensures an even finish. Allow the item to dry completely before proceeding.
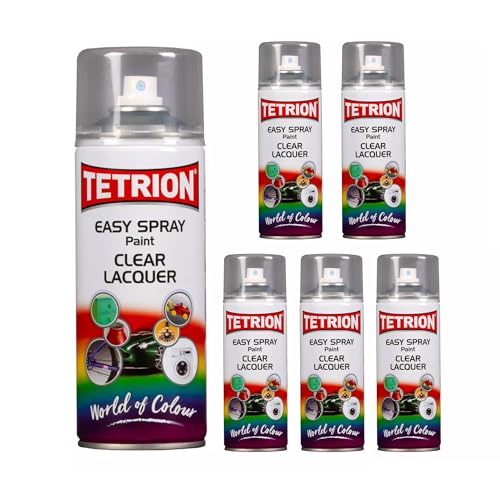
Choosing the right type of coating is crucial. For my projects, I prefer a high-quality acrylic spray or a chalk-based mixture that offers a matte finish. These options provide not only aesthetic appeal but also durability. Always conduct a patch test on a hidden area to check compatibility and color retention.


After selecting a suitable product, I apply it in thin, even layers from a distance of about 10–12 inches. This method reduces drips and ensures smooth coverage. I often wait about 20-30 minutes between coats, allowing each layer to set properly before applying the next.
Finishing touches can elevate the final look. A clear sealant offers extra protection, making your piece more resilient to wear and tear. I also recommend placing felt pads under legs to avoid scratches on floors, enhancing longevity and ensuring your stylish refurbishment stands the test of time.
Painting Lloyd Loom Creations
For optimal results, a thorough cleaning is a must. Utilize a soft cloth with mild soap and water to eliminate any dust or grime from the surface.
Select a high-quality spray primer specifically designed for woven items. Apply a light coat, allowing it to dry completely before proceeding.
When it’s time for the color layer, choose an acrylic spray or chalk-based finish that adheres well to the material. Light coats work best. Avoid applying too thickly to prevent drips.
Here’s a simple table outlining the essential supplies for the process:
| Supplies | Description |
|---|---|
| Cleaning solution | Mild soap and water |
| Primer | High-quality spray primer for woven surfaces |
| Color Coating | Acrylic spray or chalk-based finish |
| Sealer | Protective clear sealant spray |
After the color layer has dried, apply a clear sealant to prolong the life of your newly refreshed belongings. This ensures protection against scratches and UV rays. Allow sufficient drying time between coats.
Finally, for a polished look, buff the surface lightly with a soft cloth after everything has dried. This technique will enhance the uniformity of the finish.
Choosing the Right Paint for Lloyd Loom
For transforming your woven pieces, I recommend selecting a water-based acrylic option. This type dries quickly and offers excellent adhesion to the surface. Using this method, my projects achieved a smooth finish without the risk of peeling or cracking.
I always look for paints labeled as suitable for surfaces like rattan or wicker. These formulations often contain additives that enhance durability and resistance to moisture. Additionally, ensure the product is non-toxic, especially if the items are for indoor use.
When selecting color, consider light shades to maintain a fresh atmosphere. Dark colors can absorb heat, potentially leading to warping. I prefer testing paint samples on an inconspicuous area to preview the final look before full application.
Before applying, properly prepare the surface. This involves cleaning with mild soap and water, ensuring no old finishes interfere with adhesion. For optimal results, lightly sand the surface to create texture, aiding the new layer to bond effectively.
In my experience, using a primer beforehand can further enhance the final appearance. A good primer helps even out the surface, enhances color vibrancy, and improves wear resistance. I opt for a spray primer for even coverage, especially on intricate weaves.
Lastly, always finish with a clear sealant. This extra layer protects the surface from scratches and fading. A matte or satin finish gives a subtle elegance, while a glossy option might highlight imperfections. Choosing the right sheen can significantly influence the overall look.
Preparing Your Lloyd Loom Furniture for Painting
Thoroughly clean the surface with a mixture of warm water and mild soap. Remove any dust, dirt, or grease using a soft cloth. Rinse with clean water and allow it to dry completely.
If your piece has any existing finishes, lightly sand the surface with fine-grit sandpaper to promote adhesion. Pay attention to corners and crevices, ensuring a smooth surface for the new layer.
Inspect for any damages such as cracks or chips. Fill these imperfections with wood filler or appropriate filler material, smoothing it down to be level with the surrounding area. Once dry, sand again for a seamless finish.
For better results, consider applying a suitable primer designed for the material of your item. This will help in achieving an even tone and increase the durability of the color coat.
Lastly, ensure your workspace is well-ventilated and protect surrounding areas with drop cloths to catch any excess product. This preparation phase is crucial for achieving a flawless result.
Techniques for Applying Paint to Lloyd Loom
Using a spray method allows for a smooth and even finish. Maintain a distance of about 12 inches from the surface. Keep the can moving to prevent drips and ensure complete coverage. I’ve found that applying several light coats achieves better results than one heavy coat.

Brushing Techniques
For those who prefer a brush, select a high-quality synthetic bristle option. Begin with a thin layer and use long, even strokes. Don’t overload the brush; it’s better to add more layers than to apply too much at once. I also recommend brushing in the direction of the weave for an even finish that doesn’t disrupt the texture.
Rolling for Speed
A foam roller can cover larger areas quickly. Ensure the roller is slightly damp before application to avoid bubbles. Roll in sections, and use a brush to touch up corners and edges. This combination will help achieve a professional look and significantly reduce application time.
Best Practices for Painting Curved Surfaces
The key to achieving a smooth finish on curved areas lies in the use of the right tools. I prefer to use a fine brush for detailed work and a foam roller for larger curves. This combination helps to distribute the coating evenly without leaving brush strokes.
Before applying the top layer, I recommend a light sanding of the surface. This step not only helps to remove imperfections but also enhances the adhesion of the subsequent layers. Utilize a fine-grit sandpaper to avoid damaging the material.
Technique for Curved Areas
When addressing contours, I focus on working in sections. I apply the coating in thin layers, which reduces the risk of drips and allows for better control over coverage. It’s best to use a back-and-forth motion along the curve to ensure even application.
To maintain consistency, I often check for missed spots during the drying phase. If I notice any uneven areas, I lightly sand those spots and reapply a thin layer. Patience is crucial; rushing can lead to a less than satisfactory finish.
Final Touches
Once the final layer has dried, I inspect the surface for any imperfections. A light buffing with a soft cloth can give the piece a refined look. Additionally, I ensure that the piece is allowed to cure completely before using or placing it in a living space to prevent any damage.
Achieving a Durable Finish on Your Wicker Creations
For long-lasting results, it’s crucial to use a primer that adheres well to woven materials. A bonding agent designed for non-porous surfaces can be an excellent choice. This ensures that subsequent layers maintain their integrity over time.
Steps to Ensure Durability
- Select the Right Primer: Look for a spray or brush-on product suitable for synthetic and natural fibers.
- Layer Application: Apply multiple thin coats instead of one thick layer. This prevents drips and ensures even coverage.
- Allow Proper Drying Time: Each coat should dry completely before adding the next. This is vital for adhesion.
- Topcoat for Protection: Use a clear sealant designed to protect against scratches and moisture after the colored layer dries.
Maintenance Tips
- Routine Cleaning: Use a soft cloth to remove dust and dirt regularly, ensuring the finish remains intact.
- Avoid Harsh Chemicals: Clean with mild soap and water to prevent degrading the surface.
- Store Properly: If not in use, store items in a dry area away from direct sunlight to avoid fading and cracking.
By following these guidelines, I ensure that my hand-painted pieces remain beautiful and functional for years to come.
Maintenance Tips for Painted Lloyd Loom Furniture
Regular cleaning is crucial. Use a soft, damp cloth to wipe surfaces. Avoid abrasive cleaners that may scratch the finish.
For stubborn stains, mix mild soap with water. Gently scrub the area without soaking the material. Rinse with a clean cloth.
Inspect the coating periodically for chips or scratches. Touch up these areas promptly with matching color to maintain a uniform look.
Protect from direct sunlight to prevent fading. Consider using sheer curtains or placing items away from intense light sources.
Avoid placing hot items directly on the surfaces. Use coasters or mats to prevent heat damage.
For deeper cleaning, consider professional services that specialize in the care of woven fiber goods.
Store items in a controlled environment during seasonal changes, especially in areas with high humidity or extreme temperatures.
- Monthly dusting to prevent buildup.
- Rotate cushions and linens to ensure even wear.
- Maintain humidity levels to protect natural materials.
By following these guidelines, I ensure my pieces retain their charm and longevity for years to come.
Repairing Mistakes When Painting Lloyd Loom
If I notice a drop or streak in the finish, I use a fine-grit sandpaper to gently buff the area until it’s smooth. After dusting off the particles, I apply a touch of the desired coating lightly, feathering the edges to blend it with the surrounding area. This minimizes the visibility of imperfections.
Correcting Uneven Coverage
For splotchy areas where the color appears uneven, I first assess the underlying surface to ensure there are no larger issues. Afterwards, I can apply a light layer to build up the color gradually. Using a small brush helps achieve better control over specific spots, allowing me to avoid over-application.
Addressing Drips and Runs
If drips occur, I immediately scrape away excess material while it’s still wet using a razor blade. Once dried, I’ll lightly sand the area before applying a fresh coat. Patience is key, as rushing may lead to further complications.