The first thing I recommend is to gather high-quality supplies: a good sandpaper, chalk paint, and a soft brush or roller. This preparation ensures a smoother finish and better adhesion. Sanding the surface lightly creates a texture for the paint to grip, minimizing peeling and chipping in the long run.
After prepping, choose a color palette that exudes warmth and character, often reminiscent of bygone eras. Soft pastels and muted tones work wonderfully to create that sought-after worn look. Begin applying the chosen hue in thin layers, allowing each coat to dry completely before proceeding. Two to three layers are typically necessary for full coverage.
Once the final layer dries, distressing techniques can add depth and charm. Lightly sand edges and corners to reveal the underlying layers, enhancing the vintage appeal. A wax finish can seal and protect your work while providing a subtle sheen. This not only enhances the beauty of the piece but also offers durability for everyday use.
Finally, accessorizing with antique hardware or woven accents can elevate the transformation, providing that extra touch of nostalgia. This process is not only about creating a visually appealing space but also about infusing personality into your home.
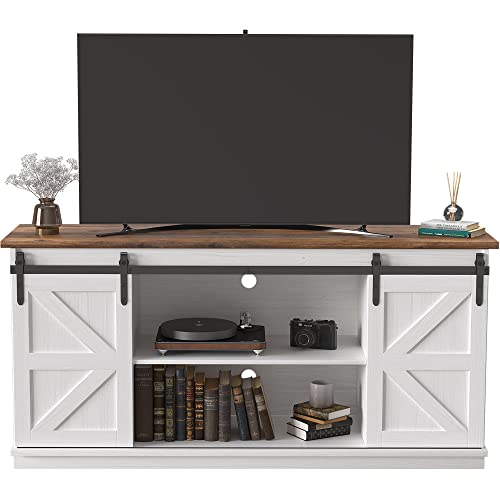
Transforming Furniture with a Vintage Touch
Choose a quality chalk or mineral-based mixture designed for adherence to wood surfaces. This ensures the finish reflects that aged appearance we all love. Optimal choices include colors like soft whites, pale blues, or muted grays to achieve that authentic timeworn style.

Before proceeding, make sure to clean the items thoroughly to remove dust, grease, and residue. A light sanding can enhance the texture and help the new layer adhere better. Focus particularly on edges and areas that would naturally wear over time.
Applying the Finish
Use a good brush for an even layer, working in thin coats. Multiple applications will achieve a richer effect and allow for better control over texture. For an aged appearance, consider dry brushing or a sponge technique for added character.
Creating Distress
After the finish is dry, lightly sand edges or corners to expose the wood underneath. This replicates natural wear and tear. For a more dramatic look, it’s possible to apply a wax or glaze in a darker hue to enhance the contrasts and give depth to the piece.
Choosing the Right Paint for Vintage-inspired Pieces
For achieving that perfect vintage look, I always opt for chalk or mineral-based products. These types offer a lovely matte finish, essential for the desired rustic charm. The texture provided by these options also enhances the dimension of any design.
Color Selections
Soft pastels, muted tones, and earth shades generally evoke the nostalgic vibe I seek. Colors like pale blue, dusty rose, and sage green work beautifully. Additionally, layering different shades can create an aged effect that boosts visual interest.
Types of Finishes
I tend to gravitate towards matte and satin finishes. Matte provides a more traditional feel, while satin offers slight sheen without overwhelming the aesthetic. Consider applying a protective topcoat to ensure durability, especially for surfaces that will be frequently used.
| Paint Type | Finish | Color Examples |
|---|---|---|
| Chalk Paint | Matte | Pale Blue, Dusty Rose |
| Mineral Paint | Satin | Sage Green, Cream |
Testing a small sample on an inconspicuous area helps ensure the right tone and texture. After finding the ideal match, I apply a thin, even coat for the best results, adding more layers as needed for coverage and depth.
Preparing Your Furniture for a Fresh Coat of Paint
Begin by thoroughly cleaning the surface of your pieces. Use a mixture of warm water and mild soap to remove dust, grime, and grease. This step ensures that the new finish adheres effectively.
Next, inspect for any imperfections. Fill in scratches, dents, or holes with wood filler, allowing it to cure completely before proceeding. Sand these areas smooth with fine-grit sandpaper for a seamless appearance.
For surfaces with existing finishes, a light sanding is necessary. This creates a better bonding surface for the new layer. Use a sanding sponge or a block for even pressure and coverage.
After sanding, wipe down the surfaces with a damp cloth to eliminate dust particles. I often follow this with a dry cloth to ensure no moisture remains, which could compromise the finish.
- Gather all necessary tools: brushes, rollers, or sprayers depending on your preferred technique.
- Choose a well-ventilated workspace to facilitate drying and minimize fumes.
- Consider applying a primer if transitioning between different finishes or colors is involved.
Finally, make sure that all hardware is removed from the pieces. This allows for a uniform application and prevents any areas from being overlooked. Secure all hardware safely for reinstallation later.
Painting Techniques to Achieve a Vintage Look
Using a dry brush technique allows for beautiful textures reminiscent of aged surfaces. I dip the brush in the chosen color, remove excess paint, and lightly sweep across the surface. This creates a soft, worn effect perfect for a classic feel.
An antiquing method can add depth. After applying a base coat, I mix a glaze with a darker color. I brush this mixture onto the surface, then wipe off the excess, leaving the darker hue in the crevices, mimicking the look of timeworn pieces.
For a more layered effect, I apply two or more colors. I typically start with a lighter shade and allow it to dry, then add a darker color on top. Once partially dry, I sand through the top layer in spots to reveal the lighter color beneath, giving the impression of multiple paint jobs over the years.
Distressing is another technique I frequently use. This involves intentionally creating scratches, dents, and imperfections to simulate the passage of time. I often use sandpaper, a hammer, or other tools to achieve a more authentic vintage appearance.
- Wax Finish: I finish with a clear wax to nourish the surface and add a soft sheen, enhancing the overall patina.
- Chalk Paint: Opting for chalk-based products helps achieve that classic matte finish with excellent adhesion.
- Color Washing: I dilute paint with water to create a translucent effect, adding a subtle hue over a base coat that complements the vintage style.
Experimenting with these techniques enriches the aesthetic considerably, transforming ordinary pieces into captivating statements within any space.
Distressing Methods for Authentic Shabby Chic Finish
I recommend using several effective techniques to achieve an authentic worn appearance. The first method is sanding. Lightly sand specific areas to create an aged effect, focusing on edges and corners. Use medium-grit sandpaper for the initial pass and finish with fine-grit for a smooth texture.
Washing Technique
A washing technique involves applying a diluted mixture of water and paint over the surface. This semi-transparent layer enhances the underlying color while allowing imperfections to show through. Experiment with different ratios; usually, a 1:1 mixture works well, but adjust according to desired transparency.
Using Wax for Aging
Wax can be instrumental in completing the distressed look. Applying dark wax over a lighter base coats can help accentuate the crevices and highlights. Use a clean cloth to apply, working it into the surface. Wipe off any excess for an even finish. This will not only provide depth but also protect the surface.
For additional authenticity, consider applying a bit of steel wool to specific areas. This creates natural wear and tear, resembling the passage of time. Use it sparingly to avoid over-distressing. Lastly, a few dings or scratches made with a sharp tool can add character–just be mindful to keep it subtle.
Sealing and Protecting Your Finished Items
I recommend using a quality topcoat to ensure your creations are well-protected. An acrylic polyurethane is ideal, as it offers durability and a clear finish, maintaining the aesthetic you’ve achieved. Apply it with a brush or a foam applicator for a smooth, even coat.
Types of Sealers
Select between water-based and oil-based options. Water-based sealants dry quickly and have less odor, making them suitable for indoor projects. However, oil-based varieties typically provide a more robust protection layer, especially for surfaces that will see high traffic or use.
Application Tips
Allow your color layers to fully cure before sealing–typically 24 hours is ideal. Lightly sand the surface with fine-grit sandpaper before applying the sealant. This step enhances adhesion and can provide a more refined finish. After your topcoat is dry, consider buffing the surface for an added sheen.
Accessorizing to Complete the Aesthetic
Incorporating decorative elements is key to enhancing the vintage vibe of your space. Start with textiles–opt for faded florals or lace curtains that add an airy, nostalgic touch. A patchwork quilt draped over your bed can also inject warmth and charm.
Wall Decor
Choose wall art that resonates with the overall ambiance. Vintage frames with botanical prints or soft landscapes can accentuate the room’s character. Consider adding a gallery wall arrangement with mismatched frames for an eclectic feel.
Decorative Accents
Add small accessories to create layers. A collection of antique jars or a rustic wooden bowl can serve as both functional and decorative pieces. Candles in distressed holders create a warm glow, enhancing the relaxed atmosphere. Incorporate natural elements like dried flowers in a vintage vase for a simple yet striking centerpiece.
Don’t overlook lighting; a delicate chandelier or vintage lamps can transform the room. For a cohesive look, select shades in soft hues that echo your other decor elements.
With thoughtful accessorizing, each detail contributes significantly to crafting a cohesive and inviting space that captures a timeless essence.