If you wish to deepen the hue of your lighter timber pieces, consider using stains designed specifically for this purpose. Focus on oil-based products, as they penetrate well and provide a more durable finish. Choose a color that is a few shades darker than your current surface to achieve the desired contrast.
Prior to applying any stain, ensure that the surface is meticulously cleaned and sanded to remove any existing finish. This step is crucial for allowing the new pigment to adhere correctly. After sanding, wipe the surface with a damp cloth to eliminate dust particles and ensure a smooth application.
When ready to apply the stain, use a brush or cloth, following the grain to enhance texture. Allow it to sit for a few minutes before wiping off the excess, as this can enhance the richness of the color. If a deeper shade is desired after the first application, a second coat may be necessary, but always follow the manufacturer’s instructions for optimal results.
Transforming Pale Timber Items
To deepen the hue of your pale timber items effectively, begin with a suitable stain. Gel stains are especially advantageous for achieving an even finish without excessive penetration. Select a color that aligns with your desired outcome, ensuring to test it on an inconspicuous area first.

Preparation Steps
- Clean the surface thoroughly with a damp cloth to remove dust and grease.
- Sand lightly with fine-grit sandpaper, following the grain to minimize scratches.
- Wipe away any dust from sanding using a tack cloth or a damp cloth.
Application Process
- Apply the chosen stain using a lint-free cloth or a brush, working in the direction of the grain.
- Allow the stain to penetrate for a few minutes, then wipe off any excess with a clean cloth.
- For a richer tone, repeat the staining process after the first layer dries according to the manufacturer’s instructions.
Finish by sealing the surface with a clear coat, such as polyurethane, to protect the new color and enhance durability. This will also give a slight sheen to the finish, enhancing overall appearance.


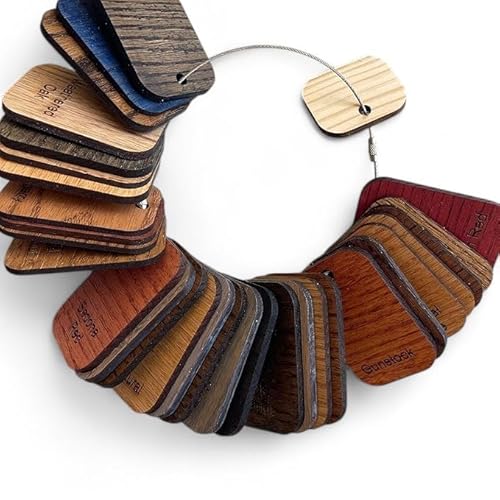
Choosing the Right Stain for Your Furniture
Using the correct tint is paramount for achieving the desired tone on your pieces. Begin by assessing the existing hues of the surface–different stains interact uniquely with various grains and finishes.
Types of Stains
Consider oil-based stains for a deep, rich finish. They penetrate the fibers effectively and offer a more pronounced color change. Water-based options dry quicker and emit fewer fumes, making them user-friendly for indoor applications. Look for gel stains when dealing with uneven textures, as they adhere well and provide consistent color across various surfaces.
Color Selection
When selecting shades, explore samples on a small, inconspicuous area first. Test various combinations to determine how they blend with underlying tones. Opting for dark espresso or walnut can create a dramatic effect, while a classic mahogany can introduce warmth without overpowering the original aesthetic. Always consider the final environment–light reflection and surrounding decor play a significant role in the outcome.
Keep in mind that mixing stains could lead to unexpected effects. If you’re looking for something unique, don’t hesitate to experiment, but document your process for consistency in future projects.
Preparing the Surface for Staining
Begin with cleaning the item to eliminate dust and dirt. A damp cloth can be effective for this task; ensure the surface is completely dry afterward. If there are existing finishes, such as varnish or lacquer, they must be removed to allow for proper absorption of the stain. I often use a chemical stripper for this purpose, applying it according to the manufacturer’s instructions and using a scraper to gently remove the old finish.
After stripping, sand the surface thoroughly using progressively finer grits, starting with 120-grit sandpaper and finishing with 220-grit. This process smooths the surface and opens the pores, contributing to even color application. Always sand in the direction of the grain to avoid scratches.
Filling in Imperfections
Inspect the surface for any imperfections, such as dents or scratches. A wood filler can be applied to these areas, ensuring it’s the same color as the surrounding material. Allow the filler to dry completely, then sand it smooth to match the rest of the surface.
Conditioning the Surface
Applying a wood conditioner before staining will promote more uniform color. This step is particularly important for softer varieties, as it minimizes blotchiness. Use a brush or cloth to apply the conditioner evenly, allowing it to penetrate for the recommended time before wiping off any excess. It’s vital to follow the instructions of the product for optimal results.
With these preparations, the piece is ready to absorb the stain effectively, achieving the desired transformation.
Using Wood Conditioner for Even Application
Applying a wood conditioner is a key step to achieve a uniform finish. This process helps in minimizing blotching and ensures the stain adheres evenly across the surface. Prior to staining, I always apply a pre-stain conditioner that penetrates the grain of the timber, allowing for more consistent absorption of the finish.
Select a high-quality wood conditioner that is compatible with the type of stain you intend to use. Here’s a simple guide to follow:
| Step | Action |
|---|---|
| 1 | Sand the surface thoroughly to ensure smoothness, using fine-grit sandpaper (220 or higher). |
| 2 | Wipe down all dust with a damp cloth, allowing it to dry completely. |
| 3 | Apply a thin coat of wood conditioner with a brush or cloth, working in the direction of the grain. Make sure to cover all areas evenly. |
| 4 | Allow the conditioner to set for about 15-30 minutes before wiping off excess product. |
| 5 | Proceed to apply the stain once the conditioner is dry, preferably within two hours. |
Following these steps minimizes variations in color, helping the final result appear rich and consistent. Utilizing wood conditioner enhances the absorption properties of the surface, yielding a more professional look in the end.
Applying Stain: Techniques and Tips
I recommend using a foam brush or a lint-free cloth for applying stain. A foam brush helps achieve a smooth application, while a cloth allows for better control and blending. Always shake the stain can thoroughly before pouring out a small amount into a separate container. This prevents potential contamination with dirt or debris from the can.
Staining Technique
Work in sections, applying the stain generously and allowing it to sit for a few minutes to penetrate. Afterward, wipe off the excess with a clean cloth, moving in the direction of the grain. This technique ensures an even finish and reduces blotches. If you prefer a darker hue, additional coats can be applied after the previous layer has dried completely, usually after 4-6 hours.
Drying and Curing
Let the coated piece dry in a well-ventilated area away from direct sunlight to avoid uneven drying. Complete curing may take a few days, depending on the specific stain used. Be cautious before applying any protective finish; ensure the stain has fully cured, as this leads to a more durable and lasting color.
Testing Stain Color on a Sample Piece
Before applying any product to the entire piece, I suggest testing the chosen tint on a sample section. This approach ensures the final appearance aligns with my expectations.
Here’s a step-by-step process for effective color testing:
- Select an offcut or a less visible area of the main item. If these aren’t available, consider purchasing a small piece of similar grain.
- Prepare the sample by sanding it with fine-grit paper to ensure a smooth surface. This step helps reveal the true nature of the stain.
- Apply a wood conditioner if necessary, especially if the sample is of a porous species. This product promotes even absorption and avoids blotchiness.
- With a clean brush or cloth, apply the selected stain, following the manufacturer’s recommendations for application thickness.
- Let the stain sit for the recommended time–generally between 5 and 15 minutes–then wipe off the excess using a clean cloth.
- Allow the sample to dry completely before assessing the final color. Drying times can vary based on humidity and air circulation.
- Evaluate the result in different lighting conditions to get a comprehensive view of how the shade appears. Daylight and artificial light can create varied perceptions of color.
If the result isn’t as anticipated, I adjust by experimenting with different tints or layering techniques until achieving the desired shade. Documenting each test, including the products and techniques used, simplifies the process, ensuring consistency during the application to the primary item.
Layering Stains for Depth and Richness
Begin with a base stain that closely matches your desired final shade. Apply it evenly, ensuring full coverage, and allow it to dry completely according to the manufacturer’s directions. This initial layer establishes the foundation for depth.
Next, choose a darker stain to enhance the richness. Apply this second layer sparingly, focusing on areas where natural shadowing occurs, such as corners and edges. Using a cloth or brush, blend the stain seamlessly into the first layer. Keep in mind that less is often more; start with a small amount and build gradually.
Drying Time
After applying each layer, allow adequate drying time. This prevents the colors from muddling and ensures that each coat has a chance to develop its unique character. Typically, waiting 24 hours between applications provides optimal results.
Testing the Combination
Before proceeding to the final application, conduct tests with the second stain on a less visible area or a sample piece that mimics the original. This step is crucial to ensure that the combination of stains achieves the desired effect without unpleasant surprises.
| Stain Layer | Application Method | Drying Time |
|---|---|---|
| Base Layer | Even application with a brush or cloth | 24 hours |
| Second Layer | Spot application, focusing on shadows and edges | 24 hours |
Following this method will ensure a rich, deep finish without the risk of overpowering your original color. Always assess the results under various lighting conditions to gauge the final appearance.
Sealing the Stain with a Protective Finish
To ensure lasting results, I recommend applying a protective finish after staining the surface. Choose between polyurethane, lacquer, or shellac, depending on the desired sheen and durability. For example, polyurethane offers robust protection and a glossy finish, while lacquer dries quickly and provides a smooth coat.
Before application, make sure the stain has completely dried, which can take anywhere from a few hours to overnight, depending on the product used. Sand the stained surface lightly with fine-grit sandpaper to enhance adhesion of the finish. I typically wipe away any dust with a damp cloth to prevent imperfections.
Apply the chosen finish in thin, even coats using a high-quality brush or foam applicator. It’s crucial to follow the manufacturer’s guidelines for drying times between coats. Generally, two to three coats will yield the best protection and appearance.
After the final coat is applied, allow the piece to cure for several days in a dust-free environment. This step is vital as it helps the finish harden fully, ensuring your newly styled item withstands everyday use while enhancing its visual appeal.
Maintenance Tips for Darker Wood Furnishings
Regular dusting with a microfiber cloth helps maintain the sheen of darker surfaces. This prevents scratches while effectively removing particles that can dull the finish.
Using furniture polish specifically designed for darker finishes enhances the color and provides a protective layer. Apply sparingly to avoid buildup, and buff to a shine with a clean cloth.
Keep furnishings away from direct sunlight to prevent fading. If possible, use window treatments to control light exposure.
For cleaning, opt for a minimal moisture approach. A damp cloth followed by immediate drying is more effective than using excessive water. This avoids water rings and potential damage to the finish.
Periodic reapplication of the protective finish is necessary, especially in high-traffic areas. This prolongs the life of the stain and protects against wear.
Address scratches or blemishes promptly. Use a matching touch-up marker or stain to minimize the appearance of imperfections and retain a uniform look.
Store items like books or vases on coasters or mats to prevent scratches and promote even weight distribution, particularly on surfaces that may warp with time.
Be cautious with cleaning agents. Avoid abrasive or ammonia-based products, as they can strip away the finish and degrade the color.
Finally, consider the environment. Maintaining consistent humidity levels helps prevent wood expansion and contraction, keeping the furniture in optimal condition.
Alternatives to Staining for Darkening Wood
Opt for a natural oil finish to achieve a darker hue. Linseed or tung oil penetrates deeply, enhancing grain while imparting warmth.
Experiment with a vinegar and steel wool solution. Soak steel wool in vinegar for several days, creating a homemade stain that reacts with tannins in the timber, resulting in a rich, aged appearance.
- Beeswax and Oil Mixture: Blend beeswax and mineral oil for a creamy finish that adds a subtle darkening effect over time. This method nourishes the fibers and offers a soft sheen.
- Dye Application: Water- or alcohol-based dyes can be used for a more controlled color outcome. They penetrate deeper than stains, providing a uniform appearance.
- Burnishing: Rubbing the surface with a soft cloth can deepen the color by compressing the fibers without any additional finish, enhancing the natural tones.
Consider charred wood techniques, where the surface is burnt lightly. This not only darkens but adds a unique texture and character.
For a more traditional approach, apply a dark wax over a natural finish. This method allows for easy adjustments, as the wax can be reapplied or removed with ease, providing versatility on color depth.