
 Caleb Turner
Begin by measuring the diameter of the cables you’ll be routing through your workspace. A drill with a hole saw bit that matches this measurement ensures a snug fit, preventing any unwanted movement.
Select the appropriate location on the surface where you want to position the entry point. Avoid areas that may weaken the structural integrity of the piece. Mark the spot with a pencil to guide your drill.


Using a drill, carefully create the access point. Maintain a steady hand and apply even pressure to avoid splintering the material. After drilling, sand the edges to eliminate any roughness that might snag cables or fingers.
For added organization, consider inserting a grommet or cable management sleeve into the opening. This not only protects the wires but also enhances the overall aesthetic of your setup. Make sure all connections are secure and neatly arranged to promote safety and cleanliness.
Choosing the Right Location for the Hole
Select the site based on functionality and accessibility. I position the opening where cords can seamlessly connect to the power source while remaining concealed from view. This placement reduces clutter and promotes a streamlined appearance.
Consider Proximity to Outlets
Evaluate the distance from electrical outlets. Keeping the gap close to power sources minimizes excess wiring and enhances safety. I also prefer to avoid areas where cords may become pinched or damaged.
Account for Usage and Aesthetics
Think about how the piece will be used. If it’s a workspace, positioning must facilitate easy access to necessary devices. For decorative items, I aim to place the opening where it won’t detract from the overall design. Balancing functionality with visual appeal is key.
Finally, test the chosen location by temporarily placing items in the designated spots. This trial run helps ensure everything functions as intended before making permanent modifications.
Selecting the Proper Tools for the Job
My first recommendation is to gather a reliable drill. A power drill, equipped with the proper bit size, can efficiently create the opening needed in various surfaces like wood or particle board. For softer materials, a standard drill bit will suffice, while harder surfaces may require a spade bit or hole saw for larger openings.
Measuring and Marking Tools
A tape measure and a pencil are essential for accurately marking the desired location. I always ensure the markings are precise to avoid any miscalculations during drilling. A square can be useful for checking right angles, especially if multiple openings are planned.
Safety Equipment
Don’t overlook personal safety. Protective eyewear safeguards against debris, while gloves can prevent injuries from sharp edges or splinters. Hearing protection might also be necessary if using a loud drill.
Finally, a dust mask is advisable when working with materials that generate fine particles. It keeps the workspace clean and protects respiratory health. Choosing the right tools significantly simplifies the entire process and ensures a neat result.
Measuring and Marking the Spot Accurately
Precision is key for achieving a clean outcome. I use a measuring tape to determine the exact distance from the edge of the surface to ensure the entry point aligns properly with existing wiring or components. A minimum of 2 inches from the edge is typically advisable to maintain structural integrity.
Using a Level for Accuracy
To avoid an uneven appearance, I place a level against the surface after marking the initial spot. Ensuring my mark is straight prevents any later adjustments that would compromise the aesthetics and function of the item.
Double-Checking Measurements
Before proceeding, I always recheck my measurements. It’s easy to make a mistake, and verifying ensures the placement is as intended. I take note of any obstructions behind the surface that could interfere with the process, marking these on the surface as a reminder.
Once I’m confident about the placement and ready to proceed, I use a pencil to lightly mark the final location. This approach leaves minimal residue, allowing for an unobtrusive adjustment if necessary.
Drilling Techniques for Different Materials
Choosing the right method is key to a successful outcome based on the material type you’re working with.
Wood
- For softwoods, such as pine or cedar, use a brad-point bit. It provides precision and clean cuts.
- Hardwoods, like oak or maple, benefit from a spade bit or hole saw for larger openings. Start with a smaller pilot hole to prevent splintering.
Metal
- Steel requires a cobalt drill bit or titanium-coated bits for durability. Use cutting oil to reduce friction and heat.
- Aluminum can be drilled with standard high-speed steel bits but should maintain a slow speed to avoid galling.
Plastic
- For acrylic or polycarbonate, a step drill bit is ideal. This will prevent cracking at the edges.
- Use low speeds to minimize melting from friction while drilling.
Composite Materials
- Materials like MDF and particleboard need a standard twist bit. Apply masking tape to prevent chipping on the surface.
- Consider a fine-toothed hole saw for larger diameters to avoid breaking apart the layers.
By tailoring the drilling technique to the material, I ensure a clean and accurate result, which prevents damage and enhances the appearance of my project.
Preventing Damage to the Furniture During Drilling
Using a scrap piece of wood beneath the area to be drilled greatly minimizes the risk of splitting or chipping the surface. This acts as a cushion and ensures clean entry and exit points for the drill bit.
Additionally, securing the object to a stable work surface prevents movement, which can lead to uneven drilling angles and potential damage. Employ clamps or a vice grip to hold the piece firmly in place.
Recommendations for Different Materials
| Material Type | Protection Method |
|---|---|
| Wood | Use a backing board and drill at a low speed to avoid burning. |
| Metal | Apply painter’s tape to prevent scratches and hold the metal in place. |
| Plastic | Drill slowly and use a bit designed for plastics to avoid cracking. |
Lastly, always check for hidden components like wires or plumbing before starting. A quick inspection ensures no unintentional damage occurs to internal parts.
Smoothing Edges After Creating the Opening
To prevent splinters and maintain a polished appearance, I use fine-grit sandpaper, typically around 220 grit. Gently rub the edges in a circular motion, ensuring an even finish without removing too much material. I pay close attention to both the interior and exterior surfaces for a seamless look.
Utilizing a Router for Precision
If I aim for a more refined edge, a router can be invaluable. I select a round-over bit to create a smooth curve. Careful setup and a steady hand ensure the router glides evenly along the perimeter, minimizing the risk of chipping.
Final Touches and Surface Treatment
After smoothing, I often apply a wood finish, such as varnish or oil, to protect the exposed areas. This not only improves durability but also enhances the overall aesthetic. I make sure to choose a finish compatible with the surrounding material, ensuring a cohesive look.
Installing Grommets for a Finished Look
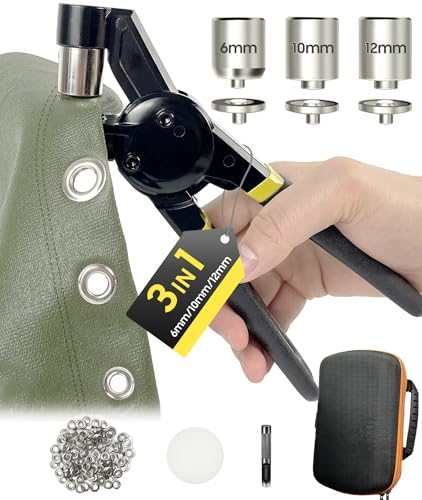
To achieve a polished and refined appearance, I always opt to install grommets after cutting openings. These provide a clean edge, preventing fraying and adding a professional touch. Begin by selecting the appropriate size for your openings; grommets come in various diameters to accommodate diverse needs.
Tools and Materials Needed
Ensure to gather the right tools: a grommet setting tool, a hammer, and the grommets themselves. Typically, metal grommets are more durable than plastic ones, making them a better choice for longevity. I recommend checking the manufacturer’s specifications to confirm compatibility between the grommet size and the cutting diameter.
Installation Steps
First, position the grommet in the opening and align it properly. Using the setting tool, carefully insert the grommet, ensuring it sits snugly against the material. I find tapping gently with a hammer achieves a secure fit without over-compressing the grommet. If any burrs or sharp edges appear during installation, smooth them out for a safe and neat finish.
The addition of grommets not only enhances aesthetics but also contributes to the durability of the openings, allowing for wires and cords to be fed through without risk of damage. By following these steps, I ensure a seamless integration of functionality and design.
Managing Cables Effectively After the Hole is Made
Select a cable management system that aligns with your setup. For a clean look, consider using cable sleeves or wraps that can bundle wires together, reducing visual clutter.
Use adhesive clips or hooks to guide cords along surfaces. This method prevents tangles and keeps cables off the floor, enhancing both safety and aesthetics.
Label each wire at both ends to simplify identification. This practice is particularly helpful when troubleshooting or rearranging electronic devices.
Install a power strip close to the created opening. This setup allows for easy access to outlets and minimizes the length of visible extensions, leading to a more organized environment.
Regularly assess and adjust the arrangements as necessary. Products like cable ties can be employed for quick reorganization when new devices are introduced.
Consider a standing desk or rolling cart for mobility if you work in varying locations. Securely fastening cables to these mobile units can streamline transitions between setups.
Finally, inspect connections periodically. Ensure everything is functioning correctly and replace any worn-out or damaged components immediately. This proactive approach will extend the lifespan of your devices while maintaining a tidy appearance.
Maintenance Tips for Long-lasting Results
Regular care of your modification is fundamental for longevity. I recommend checking frequently for any signs of wear around the opening.
Cleaning
- Use a soft, damp cloth to wipe away dust and debris that may accumulate.
- Avoid abrasive cleaners that could harm the surface or edges.
Checking for Fraying
- Inspect cables that pass through the passage. Look for any signs of fraying or damage.
- Replace any damaged cords to prevent potential hazards.
Reinforcing Edges
- Consider applying a clear adhesive sealant or edge banding to reinforce the area around the entry point.
- This can mitigate potential splintering and prolong the integrity of the material.
Periodically assess the installation to ensure there are no new stress points. Maintaining organization of wires can also enhance the aesthetics. Use cable ties or clips to prevent tangling and strain on connections.
Lastly, keep an eye on climate conditions in the area where the item resides. Excessive moisture or heat can affect the materials used. Ensuring consistent temperature and humidity levels contributes to the durability of the project.


