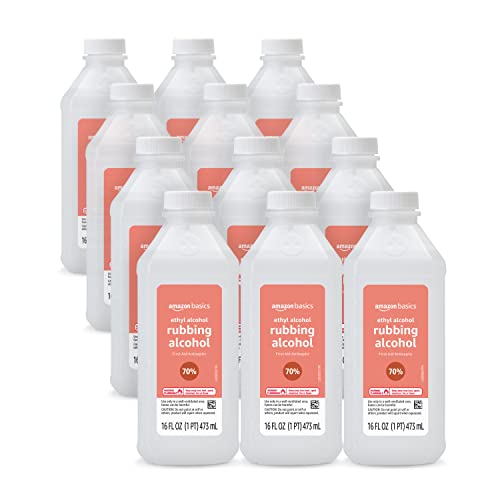


To tackle ink stains on your wooden surfaces, I recommend immediately using rubbing alcohol or hand sanitizer. Dampen a cotton ball or soft cloth with one of these substances and gently blot the affected area. Avoid scrubbing, as this may damage the finish. The alcohol effectively breaks down the dye, allowing it to lift from the wood.
For persistent stains, a baking soda paste can be beneficial. Mix baking soda with a small amount of water to create a thick paste, then apply it to the stained area. Let it sit for a few minutes before gently wiping it away with a damp cloth. This method is safe for most finishes and won’t harm the surface.
After the stain removal process, ensure to apply a suitable wood polish or conditioner to restore the surface’s shine. This step helps to maintain the overall appearance of your furniture and protects it from future stains. Remember, acting quickly is key to preventing any lasting damage.
Removing Ink from Wooden Surfaces
I recommend using rubbing alcohol or hand sanitizer for ink removal. Apply a small amount to a clean cloth and gently dab the stained area, ensuring not to rub harshly, as this may harm the finish.
For stubborn stains, mix baking soda with water to create a paste. Apply the paste to the ink and let it sit for a few minutes before wiping it away with a damp cloth.


Another option is to use a melamine sponge. Dampen the sponge and gently scrub over the ink. This method can effectively lift the mark without damaging the surrounding area.
After any treatment, ensure to clean the area with a soft, damp cloth to remove any residue. Finally, apply furniture polish or oil to restore the wood’s sheen, enhancing its appearance.
Understanding the Types of Wood Finishes
Recognizing the finish on your surface is vital for effective cleaning methods. Common categories include oil-based, water-based, lacquer, and polyurethane. Each type reacts differently to various cleaning agents and techniques.
Oil-Based Finishes
These finishes penetrate deeper into the fibers, providing a rich appearance. However, they can also absorb stains more readily, requiring gentle handling. I recommend using mineral spirits for removal of marks, testing in an inconspicuous area first.
Water-Based Finishes
Quick-drying and less odor-intensive, water-based products form a protective layer. Cleaning with a mild soap solution is often sufficient. For stubborn stains, a gentle scrub with a soft cloth should work without damaging the finish.
Choosing the Right Cleaning Solution for Sharpie Removal
Opt for isopropyl alcohol due to its strong solvent properties. It effectively dissolves ink without damaging the surface. Apply a small amount on a soft cloth and gently blot the stained area.
Alternatives to Isopropyl Alcohol
- Acetone: Works well on untreated surfaces, but use cautiously as it may strip finishes.
- White vinegar: A natural option; combine it with baking soda for enhanced effect.
- Commercial cleaners: Look for products specifically designed for ink and stain removal.
Test Before Application
Always perform a spot test on an inconspicuous area. This ensures that the chosen cleaner won’t cause discoloration or damage.
Preparing the Surface for Cleaning
Before tackling any stain removal, ensure the area is ready for the process. Clear the workspace by removing objects from the vicinity. This helps to prevent further mess and allows for better access.
Next, gently dust the affected area using a soft cloth or microfiber towel. This step eliminates dirt and debris which could interfere with the cleaning solution’s effectiveness.
Assess the finish on the surface. Identifying whether the finish is lacquer, varnish, or oil will guide the choice of cleaning products. Perform a spot test on an inconspicuous area with the selected solution to check for any adverse reactions.
Gather necessary materials: clean rags, a soft brush, and the chosen cleaning agent. Having everything organized facilitates a smoother cleaning experience.
| Material | Purpose |
|---|---|
| Soft Cloth | Dust removal and applying cleaning solutions |
| Soft Brush | Reaching into crevices without damaging the surface |
| Cleaning Agent | Removing stubborn marks |
Taking these steps prepares the area effectively, ensuring the cleaning process yields the best possible results.
Step-by-Step Guide to Removing Sharpie from Wood
I recommend using rubbing alcohol or isopropyl alcohol for efficient removal. Apply a small amount to a clean cloth and gently blot the stained area. Avoid saturating the wood, as excessive liquid can damage the finish.
After blotting, use a soft-bristle toothbrush to lightly scrub the remaining ink. The bristles help lift the stain without scratching the surface. Wipe away any residue with a dry cloth.
If the mark persists, consider using a commercial stain remover specifically designed for ink. Follow the manufacturer’s instructions carefully to prevent further damage.
Always test any cleaning solution on an inconspicuous area first. This step ensures that the finish remains intact and helps you avoid unexpected discoloration.
Once the stain is removed, it’s wise to condition the area with a suitable wood polish or wax. This not only restores shine but also protects the surface from future stains.
Using Household Items for Sharpie Removal
Isopropyl alcohol, also known as rubbing alcohol, is highly effective for this type of ink removal. Dampen a soft cloth with isopropyl alcohol and gently dab the stained area. Always test in an inconspicuous spot first to check compatibility with the finish.
Another solution is to apply toothpaste, preferably non-gel variety. Use a small amount and rub it into the stain with a soft cloth in circular motions. Wipe away with a damp cloth and repeat if necessary. This method can be quite effective on lighter finishes.
Baking soda serves as a gentle abrasive. Create a paste by mixing it with water, apply it to the mark, and scrub lightly with a cloth. Rinse the area with a damp cloth afterward, making sure to remove all residues.
Vinegar can be leveraged for its solvent properties. Mix equal parts of vinegar and water, apply to the stain using a cloth, and gently wipe away. Ensure thorough drying after cleaning to prevent any moisture damage.
- Isopropyl Alcohol: Dampen a cloth and dab gently.
- Toothpaste: Use non-gel variety, rub gently, then wipe clean.
- Baking Soda: Make a paste with water, scrub lightly, and rinse.
- Vinegar: Mix with water, apply, and wipe dry.
For additional options, consider using hand sanitizer. Its alcohol content can break down the ink effectively. Apply a small amount, let it sit briefly, and wipe clean.
Always ensure to dry and protect the surface after cleaning to maintain the integrity of the finish.
Dealing with Stubborn Sharpie Stains
For resilient marks, I recommend rubbing alcohol or isopropyl alcohol for effective stain lifting. Dampen a soft cloth with the substance and gently dab the area without saturating the surface. This technique preserves the integrity of the finish while breaking down the ink.
Alternative Solutions
Acetone or nail polish remover can also be valuable, but test it on an inconspicuous area first to avoid damage. Another option is a specialized stain remover designed for non-porous surfaces. For persistent residue, I sometimes use a combination of vinegar and baking soda to create a paste, applying it directly to the stain with a soft cloth.
Follow-Up Care
After removing the marks, it’s beneficial to clean the area with a mild soap and water solution to ensure no cleaning agents remain. Finally, consider applying a fresh coat of furniture polish or wax to restore shine and protect the surface against future staining.
Preventing Future Marker Marks on Wooden Surfaces
I recommend keeping writing instruments out of reach, particularly from young children or pets. Consider using containers with secure lids for storage.
Applying a protective coating, such as a clear sealant, can help prevent stains from penetrating. Regularly maintain the finish to ensure it remains intact.
Utilize placemats or coasters during arts and crafts activities to create a barrier against accidental markings. This minimizes direct contact between surfaces and any writing material.
Teach proper etiquette when using markers, emphasizing designated areas for artistic expression. Role modeling responsible behavior can greatly decrease the likelihood of mishaps.
Regularly inspect high-risk areas around the home, identifying potential hazards and addressing them proactively. Keeping an organized space reduces the temptation to use markers inappropriately.
Finally, consider using washable or erasable markers for projects, significantly lowering the risk of permanent marks on surfaces.


