Preparing the surface is critical. I always clean the wood thoroughly to remove dirt and oils, creating an ideal base for application. I use a mixture of warm water and mild soap, scrubbing gently with a soft brush. After rinsing, I let it dry completely before proceeding.
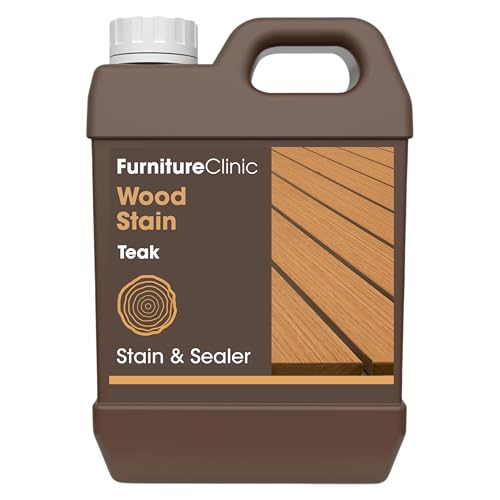
Selecting the right product is paramount. I opt for high-quality outdoor finishes specifically designed for hardwoods, which provide protection against moisture, UV rays, and mildew. These products come in different shades; I typically choose one that enhances the natural grain while offering long-lasting durability.
Application techniques matter. I prefer using a brush for even coverage, applying the finish in the direction of the grain. For intricate designs or tight corners, I sometimes use a small foam brush. I ensure each coat dries thoroughly before applying the next to achieve an even tone and a rich depth of color.
Regular maintenance keeps my pieces looking fresh. After the initial application, I reapply a maintenance coat annually or biannually, depending on the exposure to the elements. This practice helps retain the wood’s beauty and integrity over time.
Staining Outdoor Teak Furniture
Begin with a clean surface. Use a soft cloth or brush to remove dust and debris. For deeper cleaning, a mixture of mild soap and water will help eliminate any oily residues. Rinse thoroughly and let it dry completely.
Select a high-quality penetrating product specifically designed for the wood type at hand. Always check for compatibility with the existing finish. Test a small, inconspicuous area before full application.
Apply the chosen solution using a soft brush or cloth. Work in sections to ensure even coverage, following the wood grain. Be generous but avoid pooling. Wait for the recommended time for absorption, then wipe off any excess.
After staining, allow sufficient drying time, typically 24 to 48 hours, before exposing it to rain or direct sunlight. This prevents any potential smudging or fading.
Regular maintenance is crucial. Reseal every 6 to 12 months to preserve color and enhance durability. Monitor for signs of wear and address them promptly.
Store in a shaded area during harsh weather conditions to prolong its lifespan and maintain aesthetic appeal.
Choosing the Right Stain for Teak Wood
For this type of lumber, I recommend opting for an oil-based finish specifically designed for hardwoods. Oils penetrate deeply, enhancing the natural beauty while providing excellent protection against moisture.
Color Selection
I prefer deep rich hues that accentuate the grains, such as mahogany or walnut. It’s advisable to test a small area to ensure that the shade complements the surroundings and meets my aesthetic preferences.
UV Protection
Select a product that includes UV filters. This is crucial to prevent fading from sunlight exposure. I’ve found that clear finishes with UV blockers remain preferable since they allow the wood’s natural color to shine through.
Preparing Your Teak Furniture for Staining
Cleaning the surface thoroughly is my first action. I make a mixture of mild soap and warm water, then scrub the wood with a soft brush to lift dirt and grime. After rinsing with fresh water, I let it dry completely, usually for at least 24 hours, ensuring no moisture is trapped underneath the application.
Addressing Any Imperfections
Next, I inspect for surface imperfections like scratches or rough spots. I use fine-grit sandpaper to smooth out these areas, enhancing the surface for a more uniform absorption. Sanding in the direction of the grain is crucial to prevent any damage to the fibers.
Assessing the Wood’s Condition
I also evaluate whether there are any signs of oxidation or graying. If the surface appears dull, I consider utilizing a wood brightener to restore the natural color before proceeding. This treatment helps revitalize the look and ensures that the color adheres properly after the application.
Cleaning Techniques for Outdoor Teak
For effective maintenance of exterior wooden pieces, I recommend using a few specific methods to ensure surfaces are clean before applying any protective coatings.
First, gather these supplies:
- Soft-bristle brush
- Hose with a spray nozzle
- Teak cleaner or mild soap
- Bucket
- Clean sponge or cloth
- Protective gloves
Begin by rinsing the wood with a hose to remove loose dirt and debris. Next, mix the cleaner with water in a bucket as per product instructions. Wearing gloves, use the brush to apply the solution, working in the direction of the grain. Focus on areas with more significant stains or discoloration.
After scrubbing, rinse the surface thoroughly with the hose. Ensure there is no soap residue left, as it can affect the absorption of any subsequent treatment. Allow the material to dry completely before moving on to any additional protection treatments.
For regular upkeep, I suggest performing this cleaning every few months, especially after heavy usage or inclement weather. This will help maintain the wood’s integrity and appearance.
If more significant staining has occurred, consider using a mild sanding technique with fine-grit paper to remove deeper marks. Always follow with a thorough rinse and drying to prep the surface for further treatment.
Regular maintenance through these cleaning methods extends the life of your wooden pieces while ensuring they remain visually appealing.
Sandpaper Grains: Finding the Best Option
I recommend using sandpaper with a grit of 120 to 150 for preparing the surface. This range is coarse enough to smooth out imperfections without damaging the wood. After the initial sanding, transitioning to 220-grit paper will provide a finer finish, which is essential before applying any treatment.
Choosing the Right Grit
Start with 120-grit paper for the initial sanding phase. It efficiently removes old finishes and rough patches. The subsequent use of 150-grit will help refine the surface, ensuring it’s ready for application. A final pass with 220-grit will create a smooth texture, promoting better absorption of the product.
Tips for Sanding
Always sand in the direction of the grain to avoid scratches that can lead to an uneven appearance. Ensure to keep the sandpaper flat against the surface for consistency. Regularly check the progress and wipe away dust to assess the smoothness. This method will ensure an optimal base for your protective layer.
Applying Stain: Tools and Methods
For successful application, I use a high-quality bristle brush or foam applicator. These tools allow for even distribution of the product, ensuring penetration into the wood grains.
Preparation of Tools
I always ensure that my brushes or applicators are clean and dry before use. If reusing, I wash them thoroughly to remove previous residues. A well-prepared tool makes application seamless.
Application Techniques
With a brush, I apply in long, even strokes, following the grain to avoid streaks. For intricate details or small areas, I switch to a foam applicator. I keep a lint-free cloth nearby to wipe away excess product immediately for a smooth finish.
Working in manageable sections helps me control the application and observe the wood’s absorption. This is particularly useful on porous surfaces that may require multiple coats. I allow each layer to dry completely before adding another for depth of color.
Achieving an Even Finish
To ensure a uniform application, I recommend a few key techniques:
- Always work in small sections, typically around 2-3 square feet at a time. This prevents the product from drying before I can blend it in.
- Use a high-quality synthetic brush or a foam applicator. Natural bristles may absorb too much liquid, leading to uneven absorption.
- Apply the product in long, even strokes, following the direction of the grain. This promotes better adhesion and a smoother appearance.
- After the initial application, I lightly wipe off any excess with a clean rag to avoid pooling in corners and crevices.
- For larger surfaces, consider using a sprayer to achieve a consistent layer. However, I still follow up with a brush to even out any spots.
Monitoring the conditions is crucial. Avoid working in direct sunlight, as heat can cause the liquid to dry too quickly, creating blotches. Instead, I opt for shaded environments with low humidity.
Once the first layer dries, I inspect for any uneven spots. If I notice imperfections, a fine sanding can help smooth out those areas before applying a second coat.
Finally, always adhere to the manufacturer’s recommendations regarding reapplication intervals to maintain a balanced finish over time.
Drying Time: Understanding the Importance
After applying the finish to the wood, proper drying time is fundamental. The duration can significantly affect the quality of the final result. Based on my experience, allowing the coating to dry adequately ensures optimal adhesion and prevents issues such as peeling or uneven coloring.
The drying process can vary depending on factors like temperature, humidity, and the specific product used. Here’s a general guide to managing those conditions effectively:
| Condition | Drying Time |
|---|---|
| Warm & Low Humidity | 2-4 hours |
| Warm & High Humidity | 4-8 hours |
| Cool & Low Humidity | 4-6 hours |
| Cool & High Humidity | 8-12 hours |
I always recommend checking the manufacturer’s instructions for the specific product I chose. Rushing through this phase can lead to complications such as uneven coverage or premature wear. It’s worthwhile to exercise patience and conduct a touch test before proceeding with any additional coats or reassembling items.
Ensuring adequate ventilation can also expedite the drying phase. When I place my creations in a well-ventilated area, I often notice a marked improvement in drying times. Avoiding direct sunlight is prudent, as excessive heat can cause the finish to dry too quickly and lead to a cracked surface.
In summary, paying close attention to drying times and environmental variables can lead to a more satisfying and long-lasting result. I prioritize these considerations every time I work on my projects.
Maintaining Stained Teak Furniture
Regularly apply a protective finish every 6 to 12 months to preserve the color and prevent fading. Choose an oil-based or water-repellent product designed for hardwoods to enhance longevity.
For routine upkeep, use a soft cloth or a sponge with mild soap and water to wipe surfaces clean, avoiding harsh chemicals that might damage the finish.
Monitor for signs of wear, such as scratches or discoloration, and address these areas promptly with touch-up techniques. Lightly sand any rough patches and reapply the chosen protective layer to ensure uniformity.
Store pieces in a shaded area during inclement weather to avert exposure to excessive moisture or UV rays, both of which can compromise the integrity of the finish.
Cleansing the wood with a specialized cleaner several times a year can help restore its natural luster, while periodic deep cleaning every few years helps to refresh the overall appearance.
When the finish begins to wear or lose its sheen significantly, consider stripping the old coating and starting anew. This process will allow for maximum adhesion of the new application.
When to Reapply Stain to Outdoor Teak
The ideal moment for reapplication is when the surface begins to show signs of fading or wear. Typically, this occurs every 6 to 12 months, depending on the climate and exposure to elements. If you notice a change in color or an increase in moisture absorption, it’s time to refresh the protective layer.
Check for any peeling or flaking, which indicates that the protective coating has deteriorated. Sunlight can significantly accelerate the breakdown of finishes, so keep an eye on the areas most exposed. If water no longer beads up on the surface, reapplication is necessary to maintain protection against moisture and UV damage.
During the spring or early fall are the best times for this task, as temperatures are generally moderate, facilitating proper drying and curing. If you notice any signs of mold or mildew, addressing these issues promptly before reapplication is critical to ensuring long-lasting results.
Regular maintenance will prolong the life of your furnishings and keep them looking their best. I recommend setting up a schedule for inspection and reapplication, ensuring the integrity of the wood remains intact.