
 Caleb Turner

If excessive noise disrupts your living area, consider installing acoustic panels on the walls. These panels absorb sound, preventing it from echoing throughout the room. Aim for a mix of different thicknesses for optimal absorption across various sound frequencies.
For the ceiling, I recommend adding a layer of mass-loaded vinyl before installing drywall. This addition greatly enhances the barrier against sound transmission from above. Also, don’t overlook the importance of sealing gaps around windows and doors with weatherstripping or acoustic sealant to prevent sound leakage.
Flooring can also contribute to noise issues. Utilizing thick rugs or carpets can dampen sound significantly. If feasible, consider floating your floor with an underlayment designed for sound reduction, which acts as a buffer against vibrations and noise transfer.
Maximizing Acoustic Comfort in Your Living Space
Consider investing in acoustic panels. These can be wall-mounted or suspended from the ceiling, effectively absorbing sound waves and minimizing echo. Depending on the design, they can also enhance the aesthetics of the environment. Look for options made from high-density foam or fabric-wrapped versions for better absorption capabilities.
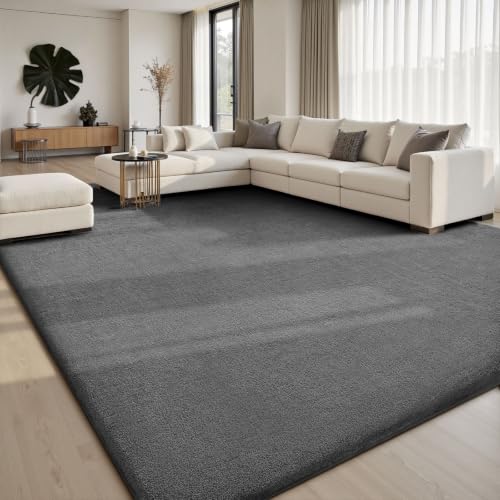


Utilizing thick rugs or carpets is another straightforward approach. Thick textiles act as sound dampeners, reducing noise reflected off hard surfaces. Place them strategically in high-traffic areas or beneath furniture to optimize sound absorption.
Utilize Soft Furnishings
Incorporate heavy curtains or drapes to obstruct noise from outdoor sources. Opt for materials like velvet or dense weaves, which block out more sound compared to lighter fabrics. Hanging them from ceiling to floor will further enhance their sound-dampening impact.
Consider Structural Modifications
If willing to invest, adding a drop ceiling with acoustic tiles can greatly reduce sound transmission between levels. Similarly, installing a solid core door instead of a hollow option will enhance privacy by minimizing noise leakage. Additionally, sealing any gaps around windows or doors with weather stripping can prevent exterior sounds from intruding into your living area.
Assessing Noise Sources in Your Loft
Identify the main contributors to unwanted sounds before implementing any measures. Start with a thorough walk-through of the space, listening for disturbances.
Common Noise Sources
- External Traffic: Consider nearby roads, public transport, or construction that may generate significant levels of disturbance.
- Appliances: Note the sound generated by HVAC systems, refrigerators, and washing machines during operation.
- Footsteps: Pay attention to impact noise from above, especially if there are individuals frequently moving around.
- Neighboring Units: Assess sounds coming from shared walls, especially in multi-unit settings.
Monitoring Noise Levels
- Sound Measurement Apps: Utilize mobile applications that can gauge decibel levels throughout the space.
- Listening Times: Take note of peak noise times, both during the day and night, to understand patterns.
- Record Noise: Document any specific instances or frequencies of disturbance, which will help pinpoint solutions.
After identifying these factors, consider the best strategies for addressing the unwanted sounds in your living environment.
Choosing the Right Soundproofing Materials
For optimal results in reducing noise, I prioritize specific acoustic materials that effectively absorb sound vibrations. My top choices include mass-loaded vinyl, acoustic foam panels, and soundproof drywall.
Mass-Loaded Vinyl
This heavy but flexible material creates a barrier against sound waves. I often install it on walls and ceilings to add density, which is crucial for blocking noise. It’s particularly effective in areas where sound travels through shared walls or ceilings.
Acoustic Foam Panels
Foam panels are excellent for improving the acoustics within my space. I carefully position them on walls and the ceiling to minimize echoes and reverberation. Opting for thicker panels increases their effectiveness, and I often choose those with a wedge or pyramid shape for better absorption.
Soundproof Drywall
Substituting standard drywall with soundproof options can drastically enhance noise isolation. This type of panel typically contains a layer that absorbs sound, and I ensure to use it in conjunction with resilient channels for better outcomes.
| Material | Best Use | Effectiveness |
|---|---|---|
| Mass-Loaded Vinyl | Walls and ceilings | High |
| Acoustic Foam Panels | Sound absorption in rooms | Medium |
| Soundproof Drywall | Replacing existing drywall | High |
In addition to these materials, I consider sealing gaps with acoustical caulk and adding carpets or rugs for extra sound absorption. It’s critical to combine various approaches for a more comprehensive solution.
Implementing Soundproofing Panels and Foam
To enhance acoustics, I recommend installing acoustic panels on the walls that face the main sources of noise. These panels absorb sound waves and minimize their reflection, improving the overall atmosphere. Choose panels made from high-density materials for the best results. Mount them at ear level or in strategic locations where sound reflection is prominent.
For ceilings, consider acoustic foam tiles. These lightweight tiles can be easily adhered to the surface and serve to dampen sound from above. Look for products designed for sound absorption, which often feature a wedge or pyramid shape, maximizing surface area and effectiveness.
The spacing between panels matters; placing them too close can lead to diminishing returns. Aim for a distance of at least 8-12 inches between large panels to optimize performance. Additionally, mixing different panel sizes and shapes can create a visually appealing design while enhancing acoustics.
Don’t forget the corners. Bass traps made of foam can significantly reduce low-frequency resonance that can make a space feel muddy. Installing these in the corners will improve the overall sound quality further.
Lastly, be sure to include a variety of colors and textures in your choices. This will not only contribute to the acoustic quality but also enhance the aesthetic of your space, creating a serene environment free from disruptive noise.
Using Heavy Curtains and Rugs for Noise Reduction
I recommend investing in heavy curtains made of thick, dense fabrics such as velvet or heavy cotton. These materials significantly reduce sound transmission by absorbing noise from outside and echo within the space. Ensure that the curtains cover the entire window area, extending from ceiling to floor, to maximize their sound-absorbing capabilities.
It’s beneficial to choose curtains with an additional layer or a soundproofing lining for enhanced noise control. Look for options labeled as noise-reducing or thermal blackout, as these designs often have superior insulation properties.
Incorporating rugs is equally important in mitigating sound. Hard flooring surfaces reflect sound, creating a noisy environment. Lay down thick area rugs or wall-to-wall carpeting to help muffle foot traffic noise and reduce echoes. The denser the rug, the more effective it will be in noise absorption.
I find that layering rugs not only adds warmth but also increases sound dampening. Placing a plush rug on top of a thinner one can offer additional sound reduction, providing a cozy and serene atmosphere.
To enhance the overall sound insulation, consider using a combination of both heavy curtains and rugs. This dual approach creates multiple layers that effectively disrupt sound waves, leading to a noticeable improvement in acoustic quality.
Sealing Gaps and Cracks in Walls and Windows
To enhance acoustic insulation, I recommend addressing gaps and cracks around walls and windows. Begin by locating all visible openings, which can allow sound to penetrate your space. A thorough inspection is essential; pay attention to areas around frames, electrical outlets, and baseboards.
Materials for Sealing
Utilize acoustic caulk specifically designed to reduce sound transmission. Unlike standard caulk, this type remains flexible, creating a tighter seal as temperatures change. Apply it generously to cracks, ensuring not to leave any gaps. For larger openings, consider using expanding foam insulation. It serves as a barrier against noise and enhances thermal insulation.
Window Treatments
Improve window seals by replacing worn weatherstripping or adding new strips that fit snugly. This helps block external noises effectively. If you face considerable disruption, consider secondary glazing or window inserts, which can greatly reduce auditory intrusion. These additions act as an extra layer, providing substantial sound dampening.
Creating a Sound Barrier with Bookshelves
To enhance acoustic isolation, I recommend using bookshelves as a sound barrier. Placing these furniture pieces against shared walls can significantly reduce noise transmission between spaces. Here’s how to optimize their effectiveness:
1. Choose the Right Bookshelves
- Select solid, heavy bookshelves made from dense materials like hardwood or engineered wood.
- Avoid lightweight or hollow shelves that are less effective at absorbing sound.
2. Fill Shelves Strategically
- Maximize sound absorption by filling shelves with books and other dense items. The denser the item, the better the noise reduction.
- Incorporate various shapes and sizes of objects to break up sound waves more effectively.
Additionally, securing bookshelves to the wall can prevent vibrations and enhance stability, reducing any resonance. Consider arranging the shelves in a staggered formation, which can further disrupt sound waves.
3. Create an Acoustic Layer
- Add sound-absorbing materials like fabric-covered bins or stuffed animals on the shelves.
- Incorporate decorative acoustical panels behind the bookshelves for an extra layer of protection.
This combination creates a multifaceted barrier that not only absorbs sound but also adds aesthetic appeal to your living space. While it may not eliminate noise entirely, enhancing your bookshelves in this way will deliver noticeable improvements.
Installing Acoustic Ceiling Tiles to Minimize Echo
Opting for acoustic ceiling tiles significantly reduces reverberation in a space. These tiles come in various materials, including fiberglass and foam, which absorb sound rather than allowing it to bounce back into the room. I recommend measuring the ceiling area to determine how many tiles are needed, ensuring complete coverage for optimal results.
Adhesive and mounting options vary for these tiles, with some designed for direct application and others requiring a grid system. Ensure the surface is clean and dry before installation for effective adhesion. Follow the manufacturer’s guidelines for placement, typically starting from the center and working outwards, which helps maintain an even aesthetic while maximizing sound absorption.
Sealing edges and joints with acoustic caulk enhances the performance of the tiles by preventing sound leaks. Additionally, opting for tiles with a high Noise Reduction Coefficient (NRC) rating–preferably above 0.7–ensures superior echo minimization. I found that combining different tile patterns can create a visually interesting ceiling while maximizing acoustic benefits.
If budget allows, consider professional installation, especially for complex configurations or larger spaces. This guarantees precise fitting and alignment, contributing to enhanced sound control. Remember, an adequately treated ceiling can transform the auditory environment, making conversations clearer and music more enjoyable.
Utilizing Furniture Arrangement for Better Sound Control
Positioning large pieces like sofas and armchairs against walls can significantly absorb sound vibrations. Opt for upholstered furniture with thick fabrics, which dampens noise more effectively than sleek, minimalist designs.
Create Zones
By arranging furniture into distinct areas, I can minimize sound travel. A dedicated reading nook with a plush rug and a few cushions can act as a sound trap, reducing reverberations.
Use Bookshelves Wisely
Placing tall bookshelves filled with books can create barriers against sound waves. I align them along shared walls or spaces connecting to noisier areas, enhancing their absorption capacity.
Don’t forget to incorporate smaller items like art pieces and knick-knacks on surfaces for added sound diffusion. Strategically placed cushions on hard surfaces also enhance quietness in specific zones.
Lastly, avoiding open pathways between rooms helps contain noise. Arranging furniture to form natural barriers can create a more serene atmosphere within the living space.
Maintaining a Quiet Environment with White Noise Machines
Investing in a white noise machine can significantly enhance tranquility in a noisy space. These devices produce a consistent sound that helps mask disruptive noises, creating a more peaceful atmosphere. Look for machines that offer adjustable volume levels and a variety of sounds, such as nature sounds or fan noises, to find what works best for you.
Choosing the Right White Noise Machine
Select a model that fits the specific needs of your area. For larger areas, machines with a higher sound output may be necessary. Additionally, consider devices with timers or that can connect to smart home systems for better convenience and control.
Integrating White Noise into Your Routine
Position the machine strategically; placing it near noise sources but still within earshot can optimize its effectiveness. Incorporate it into your daily routine, especially during activities that require focus, like reading or working. Adjusting settings for different times of the day can also help tailor the experience to changing ambient noise levels.
Regularly assess the performance of the machine and make adjustments as needed to keep your environment as tranquil as possible.


