Choosing a strong adhesive like fabric glue is the first step in addressing a damaged outdoor protective layer. Applying it generously along the edges of the breach ensures a solid bond. While the adhesive sets, gently press the fabric together to align the fibers and minimize visibility of the repairs.
Next, using a needle and outdoor thread that matches the color of the material can enhance durability. Employ a simple whip stitch technique to sew along the edges, securing both sides tightly. This method not only strengthens the patch but also adds a decorative touch if done neatly.
In case of larger damages, consider using a patch made from a similar fabric. Cut it slightly larger than the area needing attention, and follow the previous steps to adhere and sew it in place. This solution guarantees extra longevity, extending the life of your protective covering.
Assessing the Damage of the Torn Cover
Begin by examining the extent of the damage closely. Identify the location of the rip and measure its size. This will help determine the materials needed for the fix.
- Check the fabric type – is it canvas, vinyl, or another material? Knowing this influences your repair method and materials.
- Inspect the edges – are they frayed or do they have clean breaks? Edges can affect how well the patch adheres.
- Look for multiple tears or issues. Address each area based on severity and location.
- Evaluate the overall condition. If the material is worn out in several places, a patch may only be a temporary solution.
Carefully consider the environment where the item is used. If it’s exposed to harsh weather, that may affect the longevity of any fixes implemented. Make notes about how the damage affects functionality: can it still be used, or is it too compromised?
Documenting each detail will assist in selecting suitable repair supplies. This thorough assessment provides clarity for moving forward effectively.
Choosing the Right Materials for Repair
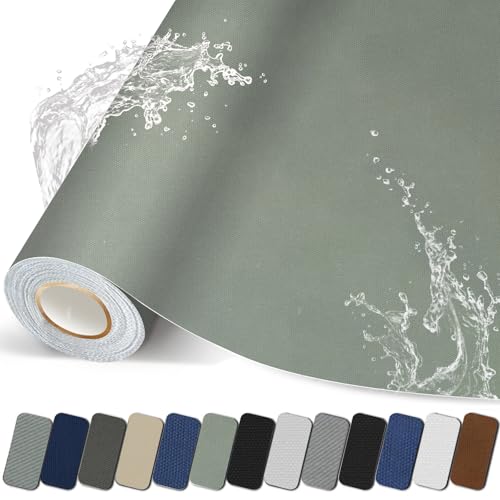
For effective patchwork, I select a sturdy fabric that matches the original texture of my outdoor coverings. Polyester or acrylic materials are ideal due to their durability and resistance to UV rays. I avoid cotton as it tends to fade and deteriorate quickly in outdoor conditions.

Next, I opt for a strong adhesive, such as a marine-grade fabric glue. This type of adhesive adheres well to outdoor textiles and withstands moisture. If seams need reinforcement, I choose heavy-duty thread made from polyester to ensure longevity in the repair.
Additionally, I keep waterproofing spray on hand. After completing the mending process, applying this treatment helps enhance water resistance and protects against mildew.
Finally, I gather essential tools: scissors for precise cutting, pins or clips for holding fabric in place during application, and a sewing machine for added security on larger patches. This combination ensures a robust fix with materials designed to endure outdoor elements.
Preparing the Torn Area for Repair
Clean the damaged section thoroughly using mild soap and water to remove dirt and debris. Rinse well and allow it to dry completely. This step ensures proper adhesion of any materials used.
Inspect the edges of the rip to assess any wear or fraying. Trim away any excessively frayed edges with sharp scissors. This creates a neater surface and prevents further unraveling during the mending process.
If the material has stiffened or hardened, gently soften it by applying a suitable fabric conditioner, then allow it to rest. This enhances flexibility, making it easier to work with during mending.
Use a lightweight sandpaper to slightly roughen the area surrounding the damage. This promotes better adhesion when applying patches or other repair materials, ensuring a more durable bond.
Before moving on to the next phase, consider marking the area with a fabric marker or chalk to outline the exact dimensions of your patch. This will guide your next steps, ensuring precision in the subsequent application process.
| Step | Action |
|---|---|
| 1 | Clean the area with soap and water |
| 2 | Trim any frayed edges |
| 3 | Soften stiff materials with conditioner |
| 4 | Roughen edges with sandpaper |
| 5 | Mark the patch area with fabric marker |
This preparation sets the stage for a successful intervention, ensuring longevity and aesthetic appeal after the process is completed.
Trimming and Aligning Torn Edges
First, I measure the length of the damaged sections to ensure precise cuts. I utilize sharp fabric scissors to trim any frayed or uneven edges, creating clean lines that facilitate a smoother joining process later on. It’s crucial to maintain consistent seam allowances–typically around half an inch–to avoid additional stress on the surrounding material.
Next, I align the frayed edges carefully, overlapping them slightly to ensure a secure fit. Pinning the pieces together makes the alignment easier and prevents shifting during the subsequent steps. I recommend laying the item flat on a surface to avoid distortions that might arise when manipulating the fabric in the air.
To ensure that the edges remain stable while I work, I might use temporary adhesive tape or a fabric-friendly glue. This step is ensuring that the aligned sections do not separate during the sewing or bonding process.
After everything is properly aligned, I double-check for any irregularities before proceeding. Accurate trimming and alignment are fundamental for a durable and aesthetically pleasing result. Taking the time at this stage can make all the difference in the final outcome.
Applying the Correct Adhesive or Patch Method
For optimal results, I recommend using a strong, flexible adhesive specifically designed for outdoor fabrics. Look for products that offer waterproof properties and UV resistance to ensure longevity. A high-quality fabric glue or a marine-grade adhesive is ideal for this purpose.
Using Adhesive
First, clean the edges of the damaged area thoroughly to remove dirt and oils. Once the area is clean, apply a thin, even layer of adhesive to both edges of the fabric. Press them together firmly and hold in place for the time specified by the adhesive instructions. Clamping or using a weight can help ensure a strong bond. Allow sufficient curing time before exposing it to the elements.
Patch Method
If opting for a patch, select a piece of fabric that matches closely in color and texture. Cut the patch to exceed the damaged area by at least an inch on all sides for a secure hold. Apply a compatible adhesive to the back of the patch and position it over the damaged spot. Again, ensure even pressure and allow it to dry fully according to instructions. For added durability, consider sewing the edges of the patch once the adhesive has set.
Reinforcing the Repair with a Sewing Technique
Use a zigzag stitch for extra strength along the edges of the patch. This method prevents fraying and offers flexibility, accommodating the movements of the fabric. Ensure that the tension on the sewing machine is appropriately set to avoid bunching.
Start by selecting a thread that matches the color of the material for a seamless appearance. If the damage is extensive, consider layering the patch for enhanced durability. Use a longer stitch length to maintain the integrity of lighter fabrics without unnecessary perforation.
For added reinforcement, sew a second line of stitching parallel to the first. This provides a double barrier against future wear. After sewing, trim any excess fabric around the edges of the patch to reduce bulk, but leave enough material to avoid compromising the seam.
Additionally, a topstitch can be applied around the perimeter of the patch for an aesthetic touch and further security. Be sure to secure the starting and ending points with backstitching to prevent unraveling.
Testing the stitched area for resilience is key. Gently tug at the edges to ensure that the patch holds firmly in place before reapplying it to its intended use.
Waterproofing the Repaired Area
After completing the mending procedure, application of a waterproofing agent is vital to enhance durability and protect against moisture. Choose a high-quality water-resistant spray or sealant specifically designed for the type of material used.
- Ensure the repaired section is completely dry before proceeding. Moisture can hinder the effectiveness of the sealant.
- Follow the manufacturer’s instructions on the product label for proper usage and safety precautions.
- Apply an even coat of waterproofing solution, covering the entire area to ensure complete protection. A spray application can provide a fine, uniform layer.
Pay attention to the edges, as they are often more susceptible to moisture intrusion. A second coat can be beneficial for added security.
- Allow the first coat to dry entirely before applying the next one. This can take several hours, depending on the product and environmental conditions.
- Test the waterproofing by spraying a small amount of water on the surface once it’s fully dried. The water should bead up and roll off if applied correctly.
Finally, regular maintenance is necessary to ensure ongoing protection. Reapply the waterproofing treatment as recommended based on exposure and wear, typically once a season or after heavy use.
Maintaining Your Outdoor Cover for Longevity
Regular cleaning prevents dirt buildup and prolongs the life of your protective shield. I utilize a mild soap solution and a soft brush, ensuring I rinse thoroughly. After cleaning, I let it air dry completely before storing or using it again.
Sun Protection Techniques
To combat UV damage, I opt for covers with UV-resistant materials. Additionally, I store my items indoors or under a shaded area during prolonged periods of non-use. Using a protective spray that adds a UV layer also extends the life of the fabric.
Storage Recommendations
During off-seasons, I carefully fold and store my gear in a dry, well-ventilated space. I avoid plastic containers that can trap moisture, which may lead to mildew. Using breathable storage bags is my go-to method for keeping them safe.
FAQ:
What materials do I need to repair a torn patio furniture cover?
To repair a torn patio furniture cover, you will typically need fabric patches, waterproof fabric glue, scissors, a needle and thread that matches the color of the fabric, and a sewing machine (if you prefer machine stitching). A measuring tape may also be helpful for cutting patches to the right size. Depending on the size of the tear, you might also want to have some heavy-duty adhesive or a fabric repair kit on hand.
Can I fix a small tear in my cover without sewing?
Yes, small tears can often be repaired without sewing by using fabric glue or adhesive patches. First, clean the area around the tear. Apply the fabric glue according to the manufacturer’s instructions, or place an adhesive patch over the torn section. Make sure to press firmly and allow it to cure completely for a strong bond. This method is particularly useful for quick fixes on lightweight fabrics.
What is the best way to prevent further tearing after I repair my patio furniture cover?
To prevent further tearing, make sure to store your patio furniture cover properly when not in use. Avoid exposing it to harsh weather conditions for prolonged periods. Consider reinforcing the areas that are prone to wear with additional patches or seams. It’s also beneficial to regularly check the cover for signs of wear and to address any small issues before they become larger problems.
Is it possible to rewaterproof my patio furniture cover after making repairs?
Yes, you can rewaterproof your patio furniture cover after making repairs. Once you’ve mended the tear, you can apply a waterproof spray made for outdoor fabrics. Ensure the cover is clean and dry before application. Follow the instructions on the product, which may include spraying the product evenly across the surface and allowing it to dry completely for optimal protection against the elements.
What type of fabric is best for making a patch on a torn patio furniture cover?
The best type of fabric for making a patch depends on the original cover’s material. If your cover is made from canvas, look for a similarly durable canvas patch. For polyester covers, a polyester patch will work best. Always choose a fabric that closely matches in weight and water resistance to ensure that the patch will blend well and provide adequate protection. If unsure, consult a fabric store for recommendations tailored to your needs.
What materials do I need to repair a torn patio furniture cover?
To repair a torn patio furniture cover, you will generally need a few basic materials. First, you’ll need a suitable fabric patch that matches the cover’s material; canvas or outdoor fabric is often a good choice. Additionally, you will require a strong adhesive or fabric glue specifically designed for outdoor use to ensure durability. A pair of scissors will be needed to cut the patch to the appropriate size. For those who prefer sewing, a needle and outdoor thread can also be beneficial. Finally, having a ruler or measuring tape can help in ensuring the patch is cut precisely for a better fit during the repair process.
Can I repair a torn patio furniture cover without sewing?
Yes, it is possible to repair a torn patio furniture cover without sewing. Using a strong adhesive designed for outdoor fabrics is an effective method. Simply clean the torn area to remove any dirt or debris and let it dry completely. Cut a patch that is slightly larger than the tear and apply the adhesive according to the manufacturer’s instructions. Press the patch onto the torn area firmly, and hold it in place for the recommended time. This method can provide a quick and lasting repair, making your patio furniture cover functional again without the need for stitching.


