Assess the damage first: inspect the metal surfaces for flakes, pits, or discoloration. Use a wire brush or sandpaper to remove the compromised layer, ensuring you reach clean, unaffected areas.
After cleaning, rinse the surface thoroughly to eliminate any dust or debris. Allow it to dry completely before proceeding. This step is vital for optimal adhesion of protective coatings.
Apply a rust-inhibiting primer using a paintbrush or spray can, focusing on bare spots. Follow up with a high-quality outdoor paint or enamel, selecting a shade that complements your space. Multiple thin coats yield the best results.
When the paint dries, consider sealing the surfaces with a clear protective coat. This measure enhances durability against future weather conditions. Regular maintenance checks will contribute to longevity, so schedule assessments every few months.
Addressing Corrosion on Exterior Seating
I recommend starting with safety. Wear gloves and a mask to protect from inhaling any dust or particles. Use a wire brush or sandpaper to scrape away the detritus from the affected areas. Ensure you remove all loose pieces for the best outcome.
After clearing, wash the surface with soap and water to eliminate any dirt or grease. Rinse thoroughly and allow it to dry completely. This step is crucial, as it prevents further damage during subsequent treatments.
Next, apply a specific primer designed for metal applications. This layer acts as a barrier, preventing moisture from compromising the integrity of the metal. Follow the manufacturer’s instructions for drying times.
Once the primer is dry, choose an appropriate paint, ideally one that is resistant to the elements. Apply at least two coats to ensure a uniform finish and long-lasting protection. Allow each coat to cure as recommended.
For ongoing maintenance, regularly check and clean the surfaces to prevent new issues from developing. A simple wipe with a damp cloth can make a significant difference in prevention.
Identify the Types of Oxidation on Your Surface
Begin by examining the appearance of discoloration. Different types indicate various levels of deterioration. Small, orange-brown spots suggest initial oxidation, commonly known as surface corrosion. This stage is easier to manage and can often be treated with simple methods.
Next, look for pitting. This form presents as small indentations in the material, resulting from deeper chemical reactions. Pitting reflects a more serious issue that requires thorough intervention.
Flaking or peeling indicates advanced decay. In cases where chunks have detached, the integrity of the entire piece is compromised. Such areas often need extensive attention and sometimes complete replacement of affected sections.
Finally, assess if there are any patches of powdery residue. This is a sign of oxidation advancing to its later stages. At this point, both restoration techniques and protective measures should be considered to prevent further degradation.
By identifying these forms, I can determine the best course of action tailored to each situation.
Gather Necessary Tools and Materials for Repair
To tackle the issue efficiently, I make sure to collect the following items:
- Protective Gear: Safety goggles, gloves, and a mask are non-negotiable to safeguard against dust and particles.
- Cleaning Solutions: I use a mixture of water and mild soap or a specialized cleaner to remove dirt and debris from the surface.
- Scrubbing Tools: A wire brush or sandpaper complements my cleaning process. I prefer a medium-grit sandpaper to smooth rough patches.
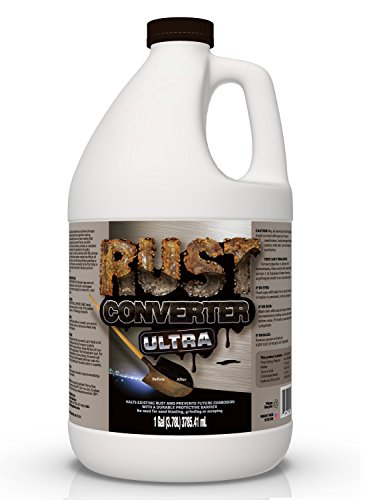
- Rust Inhibitor: A quality rust converter or inhibitor is essential to halt future corrosion.
Additional Items
- Paint or Sealant: Depending on the finish, I select appropriate outdoor paint or sealant suitable for metal or wood.
- Application Tools: Paintbrushes, rollers, or a spray gun assist in applying the rust-inhibiting product. I choose based on the surface area and desired finish.
- Cloths: Lint-free cloths help in wiping down surfaces for a clean application.
- Drop Cloths: Protecting the ground beneath the piece is straightforward with old sheets or newspaper.
Having these tools ready not only streamlines the process but also ensures a thorough treatment, enhancing durability and aesthetics of the items in my care.
Prepare the Furniture Surface for Rust Removal
Begin by thoroughly cleaning the item with a solution of water and mild detergent. This step removes dirt and debris, which could interfere with the subsequent processes. Use a scrub brush to tackle stubborn areas and rinse thoroughly with clean water.
Next, inspect the surface for damaged paint or coatings. If any areas are peeling or flaking, take a fine-grit sandpaper to smooth these spots. Sanding not only helps with adhesion but also enables better evaluation of corrosion spots that need attention.
Dry Completely
Ensure that the surface is completely dry before moving on. Moisture can hinder the effectiveness of treatments. Place the furniture in a well-ventilated area and allow it to air out; this can take a few hours depending on the environment.
Final Inspection
Conduct a final check for any remaining imperfections. Wipe down the surface with a clean cloth to remove any dust created from sanding. A clean, dry surface promotes better results for any upcoming treatments.
Choose the Right Rust Removal Method
Selecting a removal technique is based on the severity and type of oxidation. Here are some popular approaches:
- Sandblasting: For heavily damaged areas, this method effectively removes deep oxidation. Ensure you wear protective gear during the process.
- Chemical Rust Removers: Solutions containing phosphoric acid can convert rust into a stable compound. Apply as instructed and neutralize with water afterward.
- Manual Scrubbing: A wire brush or sandpaper works well for minor spots. Choose appropriate grit sizes to avoid harming the underlying material.
- Electrolysis: This method uses an electrical current to detach rust from metal. It’s intricate but suitable for delicate restoration tasks.
- Homemade Solutions: Mixtures of vinegar or baking soda can be effective for light oxidation. Soak or apply, then scrub gently.
Always assess the compatibility of these methods with your specific material and finish. Consider testing a small, inconspicuous area first before applying any treatment widely.
Apply Rust Neutralizer for Long-Lasting Protection
After thoroughly cleaning the affected areas, I turn to a rust neutralizer to ensure lasting protection. These products chemically convert remaining oxidized material into a stable compound, effectively preventing further deterioration. I carefully follow the instructions on the label, applying a thin, even layer using a brush or spray, ensuring full coverage of all previously treated spots.
Selection of the Right Product
Selecting a high-quality neutralizer is essential. I often opt for a product specifically designed for metal surfaces, paying attention to manufacturer recommendations regarding compatibility. Checking for additional protective properties like UV resistance can enhance durability, particularly for items exposed to sun and moisture.
Application Tips
Before applying, I make sure the surface is fully dry. I work in a well-ventilated area or outdoors to ensure safety. After applying the neutralizer, I allow sufficient time for it to cure, as indicated on the label, before proceeding with any further finishing work like painting or sealing. This step is crucial; it forms an effective barrier against future oxidation and prolongs the lifespan of my metal pieces.
Repaint or Refinish Affected Areas After Rust Repair
Once I addressed the damaged sections, it’s crucial to restore the appearance and protect those areas from future deterioration. I opt for a high-quality outdoor paint or finish that is specifically designed for metal surfaces.
First, I clean the repaired spots thoroughly, ensuring there are no contaminants left. A light sanding can help create a better bonding surface for the new coat. I choose a primer if the initial layer needs extra protection or if I want to enhance durability.
For application, I prefer using a spray can or a paintbrush, depending on the size of the area. Multiple thin layers yield better results than one thick coat. After finishing the first layer, I wait a minimum of two hours before applying the next one. Generally, the final finish layer should cure for 24 hours to ensure optimal hardness and protection.
Here’s a quick overview of the process:
| Step | Action |
|---|---|
| 1 | Clean the area thoroughly. |
| 2 | Sand lightly if needed. |
| 3 | Apply primer (if necessary). |
| 4 | Use spray or brush to apply paint. |
| 5 | Allow time to dry between coats. |
| 6 | Let the final coat cure for 24 hours. |
This careful attention to detail during the repainting process ensures longevity, enhancing the aesthetic and protective qualities of the treated sections.
Implement Preventive Measures to Avoid Future Rust
After treating existing damage, focus on steps to safeguard against new issues. Regular inspections are key. I check for signs of corrosion, especially in areas where moisture gathers. This allows for early intervention before significant deterioration occurs.
Choose Appropriate Materials
Selecting furniture made from rust-resistant materials, such as aluminum or treated plastics, is wise. If metals are used, consider those with a protective coating or paint that can withstand the elements. This greatly reduces the risk of oxidation over time.
Maintain a Clean Environment
Cleaning debris and moisture from the surface is crucial. I wipe down surfaces periodically with a dry cloth, removing any accumulated dirt or organic matter. This practice prevents water retention that contributes to degradation. Applying a sealant to painted areas creates an additional layer of defense against moisture ingress.
Storing items in a covered area during harsh weather further protects against direct exposure to rain and snow. If such storage isn’t feasible, using weather-resistant covers can offer adequate protection while maintaining ventilation to prevent condensation.
Maintain Your Outdoor Furniture Regularly to Extend Lifespan
I recommend cleaning the surfaces of your patio seating and tables at least once a month to prevent dirt buildup and moisture retention. Use a mild soap solution and a soft cloth to gently wipe down all areas.
Inspection for Early Detection
Periodically inspect every piece for signs of wear, such as scratches, chips, or discoloration. Early detection allows me to address potential issues before they escalate, ensuring longevity.
Protective Covers are Key
Investing in high-quality protective covers can shield items from harsh weather conditions. I utilize these covers during unfavorable seasons, providing an extra layer of defense against moisture and UV damage.
Regular maintenance tasks, like tightening loose screws or bolts, are also crucial. I make a habit of checking these fastenings to prevent structural issues. Keeping the items in a covered or shaded area, whenever possible, aids in minimizing exposure to the elements and prolongs their lifespan.


