
 Caleb Turner

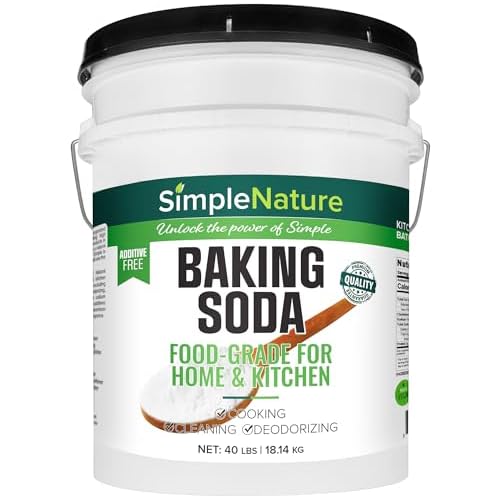
I recommend mixing a paste of baking soda and water to tackle those stubborn marks left behind after your morning cup. Apply the paste directly on the blemish and gently rub it in with a soft cloth. The mild abrasive properties of baking soda lift the discoloration without harming the finish.
If the residue persists, consider using vinegar diluted with an equal part of water. Dampen a cloth with this solution and dab–not scrub–the affected area. This method works wonders due to the natural acidity of vinegar, which breaks down grime effectively.
For a polished look, finish by applying a small amount of olive oil or mineral oil to a clean cloth and buffing the area gently. This helps restore luster and protect the wood from future mishaps. Always test any solution in an inconspicuous spot first to ensure compatibility with your surface.

Eliminating Stains on Surfaces
For effective treatment, mix equal parts of white vinegar and olive oil. Apply the solution using a soft cloth, rubbing gently in a circular motion. This combination not only lifts discoloration but also nourishes the wood.
Alternative Techniques
Another approach involves using baking soda. Create a paste with water and apply it to the mark, letting it sit for a few minutes before buffing with a clean cloth. This method helps to gently abrade the stain without damaging the underlying finish.
Prevention and Maintenance
To safeguard surfaces, consider using coasters or mats under beverages. Regularly polishing the furniture with a suitable wax also aids in forming a protective barrier against stains.
| Method | Ingredients | Steps |
|---|---|---|
| Vinegar and Olive Oil | White vinegar, Olive oil | Mix, apply, rub gently. |
| Baking Soda Paste | Baking soda, Water | Mix, apply paste, let sit, buff. |
Identifying the Type of Furniture Finish
To tackle blemishes effectively, pinpoint the finish on your surface. This crucial step guarantees the application of appropriate cleaning methods. The most common types include lacquer, varnish, oil, and polyurethane.
Lacquer and Varnish
Lacquer creates a hard, shiny layer, often found on modern pieces. A simple test involves applying a drop of water; if it beads up, you likely have lacquer. Varnish shares similarities but is typically more flexible. It can feel sticky to the touch, especially when scratched.
Oils and Polyurethane
Oiled finishes stand out due to their natural look and feel, requiring periodic reapplication. If it absorbs the water, an oil-based method is present. Polyurethane, conversely, offers a protective glossy layer and often resists moisture well. A further inspection should show a solid, glassy finish.
Distinct finishes respond differently to treatment, so precise identification enhances success in preserving your cherished items.
Quick Fixes Using Household Items
A mixture of baking soda and water creates a paste that can effectively tackle those unsightly blemishes. Apply it gently with a soft cloth, then wipe it clean with a damp cloth.
Alternative Options
- White Vinegar: Mix equal parts of vinegar and olive oil for a natural polish that can disguise those imperfections.
- Toothpaste: Use a non-gel variety. Gently rub a small amount on the stained area with a soft cloth, then wipe away with a damp cloth.
- Olive Oil: Apply directly on the spot and buff with a clean cloth to restore shine.
Techniques to Try
- Lightly rub the surface with a dryer sheet, which can work wonders in lifting stains.
- Use mayonnaise for its oil content; spread a small amount on the mark, let it sit for a few hours, then clean thoroughly.
- If you have a walnut, rubbing it over the spot can help to blend the discoloration into the surrounding area.
These methods should provide immediate relief and restore the appearance of your surfaces without the need for harsh chemicals.
Using Commercial Stain Removers
For efficient elimination of unsightly marks, I frequently turn to specialized products designed explicitly for this issue. These commercial stain removers contain potent ingredients that target specific types of blemishes, ensuring the best outcome. It’s crucial to select a cleaner compatible with your surface type; always check for suitability.
Application Process
I start by testing the product in a less visible spot to ensure it won’t damage the finish. Once confirmed safe, I apply the solution directly onto the affected area using a clean cloth. Gentle dabbing rather than scrubbing is essential to avoid spreading the stain further. I let it sit for the recommended time on the label before wiping it away with a damp cloth.
Follow-Up Care
After treating the area, I often use a wood conditioner or polish to restore luster and protect the surface. This step helps maintain the overall appearance and can prevent future damage. Regular maintenance with suitable products ensures my furniture remains in top condition.
Restoring Furniture with Natural Oils
To restore the beauty of your wooden pieces, I recommend using natural oils like tung oil or linseed oil. Apply a small amount onto a soft cloth and rub it into the affected area, following the grain of the wood. This not only rejuvenates the surface but also helps to seal it, preventing future damage.
Before starting, ensure the surface is clean and dry. Test the oil on a less visible area to check compatibility. For optimal results, allow the oil to penetrate for about 30 minutes before wiping off any excess. I find this technique enhances the wood’s natural luster while providing a protective barrier.
If your item has a matte finish, linseed oil is particularly effective, as it dries slowly, allowing ample time for even application. For those seeking a quicker drying option, tung oil is ideal, providing a more durable finish. Frequent application will maintain the vibrancy and prolong the life of your cherished pieces.
In addition, consider blending oils with beeswax for an added protective layer, which helps to fill in small scratches and imperfections. Simply mix equal parts oil and wax, warm slightly, and apply to the surface. This combination results in a smooth and polished look without harsh chemicals.
Preventing Future Stains
Apply coasters to every surface where beverages are enjoyed. They create a barrier between the cup and the material, significantly reducing the risk of marks and blemishes.
Invest in a high-quality sealant or finish for wooden surfaces. Regular application helps protect against spills and enhances resistance to moisture.
Immediate Cleanup
Always have a cloth or towel on hand for quick spills. The faster liquid is blotted, the less chance there is for a stain to set in. Make it a routine to wipe up any drops immediately.
Design Choices
- Select darker furniture or materials that camouflage potential stains.
- Consider using tables with surfaces that are easier to clean, such as glass or lacquered finishes.
Regular maintenance and care will keep the surfaces in good condition and minimize the possibility of unsightly marks. By being proactive and attentive, I ensure my furnishings remain pristine for years to come.
When to Seek Professional Help
If the stains persist despite your best efforts or if you encounter extensive damage, it is advisable to consult experts. They possess specialized tools and products designed for more challenging blemishes that may not respond to common household remedies.
Signs That Indicate Professional Intervention
Look for signs of warping, discoloration, or significant wear on the surface. If the finish is compromised or if you have valuable antiques, seeking a professional restoration service is wise. Additionally, if your attempts result in further damage, it’s time to hand over the task to skilled craftsmen who can restore your pieces effectively.
Benefits of Professional Restoration
Professionals can provide a tailored solution based on the type of material and finish, ensuring a seamless restoration. Their insights can also help maintain the longevity of your items and enhance their aesthetic appeal. Investing in expert care can save time and prevent further complications that DIY solutions may bring.




