 Caleb Turner

Begin with thorough cleaning. Remove all dirt, dust, and loose particles using a mixture of water and mild detergent. A stiff brush or a cloth will help here. Rinse off with clean water and let the surfaces dry completely.
Next, tackle the surface imperfections. Employ a wire brush or sandpaper to remove any flaky areas or layers of discoloration. This step is crucial; the cleaner and smoother the surface, the better the adhesion of any coatings.


Once the surface is prepped, apply a suitable primer, especially if the base is raw. Look for products specifically designed for ferrous surfaces, which will protect against future deterioration. Allow the primer to cure as per the manufacturer’s instructions before proceeding.
Finally, choose a paint that can withstand the elements, ideally one that’s labeled for exterior use. Applying multiple thin layers allows for better durability over one thick coat. After the last coat, give it adequate time to dry before exposing it to moisture.
Refurbishing Corroded Garden Seating
Begin with a thorough examination. Check for weak spots and ensure the structure is sound. Use a wire brush or sandpaper to remove flaky areas and loose debris. Follow this by wiping the surface with a clean cloth to eliminate dust.
Apply a high-quality primer suitable for the chosen material. This step is crucial for ensuring the subsequent paint adheres well and provides long-lasting protection.

Choose an outdoor paint designed to resist weather conditions. A spray can may give a smoother finish, while a brush can provide better control in detailed areas. Apply multiple thin coats, allowing adequate drying time between applications, as this leads to a more durable finish.
Finally, seal the painted surface with a clear protective topcoat, enhancing durability against moisture and UV rays. Ensure the sealant is compatible with the paint used, and allow it to cure fully before exposing the seating to the elements.
Regular maintenance will prolong the life of your revitalized pieces. Wipe them down periodically and inspect for any signs of wear, addressing any new imperfections promptly.
Assessing the Extent of Rust Damage
To effectively address degradation on your items, first examine the surfaces closely. Identify areas with visible surface blemishes. A magnifying glass can help pinpoint early signs of corrosion that may not be immediately discernible. Take note of the severity of discoloration; lighter spots may require less intensive care than deep pitting.
Types of Damage
| Damage Type | Description |
|---|---|
| Surface Rust | Thin, flaky layers that can be easily removed with light scrubbing. |
| Pitting | Holes or depressions in the surface indicating deeper corrosion. |
| Flaking | Lifting paint or coating that exposes the underlying structure. |
| Crumbling | Weakening of the material often requiring significant restoration efforts. |
Conduct a thorough inspection by feeling for texture inconsistencies. If a finger can catch on rough areas, this indicates significant wear. Document the findings, noting both extent and location, to plan for necessary interventions. Be prepared to adjust techniques based on the damage identified to achieve desired results.
Tools for Assessment
Using a wire brush or sandpaper can help reveal how deep corrosion runs beneath the surface. Ensure to wear protective gloves. A moisture meter may also aid in evaluating whether the item has retained any dampness, which can promote further degradation.
Choosing the Right Tools and Materials
Begin with safety gear. I always wear gloves, goggles, and a mask to protect myself from debris and dust. A sturdy pair of work gloves is essential to avoid cuts and scrapes, while a mask helps filter out harmful particles.
Next, gather the necessary tools:
- Wire brush or power sander: A wire brush effectively removes loose rust, while a power sander speeds up the process for large surfaces.
- Scraper: This is useful for lifting off stubborn rust and paint residue.
- Sandpaper: Use various grits (from coarse to fine) to smooth out any rough spots and prepare surfaces for painting.
Invest in appropriate materials:
- Rust-inhibiting primer: A good primer protects against future corrosion and enhances paint adhesion.
- Exterior enamel paint: Choose high-quality, weather-resistant paint suited for the type of surface you are restoring.
- Sealer: Consider a clear coat to provide an additional layer of protection against the elements.
Ensure you have cleaning supplies on hand:
- Degreaser: To remove oils and dirt that could interfere with coatings.
- Rags and sponges: For wiping down surfaces before and during the process.
Gathering the right tools and materials sets the foundation for a successful project. I always check my inventory before starting to ensure a smooth workflow. The effort spent in preparation pays off in the long run.
Preparing the Furniture for Refinishing
Remove all cushions, fabric covers, and any accessories from the piece. This prevents damage during the restoration process.
Next, give the surface a thorough cleaning using a mixture of warm water and mild soap. A soft brush or sponge works well to eliminate dirt and debris. After cleaning, rinse with clean water and allow ample time for drying.
Inspecting for Damage
Check meticulously for any loose parts or structural issues. Tighten screws and bolts, and replace any broken hardware as necessary. This step ensures a sturdy foundation for the upcoming refinishing stages.
Protective Measures
After ensuring the structure is sound, lay down a drop cloth or old newspapers to catch any debris or drips. Consider working in a well-ventilated area to reduce inhalation of dust and fumes during the process.
Removing Rust: Techniques and Products
For immediate rust elimination, I recommend using a wire brush or a wire wheel on a drill. This method is effective for flaky areas, allowing me to strip away loose grime swiftly. Additionally, employing a sandblaster can offer significant results on larger surfaces, targeting tough patches with precision.
For smaller corrosion spots, a mixture of vinegar and baking soda works wonders. I apply it directly to the area, letting it sit for about 30 minutes before scrubbing with an old toothbrush. This solution not only tackles the corrosion but also helps neutralize the acid afterward.
Chemical rust removers, such as phosphoric acid-based products, are also available for more stubborn cases. Following the product instructions is key; in most cases, applying with a brush and rinsing after a designated time yields the best results. I always use gloves and goggles during this process for safety.
After treatments, I ensure the surface is thoroughly dried and clean. Any remnants or dust can interfere with the next steps. A final wipe with a damp cloth ensures I have a smooth surface ready for finishing applications.
Regular maintenance, such as applying a protective coating, can prevent future issues. I make it a habit to check for signs of wear and address them immediately, prolonging the life of my exterior items.
Applying Protective Coating for Longevity
After completing the restoration process, it’s imperative to apply a protective layer to safeguard against future deterioration. I recommend selecting a high-quality varnish or specialized outdoor sealant designed for metallic surfaces.
Follow these steps for optimal application:
- Choose the right product: Look for options specifically designed to resist UV rays, moisture, and corrosion.
- Surface preparation: Ensure the surface is clean and completely dry. Any leftover dust or debris can hinder adhesion.
- Application method: Utilize a paint sprayer or a brush for even coverage. Avoid rollers, as they tend to leave uneven layers.
- Thin coats: Apply multiple thin layers rather than one thick coat. This approach minimizes drips and ensures a uniform finish.
- Curing time: Allow each coat to dry thoroughly according to the manufacturer’s instructions, typically 24 hours between layers.
- Final inspection: Once the final coat has dried, inspect for any blemishes or missed spots. Touch up as necessary.
Regularly checking the condition of the protective coating enhances its lifespan. If wear or peeling occurs, reapply the sealant promptly to maintain durability. This method not only preserves the aesthetic appeal but also extends the life of your outdoor gear significantly.
Restoring Paint or Finish to Metal Surfaces
I recommend using a high-quality primer specifically formulated for ferrous substrates. This type of primer adheres well and prevents rust from reappearing. Before application, ensure the surface is clean and free of dust or grease. I typically choose a rust-inhibiting primer; it creates a protective barrier that enhances the durability of the topcoat.
Select a paint designed for outdoor use with UV protection. I usually opt for an acrylic or enamel finish, as these withstand weather conditions effectively. Apply at least two coats for even coverage. Between coats, I lightly sand the surface with fine-grit sandpaper to enhance adherence and achieve a smooth finish.
<p.For a glossy look, I finish with a clear topcoat. This not only seals the color but also provides additional protection against scratches and chips. When applying any coating, I choose a day with low humidity and moderate temperatures to ensure optimal drying conditions.
<p.I find that using a spray can for even application eliminates brush strokes and gives a professional appearance. Always maintain a consistent distance from the surface while spraying for uniform coverage. Allow adequate drying time before using the item to ensure the finish sets properly.
Maintaining Refinished Outdoor Pieces After Treatment
To ensure longevity, I regularly clean surfaces with a damp cloth and mild soap solution. This removes dirt and debris without damaging the newly applied coating. Rinsing with clean water, followed by thorough drying, keeps moisture at bay.
Routine Inspection
I inspect my restored items periodically for any signs of wear or damage. This includes checking for scratches, chips, or areas where the protective layer may have worn off. Early detection allows for prompt repairs, preventing larger issues down the line.
Seasonal Care
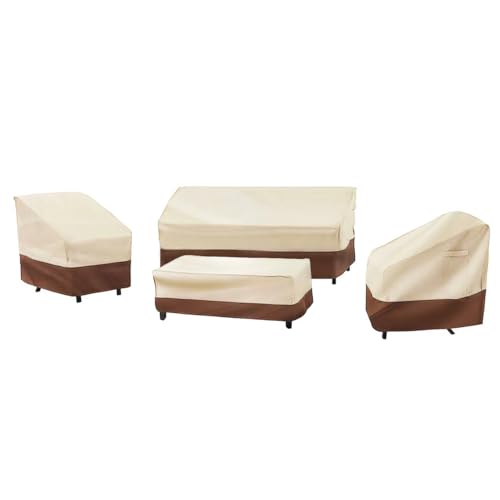
In colder climates, I store these items indoors during winter months. If outdoor storage is required, I apply a weather-resistant cover to shield from harsh conditions. Additionally, I make it a practice to reapply protective coatings seasonally, enhancing their durability against the elements. Keeping these habits can help sustain the beauty and integrity of my outdoor seating and tables for years to come.