Caleb Turner

Begin by selecting a suitable high-density synthetic or natural fiber item that requires a refresh. Before proceeding, ensure that the surface is clean and free of dust or grease. A thorough wipe-down with a damp cloth can prepare it perfectly, allowing the new finish to adhere smoothly.
Next, gather necessary tools including a quality applicator specifically designed for detailed workmanship. Choose a color that compliments your existing decor, ensuring it aligns with the envisioned aesthetic. Test the option on a small, inconspicuous area to confirm that it matches your expectations.
Apply the coating in thin even layers, allowing adequate drying time between applications. This method promotes a more polished finish, reducing the likelihood of drips or uneven texture. Concentrate on intricate sections, as these areas often require more attention and finesse, enhancing the overall appeal of your piece.


Regular intervals for inspection during the process can help guarantee uniformity. Complete the transformation by sealing the surface, providing protection against wear and extending its lifespan. This careful approach will result in a refreshed item ready to elevate your space.
Techniques for Applying Color to Rattan Pieces
Select a high-quality formula suitable for textured surfaces. Use a soft-bristle tool to ensure smoother coverage, minimizing brush marks. Prepare the chosen surface by cleaning thoroughly to eliminate dust and grease, which can inhibit adhesion. Consider light sanding to enhance the texture, allowing pigment to penetrate better. After cleaning, allow it to dry to avoid trapping moisture.
Application Process
<p Dip the applicator into the pigment, removing excess. Begin from a corner or less visible area, applying thin layers. This approach prevents drips and encourages even coverage. Move systematically, following the weave's direction to avoid uneven spots. A second layer may be necessary once the first dries completely, resulting in a more unified hue.
Finishing Touches
<p After achieving the desired color depth, protect the surface with a clear sealant designed for outdoor exposure or high humidity. Allow ample drying time before placing the item back in use. Regular maintenance, including gentle cleaning, can prolong the vibrancy and appearance of your renovated pieces.
Choosing the Right Paint for Wicker Furniture
Select a paint designed for outdoor use to ensure durability and resistance to weather conditions. Look for options specifically labeled as suited for rattan or similar materials.
- Opt for acrylic latex formulations; they offer flexibility and are less prone to cracking.
- Avoid oil-based products; they may cause issues with adhesion and drying time.
- Consider using spray products for easier application on intricate designs; however, ensure proper ventilation.
Test the paint on a small section to check for compatibility. If it adheres well and produces the desired finish, proceed to cover larger areas.
- Choose a matte or satin finish for a subtle look.
- If a glossy appearance is desired, ensure it is suitable for outdoor settings to avoid issues with fading.
Always prioritize paints that include UV protection to prevent fading and extend the lifespan of your project.
Preparing the Surface Before Painting
Begin by cleaning the item thoroughly. I often use a mixture of warm water and mild soap to eliminate dirt and grime. A soft brush or cloth helps reach crevices, ensuring all remnants are removed.
After washing, it’s essential to let the piece dry completely. I typically allow it to air dry in a well-ventilated area, which can take a few hours. Patience during this step prevents moisture from affecting the adhesion of the coating later on.
Repairing Damage
If I notice any damaged areas, such as frayed strands or broken sections, I address those issues before proceeding. I use a strong adhesive suitable for the material to mend these spots, holding them in place until the repair sets. Once repaired, I sand these sections lightly to create a smooth surface.
Sanding and Smoothing
Next, I take fine-grit sandpaper to gently sand the entire surface. This step not only helps remove any old finish but also provides a better grip for the new coating. After sanding, I wipe down the entire surface with a damp cloth to eliminate any dust particles.
Finally, I inspect the piece for any remaining imperfections. Addressing these small details ensures the final outcome meets my expectations and enhances the overall appearance.
Tools Needed for Brush Painting Wicker
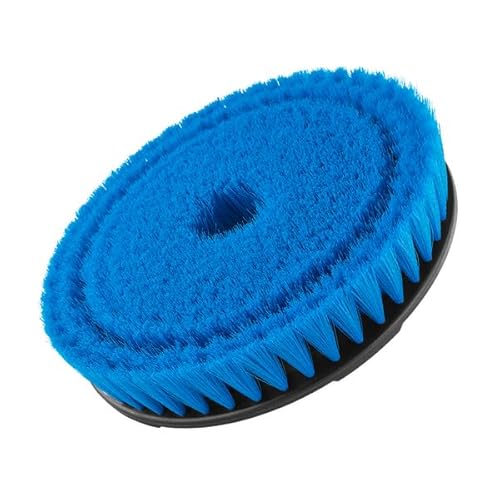
To achieve optimal results, gather the following items: a high-quality angled or flat synthetic brush, which allows for precision in hard-to-reach areas. Choose a brush with good bristle stiffness to apply materials evenly on textured surfaces.
Additional Supplies
Prepare a paint tray for easy access to your medium. A drop cloth can protect your workspace from spills. Use painter’s tape to create clean lines and shield other areas from accidental application.
A stir stick is handy for mixing the chosen medium thoroughly, ensuring consistent color and texture. For finishing touches, keep a foam brush or small detail brush to smooth out any imperfections.
Cleaning Tools
Have a container of soapy water or a solvent, depending on the medium you select, to clean your tools. This prevents the bristles from hardening, extending the life of your brushes.
With these tools, you will be ready to refresh your pieces effectively, ensuring a professional-quality finish.
Proper Cleaning Techniques for Wicker Items
I recommend using a soft-bristle brush or a vacuum cleaner fitted with a brush attachment to remove dust and debris from intricate surfaces. A damp cloth slightly moistened with a mild soap solution can be utilized to wipe down the exterior. Ensure the cloth is not soaking wet to prevent water from saturating the material.
Steps for Thorough Cleaning
- Begin by dusting with a soft-bristled brush or vacuum.
- Mix warm water with a few drops of a gentle detergent.
- Dampen a cloth in the soapy water and wring it out well.
- Wipe the surfaces, ensuring not to soak the fibers.
- Rinse the cloth in clean water and wipe again to remove soap residue.
- Allow the item to dry completely in a well-ventilated area.
Tips for Maintenance
Regular upkeep is key. A quick dusting every few weeks, followed by a deeper clean every few months, will keep your decorative pieces looking fresh. If stains occur, treat them promptly with a spot-clean method, using a mixture of water and gentle soap on a clean cloth.
| Cleaning Tools | Purpose |
|---|---|
| Soft-bristle brush | Removes dust and visible dirt |
| Vacuum with brush attachment | Safely removes debris without damaging fibers |
| Mild detergent | Cleans surfaces without harsh chemicals |
| Damp cloth | Wipes down surfaces without soaking |
Applying Primer for Better Adhesion
For enhanced adherence of your coating, I recommend a high-quality primer designed for difficult surfaces. This step is vital before introducing any color. To achieve the best results, follow these guidelines:
- Select a primer suitable for porous materials, ensuring compatibility with your chosen topcoat.
- Apply a thin, even layer using a wide-bristled tool, allowing the product to sink into gaps and crevices.
- Work in a well-ventilated space, ensuring optimal drying conditions and reducing any potential health risks.
- Allow the primer to dry thoroughly according to manufacturer instructions, which usually takes a couple of hours.
- Lightly sand the primed surface to create a smoother base for the final coat, enhancing adherence.
Following these steps will ensure the finish lasts longer and resists peeling or chipping. I’ve noticed substantial improvements in durability when adding this preparatory layer before any tinting work.
Selecting the Best Brush for Wicker Painting
For this project, I recommend using a synthetic bristle brush. This type holds up well against water-based mediums and ensures a smooth application on the intricate fibers.
A 2 to 3-inch angled brush is ideal for reaching into the crevices without overloading the bristles, providing better control around the curves and corners. For flat surfaces, a wide brush can expedite the process.
If finer details are necessary, a smaller round brush allows for precision in tight spots, enhancing the overall finish. Ensure that the brush has sufficient flexibility to navigate the contours of the design.
Checking the quality is essential; look for tightly packed bristles that won’t shed, as loose fibers can mar the finish. Investing in a few quality brushes is preferable to using multiple cheaper options.
Lastly, clean the brushes thoroughly after each session to maintain their shape and longevity. Regular maintenance will keep them ready for future projects, ensuring consistent results.
Techniques for Evenly Applying Paint on Wicker
Begin by loading the applicator with a moderate amount of coating, avoiding excess that may drip or clump. Use a systematic approach, working in small sections to maintain control and ensure complete coverage.
Employ a dabbing technique, pressing the bristles into the intricacies of the fibers. This helps the coating fill in gaps and adhere well to uneven surfaces.
When transitioning to a new section, slightly overlap the edges of wet areas to create a seamless look. Always aim for long, smooth strokes in the direction of the fibers to avoid brush marks.
For tight spots, utilize a smaller applicator. This allows for precision while covering hard-to-reach areas without compromising the overall finish.
Consider slightly thinning the coating if it appears too thick, which enables better flow and absorption into the texture.
After each coat is applied, allow adequate drying time. One thin layer is typically more effective than a single thick application, preventing drips and bubbles.
| Technique | Description |
|---|---|
| Loading the Applicator | Apply a moderate amount to prevent drips. |
| Dabbing Technique | Press bristles into fibers to fill gaps. |
| Overlapping Strokes | Blend new sections with wet areas. |
| Using Smaller Tools | Utilize mini brushes for tight spaces. |
| Thinning | Adjust consistency for better flow. |
| Allow Drying | Thin layers ensure an even finish. |
Drying Time Considerations for Painted Wicker
Allow at least 24 hours for the initial coat to dry thoroughly before applying a second layer. Depending on humidity and temperature, the drying time may vary significantly.
Factors Affecting Drying Time
- Humidity: High humidity can extend drying periods, potentially up to 48 hours or more.
- Temperature: Warmer environments generally reduce drying times. Optimal temperatures between 70°F and 80°F are ideal.
- Ventilation: Adequate airflow accelerates drying. Work in a well-ventilated area to enhance circulation.
- Type of Finish: Certain sealants may require longer drying periods. Always check the manufacturer’s recommendations.
Tips for Ensuring Proper Drying
- Use a fan to increase air circulation around the item.
- Avoid direct sunlight during the drying process, as it can cause uneven drying.
- Conduct a touch test; if the surface feels tacky, it needs more time.
- Leave the item undisturbed on a flat surface to prevent smudging or imprints.
Maintaining and Caring for Painted Wicker Furniture
Regular dusting with a soft cloth prevents dirt buildup. For deeper cleaning, use a mild soap solution and a damp sponge. Avoid soaking as it can damage structure and finish. A soft-bristled brush can help clean crevices effectively.
Protection from the Elements
Keep these items outdoors under a protective cover or in a sheltered space when not in use. If placed outside, consider using UV-resistant coatings to prolong color vibrancy. During extreme weather, store indoors to prevent moisture-related issues.
Touch-Ups and Repairs
Inspect surfaces periodically for chips or scratches. Quick touch-ups with the same finishing product can prevent further deterioration. If peeling occurs, sand down the affected area lightly and reapply the top coat, ensuring a seamless finish.