
 Caleb Turner

Choose a quality base layer that adheres well to wood to ensure longevity. An acrylic or chalk type blend works wonders for this task. Apply a solid coat and let it dry completely before moving on. This step lays the groundwork for the unique finish you want to achieve.
Layering techniques are essential in this process. Select two or three contrasting shades to create depth. Begin with the lighter hue, applying it generously across the whole piece. Once dried, use finer sandpaper to lightly wear down the edges and raised details, allowing the base layer to peek through. Repeat this with each subsequent color, ensuring to focus on areas that naturally receive more wear over time.
After achieving the desired look, seal your masterpiece with a protective finish. A matte or satin varnish not only preserves the colors but enhances the overall texture. This final touch ensures your revamped item withstands the test of time while showcasing its unique character.
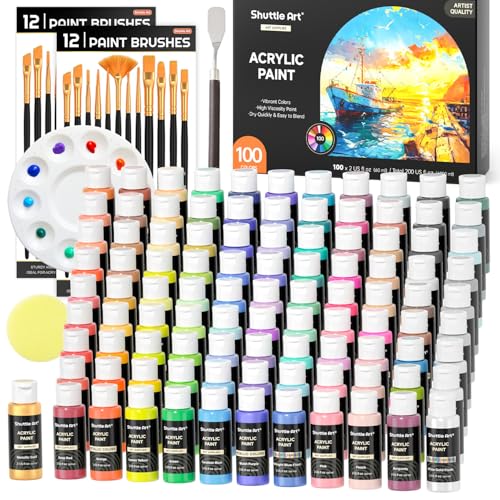


Applying a Distinctive Finish with Layering Techniques
Layering various hues is a technique I rely on to achieve a unique and eye-catching effect. I start with a base coat of a lighter shade to provide contrast against the darker accents. Once that dries completely, I apply a second color, typically a bolder tone, with a sponge or brush for a textured look.
Creating Depth with Sanding
After the paint has cured, I take fine-grit sandpaper to gently scuff areas where natural wear would occur. This not only enhances the aged appearance but also allows the base color to peek through, adding depth. Focusing on edges and surfaces that would naturally experience friction helps create an authentic look.
Sealing for Longevity
To complete the process, I use a clear wax or matte sealer. This step is crucial for maintaining the finish and ensuring durability. I apply it using a soft cloth, buffing gently to achieve a smooth surface that protects the layers beneath while enhancing their vibrancy.
Choosing the Right Type of Paint for Distressed Furniture
For achieving the perfect finish, I recommend using chalk or acrylic-based substances. Chalk varieties provide a matte look that adheres well to various surfaces, offering a textural appeal ideal for a vintage aesthetic.
Benefits of Chalk Paint
Chalk-based options dry quickly and require minimal prep work, which is advantageous for beginners and pros alike. Additionally, they can be easily distressed with sandpaper to create a worn-out effect. These paints are also known for their low odor and non-toxic formulations, making them safe for indoor use.
Acrylic Paint Properties
Acrylic options are more durable than chalk, making them suitable for high-traffic items. They come in a wide array of shades and are often more resistant to stains. This makes them a great choice if the piece will be used frequently or exposed to moisture. Using a sealer on top enhances durability while maintaining the vibrant look.
| Type | Benefits | Ideal Usage |
|---|---|---|
| Chalk | Low prep, matte finish, easy to distress | Indoor decorative items |
| Acrylic | Durable, wide color selection, moisture resistant | High-use objects, damp areas |
Deciding between these materials hinges on the intended use of the piece. If it’s for aesthetics, chalk works beautifully. For functionality, acrylic might be the better choice. Choose wisely to achieve a satisfying result!
Preparing Your Furniture for Painting
Begin with a thorough inspection of the surface. Check for any damage or imperfections that may need repairing. Fill in holes or cracks using wood filler, and allow it to dry according to the product instructions.
Next, sand the entire piece. Use medium-grit sandpaper (around 120-grit) followed by fine-grit (220-grit) for a smooth finish. This creates enough texture for the new finish to bond effectively. Make sure to dust off any debris using a clean cloth.
If the item has a glossy finish or old coatings, consider using a deglosser or primer suitable for the material. This step enhances adhesion and prevents peeling later.
When working with different shades, plan the placement of colors. I recommend sketching a rough layout to visualize the final design. Remove hardware, such as knobs and hinges, to ensure a clean application throughout.
Consider performing a test on a hidden area to see how the new finish interacts with the surface. This will help avoid unfavorable reactions or unwanted results.
Finally, ensure your workspace is well-ventilated and free of dust. Lay down a drop cloth to catch any accidental drips or spills, which will aid in an organized and clean process.
Applying Base Colors for the Distressed Look
Begin with a selection of base shades that complement each other. Opt for lighter hues for a more subtle foundation or darker tones for a dramatic effect. Choose complementary palettes that will allow the top layers to shine through.
Layering Technique
Apply two or three coats of your chosen base color, ensuring each layer dries completely before adding the next. This layering provides depth and richness to the overall appearance.
- Light Toner Options: Soft whites or pale grays enhance a clean look.
- Mid-Tone Selections: Light blues or sage greens give a fresh, inviting atmosphere.
- Rich Undertones: Deep navy or charcoal can add an elegant touch.
Application Method
I prefer using a synthetic brush for thorough coverage, especially in intricate areas. A foam roller can speed up the process for flatter surfaces, ensuring smooth application. Maintain an even stroke to keep the texture consistent.
After applying a base color, lightly sand areas that are likely to show wear. This method will allow subsequent layers to interact beautifully with the underlying tones, creating a naturally aged appearance.
Finally, don’t be afraid to experiment with layering different shades; the right combinations will contribute to a dynamic finish and elevate the overall artistry of the piece.
Techniques for Creating a Multi-Colored Effect
Layering is fundamental. I apply different hues in sections, allowing each layer to dry before adding another. This technique builds depth, enhancing the visual appeal.
Wet distressing is another helpful strategy. After applying the base, I slightly dampen the surface with a cloth before sanding it back, revealing the contrasting color underneath. This method allows blending of shades while achieving an aged effect.
Sponge or rag techniques introduce an interesting texture. I dip a sponge in a lighter or darker tone, dabbing it gently over the base color. This creates soft, mottled effects that mimic natural wear.
Stenciling offers a unique approach to adding patterns. Using stencils, I can apply additional colors selectively. This not only adds interest but also allows me to customize pieces according to my vision.
Color washing is advantageous as well. Mixing a little water with the chosen color, I brush it over the dried surface, allowing the base to show through. This results in a translucent finish that softens bold colors.
Finally, highlighting raised areas can draw attention to details. I use a smaller brush to apply a contrasting shade to edges or carved sections, emphasizing the intricate work while keeping the overall look cohesive.
Distressing Your Painted Finish
To achieve a convincingly worn appearance, I focus on layering different techniques to reveal underlying tones. I typically use sandpaper or a sanding block for this purpose, applying pressure selectively on edges and corners where natural wear would occur. A 120-grit paper is effective for larger areas, while a finer 220-grit works well for more delicate touch-ups.
Using Tools for Distressing
I alternate between hand-sanding and power tools like an orbital sander for greater efficiency. The latter allows me to cover broader surfaces quickly, but I remain cautious not to overdo it, as I still want to maintain some control over how much of the base colors show through.
Enhancing the Look
Incorporating different mediums can drastically elevate the final look. I apply a dark wax or glaze over the surface post-sanding to accentuate the crevices and imperfections. It adds depth and character, pulling together the various hues and creating a cohesive, antique aesthetic.
For final touches, I might add stencils or decorative elements using a contrasting hue that mirrors the core tones underneath. This adds a personalized aspect, making each piece uniquely attractive.
Sealing and Protecting Your Finished Piece
To safeguard my newly revitalized item, I always apply a high-quality clear sealer. This not only enhances the finish but also shields the underlying layers from moisture, scratches, and general wear. I prefer a non-yellowing polyurethane or acrylic varnish, depending on the desired sheen.
Selecting the Right Sealer
When choosing a sealing product, I consider its application method. Water-based sealers dry quickly and allow easy cleanup, while oil-based alternatives offer a more durable finish but take longer to cure. For items that will experience heavy use, I lean towards oil-based options.
Application Process
I use a foam brush or a clean cloth to apply the sealer, ensuring an even coat. Lightly sand the surface between coats with fine grit sandpaper to promote adhesion and achieve a smooth finish. Typically, I apply two to three coats, allowing adequate drying time as per the manufacturer’s instructions.
Once the final layer is applied, I wait a full 24 hours before placing objects on the surface. This precaution helps in achieving maximum durability and protects my creation effectively.
By taking these steps, I ensure that my revamped accent piece remains not only beautiful but also functional and long-lasting.


