Caleb Turner

To maximize storage options in my workspace, I recommend constructing a sturdy elevated platform system. This approach efficiently utilizes vertical space, allowing for better organization and accessibility of tools and supplies. Begin by determining the precise dimensions based on the available height and intended weight capacity.
Choose quality materials such as 2×4 lumber for framing and plywood for the surface. I advise securing the structure firmly to wall studs, ensuring stability. Use metal brackets for additional support, especially at the corners. Make precise measurements for cutting materials; accuracy is crucial to avoid unnecessary adjustments later.
Once the framework is in place, consider adding railings or netting to prevent items from falling. This extra layer of safety enhances the overall functionality of your setup. Finish by painting or sealing the wood for durability and a polished look, contributing to a well-organized and aesthetically pleasing environment.
Constructing Elevated Storage in a Work Area
Consider utilizing 2×4 lumber for the framework, ensuring durability and strength. Begin by measuring the wall space and planning the dimensions carefully, keeping in mind the ceiling height for accessibility.
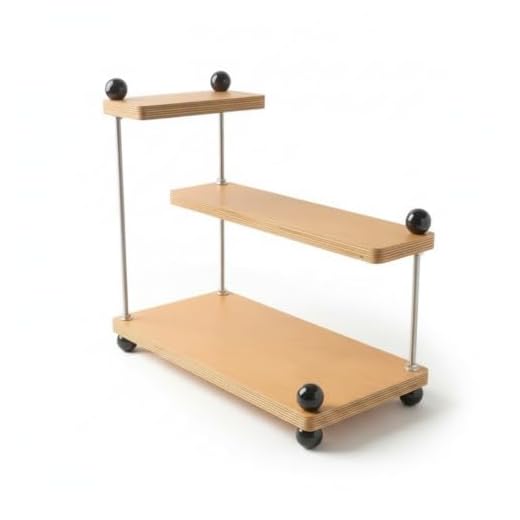


Use a stud finder to identify wall studs, as these will provide reliable support. Secure horizontal beams at the desired height and attach vertical supports every 24 inches for stability.
For the surface, plywood is recommended. Cut it to fit the frame, ensuring it’s flush with the edges. Secure the plywood using wood screws, placing them every 12 inches along the perimeter.
To enhance safety, install a railing system if the structure is elevated. This can be done with simple 1×3 boards securing the edges, preventing items from falling.
Finish the project by applying a protective sealant to the wood, increasing longevity and resistance to moisture. Maintenance should include regular inspections for any loose screws or signs of wear.
Consider labeling boxes or storage bins to keep contents organized, enhancing efficiency when accessing items stored above.
- Materials needed: 2×4 lumber, plywood, wood screws, wood sealant.
- Tools required: drill, saw, stud finder, measuring tape.
- Safety gear: goggles, gloves, and a mask when cutting wood.
Choosing the Right Location for Your Elevated Storage
Prioritize areas that remain free from obstructions. Assess the space for potential hazards, such as low-hanging pipes or electrical wires. High-traffic zones should also be avoided to minimize risk during access.
Consider Weight Distribution
Locate your installation near load-bearing walls or pillars. This ensures stability and increases safety when storing heavier items. Using a level to verify the ground and surrounding wall integrity can enhance security.
Access and Safety
Position your storage where it can be easily reached. Incorporate a robust ladder or staircase for smooth access. Ensure pathways remain clear to avoid accidents, and install appropriate lighting to illuminate the area.
Evaluate climate factors; ventilation is vital to prevent moisture accumulation. Avoid placing items near heat sources or areas susceptible to temperature fluctuations. A well-considered location will maximize usability and longevity of stored items.
Gathering Necessary Tools and Materials
Before I tackle the assembly, I ensure I have the following items: a tape measure for accurate measurements, a level to ensure everything is even, and a stud finder to locate strong points in the wall.
Regarding materials, I select plywood or oriented strand board (OSB) for the top surface due to its durability. For support, I choose sturdy 2×4 lumber, which will provide adequate strength. Additionally, I acquire heavy-duty brackets for secure anchoring.
My next focus is hardware. I gather wood screws, preferably 3-inch, for robust fastening, plus lag bolts for attaching larger sections securely. Having a drill ready with the appropriate bits simplifies the process.
Safety gear is a priority; I equip myself with gloves and safety goggles to prevent any injuries. A workbench will serve as a solid assembly area, ensuring stability during construction.
I confirm I have a saw, either a circular or miter saw, for precise cuts, and an impact driver to make installation smoother. Having a helper nearby can also be beneficial for holding pieces while I fasten them together.
Measuring and Marking the Installation Area
First, I determine the dimensions I want for the upper storage. I use a tape measure to find the width and depth that will fit my needs. It’s crucial to consider the height of the ceiling when selecting the height of the structure to ensure I can easily access items stored on it.
Marking Points on the Wall
After deciding on size, I mark the points on the wall where the brackets will be installed. I make sure to use a level to ensure that my markings are straight. I start by marking the desired height on both sides of the wall, then use a level to create a straight line between them.
Checking for Obstacles
Next, I inspect the installation area for any pipes, electrical wires, or other obstructions. I carefully adjust the location of my markings if needed to avoid any conflicts with existing structures. This step prevents unexpected issues during the installation process.
Building the Loft Shelf Frame
Begin by creating a sturdy frame using 2×4 lumber. Cut four pieces to the desired length of your overhead structure, typically between 6 to 8 feet, depending on space and storage needs. Assemble these pieces into a rectangle, securing corners with brackets or wood screws for added strength.
Next, cut additional 2×4 pieces for vertical supports. The height of these should reflect how much clearance you need below. Position these supports every 4 feet along the perimeter of the frame. Secure them firmly to the horizontal pieces using lag screws to ensure stability.
For added reinforcement, consider adding diagonal bracing between the vertical supports and horizontal frames. This will prevent any swaying and provide enhanced structural integrity. Use shorter lengths of the same lumber for these diagonal pieces, connecting them at a 45-degree angle.
Confirm that everything is level and square before moving on. Use a level tool, checking both the frame and supports. Adjust as necessary, making sure everything aligns properly. This step can prevent potential issues during installation.
Finally, prepare for attachment to the wall or ceiling joists. Use heavy-duty lag bolts or appropriate anchors based on your wall type. Mark precise locations for secure installation, ensuring that the frame has adequate support from existing structures.
Installing Support Beams Securely
To ensure the stability of the upper storage area, I always choose heavy-duty wooden or metal beams, depending on the weight they will bear. I start by precisely measuring and cutting the beams to the required length, making sure they fit snugly between the wall and the horizontal supports.
Before attaching, I drill pilot holes to prevent splitting, and I use lag bolts or carriage bolts for solid connection points. I position the beams evenly, ideally placing them every 4 to 6 feet, depending on the anticipated load. This distributes the weight effectively across the structure.
For added security, I employ metal brackets at the ends of each beam. After I’ve secured the beams, I check for levelness using a bubble level, making adjustments if necessary. Once everything is aligned, I firmly tighten all connections and make sure there is no wobble. Reinforcing interactions between beams can enhance durability, especially if I anticipate heavy items on the platform.
As a final step, I inspect all attachment points. A quick check for any loose bolts or screws ensures that the support system can withstand the test of time and usage.
Adding Shelving Boards and Finishing Touches
To enhance the utility of my elevated storage area, I carefully measured and cut the shelving boards to the desired dimensions. Selecting materials like plywood or MDF provides the necessary strength for holding various items.
- For a clean look, I sanded the edges and surfaces of the boards to eliminate any splinters or rough spots.
- I applied a wood stain or paint, which not only offers protection but also complements my existing decor.
With the boards ready, I secured them onto the frame using brackets or wood screws. Ensuring everything is level at this stage is crucial to prevent future issues with stability.
Finally, I added rubberized feet or pads at the contact points with the walls and floor. This minimizes vibrations and protects surfaces.
In conclusion, a thorough inspection of all connections and adjustments results in a finished setup that is both functional and visually appealing.
Organizing and Utilizing Your New Elevated Storage Space
Prioritize categorizing items based on usage frequency. Place everyday tools and equipment at eye level, while seasonal or less frequently used items can go higher up. This strategy enhances accessibility and simplifies retrieving necessary items.
Consider using clear, labeled bins for smaller items. This practice helps maintain a tidy appearance and allows for easy identification. Use durable storage containers that can withstand weight and avoid crush-related damages.
Integrate vertical space further by adding hooks or pegboards on the walls beneath the structure. This approach maximizes floor area and keeps tools readily available. Seasonal items such as holiday decorations or camping gear should be stored out of sight yet easily reachable.
Utilize sturdy shelving dividers to keep larger items organized. This prevents clutter and makes it easier to locate items without having to sift through everything. Regularly reassess the organization scheme; after a few months, adjust placements based on new usage patterns.
| Item Type | Optimal Storage Location | Recommended Container |
|---|---|---|
| Hand Tools | Eye Level | Clear bins with labels |
| Heavy Equipment | Lower Levels | Sturdy crates |
| Seasonal Items | Upper Levels | Clear, labeled bins |
| Smaller Accessories | Beneath Shelving | Drawer organizers |
Keep a log or inventory of stored items to track what’s where. A simple digital document or a written list can save time and frustration. Regularly update this log as you add or remove items.
Finally, regularly clean the area and reassess the organization to ensure it meets evolving needs. A tidy and organized setup not only enhances efficiency but also maintains a pleasant atmosphere in the workspace.
FAQ:
What materials do I need to build a loft shelf in my garage?
To build a loft shelf in your garage, you’ll typically need plywood or particleboard for the shelving surface, 2×4 lumber for the frame and support beams, screws or nails for assembly, and brackets for added stability. Additionally, a saw, drill, and measuring tape will be necessary for cutting and assembling the materials accurately. If you plan on painting or sealing the shelf, consider wood finish or paint as well.
How do I determine the height for my loft shelf?
When determining the height for your loft shelf, consider what items you’ll be storing and their sizes. Measure the clearance you need to easily lift items onto and take them off the shelf. A common practice is to leave about 3 to 4 feet of space between the top of the shelf and the ceiling, which allows for both storage and accessibility. Also, make sure to account for any overhead garage doors, lights, or other fixtures that could affect the height.
Can you explain the process of framing a loft shelf?
The process of framing a loft shelf involves several key steps. First, measure and mark where you want the frame to be positioned on the walls. Using 2×4 lumber, cut pieces for the horizontal and vertical supports. Assemble the frame by creating a rectangular shape with two horizontal beams at the top and bottom, and vertical supports connecting them at intervals, typically every 2-3 feet. Secure the frame to the garage walls using appropriate anchors or screws, ensuring it’s level and sturdy before adding the shelving surface. This structure provides strong support for the weight of the items you plan to store.
What weight capacity should I expect for my loft shelf?
The weight capacity of your loft shelf largely depends on the materials used and the construction method. A well-built shelf using high-quality 2×4 lumber and securely fastened supports can typically hold anywhere from 200 to 500 pounds, distributed evenly across the surface. To ensure safety, it’s advisable to calculate the maximum expected load and possibly reinforce areas of high stress. Regularly check for any signs of wear or sagging over time, and adjust your storage strategy if necessary.