
 Caleb Turner

Combine equal parts white vinegar and water in a spray bottle, then apply generously to the affected area. Allow it to sit for a few minutes before blotting with a clean cloth. This solution neutralizes and breaks down unwanted odors quickly.
For persistent issues, a mixture of baking soda and essential oils can work wonders. Sprinkle baking soda gently over the area, and add a few drops of your preferred oil. After letting it sit for several hours, vacuum the residue to refresh the space.
Commercial enzymatic cleaners specifically designed for such challenges can also be a powerful ally. Follow the manufacturer’s instructions carefully to ensure optimal results. These products break down odor-causing compounds at a molecular level.
Always test any cleaning solution in a hidden spot first to ensure it does not damage the material. Regular maintenance and immediate action when accidents happen can significantly reduce the chance of lingering odors.
Identify the Type of Furniture Material
Determine the composition of the item. This affects the approach to tackling persistent odors. For wooden pieces, a mixture of vinegar and water can be applied cautiously, followed by thorough drying. Upholstered options require a dedicated fabric cleaner or a vinegar-water solution, tested on a small, hidden area first. Leather necessitates special care; a solution of mild soap and water may be used, ensuring not to soak the material. Metal surfaces allow for easier cleaning with general-purpose cleaners, but ensure they are safe for use on the specific finish.
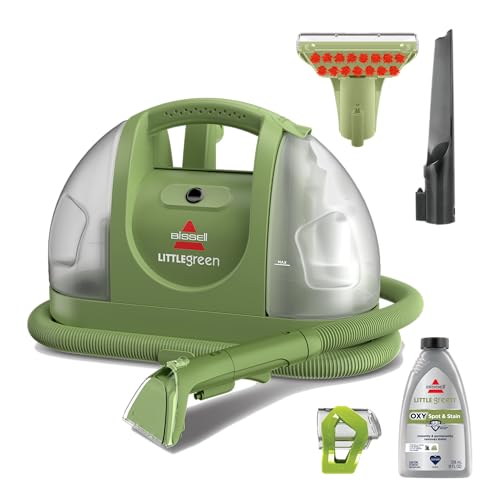

Always check manufacturer specifications if available. Each material reacts differently, influencing how successfully unpleasant scents can be eliminated. Fabric blends may need particular care, as certain components may not withstand harsh chemicals. If the item is antique or delicate, consulting a restoration expert prevents damage during cleaning.
Gather Necessary Cleaning Supplies
Begin with white vinegar, which neutralizes odors effectively. A solution of equal parts vinegar and water works wonders.
Baking soda serves as an absorbing agent. Sprinkle it generously and let it sit for several hours before vacuuming.
Fresh lemon juice acts as a natural disinfectant while leaving a pleasant scent. Combine it with water for better results.
Enzyme cleaners are specifically designed to break down organic compounds, making them highly effective. Choose one suitable for the material at hand.
A soft cloth or sponge will help gently scrub surfaces without causing damage. Microfiber options are ideal for retaining moisture without scratching.
A vacuum cleaner equipped with an upholstery attachment assists in removing any residue or baking soda after treatment.
Lastly, consider gloves to protect hands during the cleaning process and a mask if sensitivity to odors is a concern.
Blot the Affected Area Immediately
Action must be taken as soon as the spot is identified. Use absorbent materials like paper towels or a clean cloth. Gently press down on the damp area to soak up as much liquid as possible. Avoid rubbing, as this can push the fluid deeper into the fibers or material.
Technique for Blotting
Employ a dabbing motion rather than wiping. This technique helps to lift the liquid without spreading it further. Continue blotting until the area feels damp but not soaked. Discard any used absorbent materials and repeat if necessary.
Check for Residual Moisture
After the initial blotting, inspect the spot. It’s crucial to ensure the area is as dry as possible. If any signs of moisture remain, continue blotting until it feels dry. A thorough initial response significantly reduces the risk of lingering odors.
Prepare a cleaning solution for urine removal
Combine equal parts of water and white vinegar in a spray bottle for a potent cleaning mixture. This solution neutralizes unpleasant odors and helps with stain lifting.
For enhanced cleaning power, add a few drops of dish soap to the mixture. This will increase its ability to break down residue left on the surface.
Alternatively, a baking soda paste can be created by mixing baking soda with a small amount of water until a thick consistency is achieved. This paste acts as a natural deodorizer and can be applied directly to affected areas.
Consider utilizing enzymatic cleaners specifically designed for this purpose. These products break down waste materials, effectively eliminating lingering scents.
| Ingredient | Purpose |
|---|---|
| White Vinegar | Neutralizes odors |
| Dish Soap | Breaks down residue |
| Baking Soda | Natural deodorizer |
| Enzymatic Cleaners | Breaks down waste materials |
Apply the Cleaning Solution to the Stain
Soak a clean cloth or sponge with the prepared mixture. Gently dab the specific area to avoid pushing the liquid further into the material. Ensure the fabric absorbs the solution without saturating it. Allow the cleaning agent to penetrate the stain for approximately 10 to 15 minutes.
Area Treatment
During this time, lightly agitate the surface using the cloth to help lift the residue. If the material allows, consider using a soft brush for tougher fabrics. After the waiting period, blot the surface with a dry towel to absorb excess moisture and remnants of the mixture, repeating as necessary.
Final Rinsing
For synthetic textiles, mist the area with plain water after blotting to remove any remaining cleaning solution. This step will aid in preventing any detectable residue from establishing new odors. Finally, allow the area to air dry completely, preferably in a well-ventilated space.
Use enzymatic cleaners for odor neutralization
Enzymatic cleaners effectively eliminate lingering odors by breaking down organic compounds. Selecting a product specifically designed for this purpose is crucial. Look for labels that mention enzymes such as protease, amylase, or lipase, as they target proteins, starches, and fats, respectively.
Before application, test the cleaner on an inconspicuous area to ensure it doesn’t damage the surface. Apply the product generously to the stained region, allowing it to penetrate for the recommended time, often 10 to 15 minutes, to maximize its effectiveness. Consider using a soft brush to gently agitate the area, ensuring that the cleaner reaches deeper fibers.
Thoroughly rinse the area with water once the enzymatic action is complete. After rinsing, blot the surface again to remove excess moisture, helping prevent any residue that could attract dirt or other odors later. Repeat the process if necessary, especially for persistent cases, to achieve optimal results.
Ventilate the Area During Cleaning
Open windows and doors to create a cross breeze that helps dissipate odors while tackling stains. Fresh air reduces the concentration of lingering scents and aids in the drying process.
Consider using fans to increase airflow, directing them towards the affected area to enhance ventilation. This speeds up drying and minimizes the chance for any remaining odors to settle back into the fabric or material.
During the treatment, ensure pets and people maintain distance from the cleaning zone to avoid inhalation of chemicals, if used. Proper ventilation is crucial for both safety and effectiveness.
After completing the cleaning, keep the area ventilated for several hours or even overnight. This ensures that any residual moisture evaporates fully and odors diminish significantly.
- Open three or more windows if possible for optimal airflow.
- Use portable fans to circulate air effectively.
- Avoid sealing the area with closed doors while cleaning.
Test a small area for colorfastness
Before applying any cleaning solution, selecting an inconspicuous area on the fabric or material is crucial. This test will determine if the cleaner affects the color or texture.
Use a cotton swab or a soft cloth to apply a small amount of the cleaning mixture to the hidden spot. Allow it to sit for approximately 10 minutes, then blot with a clean cloth to see if any color transfers.
If discoloration or spotting occurs, it’s advisable to try a different cleaning solution or method that is safer for the specific material. For areas that pass the test, proceed with confidence to treat the larger affected area.
Always allow the test area to dry completely to accurately assess if there are any adverse effects before continuing with the entire cleaning process.
Repeat the Process if Necessary
In cases where the initial attempt does not achieve complete success, repeating the cleaning steps may be necessary. Follow these guidelines to enhance results:
- Reassess the area to determine if there are still signs of odor or stain.
- Ensure that the cleaning solution is properly mixed according to the recommended ratios.
- Apply the solution generously, ensuring it penetrates the material.
- Allow the cleaner to sit for a longer duration than before, as stubborn odors may require additional time.
- Blot the area again with a clean cloth, repeating as needed until the cloth shows no discoloration.
- If lingering odor persists, consider using a specialized enzymatic cleaner designed for deeper removal.
Stubborn situations might benefit from multiple applications of the chosen method, so patience and thoroughness play a critical role in achieving a fresh outcome.


