Apply a mixture of water and vinegar in equal parts to a soft cloth. Gently rub the surface of your laminated item, paying extra attention to areas where you want to create a more worn look. This technique helps to loosen the top layer, making it easier to achieve the desired effect.
To add depth, utilize a utility knife or sandpaper with a fine grit. Focus on edges and corners, where wear naturally occurs over time. Be cautious; small, controlled movements yield the best results. An irregular texture adds authenticity to your piece.
Next, consider using stains or paint in muted tones to enhance the aged appearance. Applying a dark wax after staining can amplify the worn effect. Use a soft cloth to buff the surface, ensuring even coverage and a natural sheen.
Finally, finish with a top coat of polyurethane for protection. Choose a matte or satin finish to maintain the rustic charm. This final step will ensure that your transformed piece withstands the test of time while showcasing the character you’ve infused into it.
Techniques for Aging Wood Surfaces
To achieve an aged look on wooden surfaces, I use sandpaper with various grits. Starting with a coarse grit, I gently rub the edges and corners to create a natural wear effect. This technique mimics the passage of time, revealing the lighter wood beneath the top layer.


Applying a Stained Finish
After distressing the surface, I apply a dark stain to enhance the antique appearance. By using a rag or brush, I work the stain into the scratched and worn areas to add depth. Allow the stain to penetrate for a few minutes before wiping off the excess, ensuring it remains visible in the distressed zones.
Using Paint Techniques
Dry brushing is another method I enjoy. I dip a stiff-bristle brush into a lighter paint color and wipe off most of it on a cloth. Then, I lightly sweep across the surface, letting the brush catch the raised areas. This creates a subtle contrast that mimics natural wear. For an added layer, a bit of glazing can follow, which I apply selectively to accentuate specific features.
Choosing the Right Tools for Distressing
Selecting appropriate implements is crucial for achieving the desired look on your surfaces. I recommend having a variety on hand to enhance texture and character.
| Tool | Purpose | Recommendation |
|---|---|---|
| Sanding Block | To abrade edges and surfaces | Use medium to fine grit for control |
| Wire Brush | Create a worn and weathered effect | Opt for a stiff brush for more impact |
| Chisel | Carve out imperfections and texture | A set with various widths offers flexibility |
| Hammer | Imitate damage or aging | A rubber mallet helps manage force |
| Drill with Bits | Make small holes or divots | Use a variety of bit sizes for diverse effects |
| Rag or Cloth | Apply finishes or stains | Choose old t-shirts or soft fabric |
Gathering these tools will allow exploration of various techniques, ensuring a unique and personal touch to each creation. The choice of materials and implements can significantly influence the outcome, so experimenting with combinations is beneficial.
Selecting the Appropriate Stain or Paint
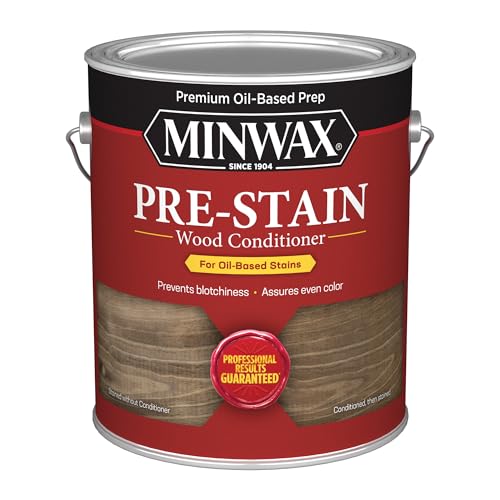
For achieving a vintage look, using water-based stains is optimal. They penetrate the surface efficiently and provide a rich, deep color without obscuring the wood grain. I often opt for shades like walnut or espresso for a classic appeal.
When choosing paint, consider chalk paint or milk paint as they offer a matte finish that’s perfect for achieving an aged appearance. These paints adhere well and can be easily distressed to reveal the underlying layers.
If your intent is to highlight textures or imperfections, look for finishes with a satin or eggshell sheen. These will create reflections that draw attention to the details of the piece.
Test each option on a small, inconspicuous area to see how the color interacts with the wood and finish. This mini-test helps determine if the chosen hue meets my expectations before committing to the entire surface.
For a multi-layered effect, I layer different colors, starting with a base coat and adding additional layers atop it. Once it has dried, light sanding can expose layers beneath, yielding a unique, aged look.
Techniques for Creating a Distressed Look
To achieve a weathered appearance, I recommend using a few specific methods. One effective technique is using sandpaper to create worn edges. Start with a medium grit (around 120) to remove some of the finish or surface material, which reveals the layers beneath. Follow with finer grit to smooth out rough areas.
Another option is to apply a technique known as “whitewashing.” Mix equal parts of water and paint, then brush it over the surface. Wipe off the excess with a cloth, allowing some color to penetrate while still showing the wood grain. This creates a softer, aged feel.
Consider adding texture through the use of tools like a wire brush. Lightly dragging the brush across the surface mimics the effect of grain expansion and weather wear. Be gentle to prevent deep scratches, focusing on areas that would naturally wear down over time.
For a more dramatic effect, I sometimes use a hammer or a similar tool to create small dents and nicks. Focus on corners and edges where wear would naturally occur. Careful application will make these imperfections appear authentic.
Layering is also a recommended approach. After applying your base color, a second color can be brushed or dry-brushed over it. This method lets the base color show through, enhancing depth and character. Combine this with sanding to refine and blend the colors seamlessly.
Finally, consider using a glaze. A transparent or semi-transparent glaze can amplify the imperfections, creating shadows that add depth. Apply it sparingly and focus on crevices for a more dimensional effect.
Adding Texture Through Sanding Methods
Using varied sanding techniques creates a captivating texture on the surface. I prefer incorporating both manual and power sanding methods to achieve a dynamic finish. The key is selecting the right grit for your project.
Manual Sanding Techniques
For a softer effect, start with a medium-grit sandpaper, like 120 or 150. This allows for control and precision when working on intricate areas. I often wrap sandpaper around a block for flat surfaces, ensuring even pressure throughout. In corners or detailed accents, a piece of folded sandpaper does the trick, allowing me to reach tight spots effortlessly.

Power Sanding Options
When speed is essential, I switch to an orbital sander with a finer grit, typically around 220. I apply light pressure to avoid removing too much material too quickly. This method not only reduces labor but can also create a subtle, weathered look. For final touches, I sometimes use a sanding sponge to contour the edges, giving it a naturally worn appearance.
Combining these techniques lets me layer textures, enhancing the piece’s overall character while achieving that sought-after antique vibe.
Protecting Your Finished Piece
Applying a clear protective finish is vital for safeguarding your project. I recommend choosing polyurethane or shellac, which offer excellent durability.
Steps to Apply Protective Coating
- Ensure the surface is clean and fully cured.
- Use a high-quality brush or foam applicator for even coverage.
- Apply thin coats, allowing each to dry thoroughly before adding another.
- Lightly sand between coats with fine-grit sandpaper to enhance adhesion.
For outdoor items, I suggest using a marine-grade finish to withstand moisture and UV exposure effectively.
Maintenance Tips
- Regularly dust the surface with a soft, dry cloth.
- Avoid using harsh chemicals; opt for a mild cleaner and warm water.
- Reapply the protective coating every few years, or when wear becomes noticeable.
Following these steps will help maintain the beauty and integrity of your piece over time.
Maintaining the Distressed Appearance Over Time
Regular upkeep is key to preserving the worn look of your piece. Here are specific steps to ensure longevity:
Cleaning Practices
- Use a soft, dry cloth for dusting. Avoid abrasive materials that could damage the surface.
- For deeper cleaning, slightly dampen the cloth with water and a mild soap. Wipe gently, avoiding excess moisture.
- Ensure the item dries completely to prevent water damage.
Periodic Touch-Ups
- Inspect the finish every few months. Look for scratches or areas where the aging appearance has faded.
- Apply a matching wax or glaze to these areas using a soft cloth to reinstate the aged effect.
- Consider reapplying stain or paint to certain areas if fading is significant. Test on an inconspicuous spot first.
Environmental Control
- Keep the piece away from direct sunlight to prevent fading and warping.
- Maintain stable humidity levels. Excessive moisture can lead to peeling or warping.
- Avoid placing near heat sources like radiators that could cause cracking.
By following these practices, I ensure my item retains its charming, aged character for years to come.