If you want to give your items an appealing worn appearance, start with sanding the surfaces using fine-grit sandpaper. Focus on the edges and corners, as these areas naturally wear faster over time. A light touch will allow you to achieve a subtle effect without overdoing it.
Next, consider applying a base coat of paint in a neutral tone. Once dry, use a contrasting color on top and then sand through the top layer to reveal the base. This method mimics the natural aging process, creating depth and character.
To further enhance the vintage feel, try adding a glaze or clear coat with a tint. This step will provide a slight sheen while accentuating the texture. When applying, use a brush or cloth to blend it seamlessly into the grain.
Experiment with the application of wax to the finished piece. A soft wax can add richness and protect the surface, while also enhancing the aged aesthetic. Buffing the wax after application will impart a soft glow, giving your piece a polished yet rustic finish.
Selecting the Right Type of Furniture for Distressing
Choosing appropriate pieces for a weathered aesthetic hinges on material type and construction. Select items crafted from solid wood, as they withstand techniques such as sanding, chipping, and painting better than engineered alternatives. Softwoods like pine or fir naturally take on wear, enhancing the final appearance.
Consider the item’s style. Vintage or rustic styles inherently blend well with unconventional finishes. Look for pieces with intricate carvings or unique designs, as these details can accentuate the aged effect. Farmhouse tables or antique cabinets align well with this approach.
Assess current finishes. Avoid high-gloss or laminate surfaces, which can complicate alterations. Instead, look for raw or previously painted wood; these bases can absorb stains and paints more effectively, allowing for better texture contrasts.
Pay attention to scale and proportions. Larger items provide ample space for experimentation, while smaller accents like side tables can be equally rewarding and less daunting to modify. A diverse selection can maintain visual interest while unifying the overall ambiance.
Preparing the Surface: Cleaning and Sanding Techniques
I recommend beginning with a thorough cleaning to eliminate dust, grease, and any old finishes. Use a mixture of warm water and mild soap on a soft cloth. For stubborn stains, try a gentle sponge or scrub brush, ensuring not to damage the underlying material.
Cleaning Steps
After wiping down the piece, allow it to dry completely. If there are remnants of gloss or varnish, consider using a chemical paint stripper, applying it in a well-ventilated area and following manufacturer instructions. Always wear gloves and a mask to protect yourself from fumes.
Sanding Techniques
Sanding is crucial for achieving the desired texture. Start with coarse sandpaper (around 80 grit) to remove the old finish and smooth out any imperfections. Focus on edges and corners where wear naturally occurs. Follow up with a finer grit (220) for a smoother surface that’s ready for painting.
Use a sanding block or an electric sander for larger areas. For detailed work or intricate designs, opt for hand sanding to maintain control. Regularly wipe the surface with a damp cloth during the process to remove dust particles, ensuring a clean base for your next steps.
Choosing and Applying the Base Paint Color
For an authentic appearance, I select a base color that aligns with the desired aged effect. Soft, muted shades like pale blues, muted greens, or creamy whites are often ideal. They provide a foundation that enhances the weathered aesthetic when distressed techniques are applied.
Testing the Color
I recommend applying a small sample of the chosen color to a hidden area of the piece. This allows for a clear visual reference once the piece undergoes further treatment. Observing the sample in different lighting conditions ensures it fits the overall environment.
Application Technique
I use a high-quality brush or a foam roller for an even application. Multiple thin coats work better than one thick layer, allowing the undercoat to show through in areas later distressed. Once dry, light sanding on edges and corners can enhance the authenticity of wear, setting the stage for the next steps.
Methods for Creating Distressing Effects: Scraping and Rubbing
For achieving an authentic aged appearance, I utilize scraping and rubbing techniques as fundamental methods. The scraping technique involves using a putty knife, sanding block, or a utility knife to gently remove paint or finish from edges and high points. Applying controlled pressure helps to create realistic wear patterns. I move with the grain or in a random fashion, depending on the desired effect.
Prior to scraping, I recommend letting the base coat cure completely to avoid unwanted chipping. Once ready, I select areas that naturally experience more wear, like corners or drawer fronts. This adds to the realism, making the piece appear genuinely used.
Rubbing is another effective approach, often used alongside scraping. I employ a fine-grit sandpaper or a rubbing pad, making small circular motions to gently wear down surfaces. This method softens the edges and allows the base color to emerge subtly below the top layer. For a layered effect, I might apply a dark wax or glaze after rubbing, enriching the depth of the finish.
Combining these techniques builds authenticity. I also take care to use protective gear, as dust and debris can accumulate during the process. Regularly stepping back and assessing the progress helps ensure that the effects remain balanced, avoiding overly aggressive wear.
Finally, sealing the piece after achieving the desired wear is key to protecting the finish and enhancing durability. I often choose a matte or satin clear coat to maintain the vintage feel while providing necessary protection.
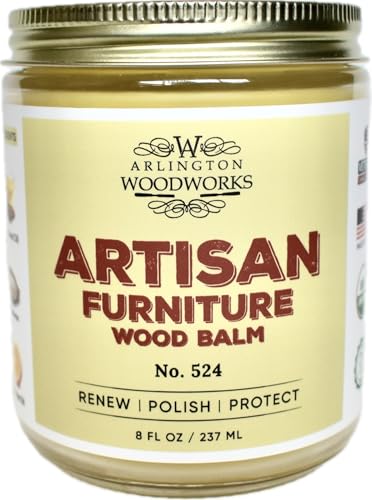
Using Wax or Glaze to Enhance the Distressed Finish
For a refined touch, I recommend applying wax or glaze after achieving the weathered appearance. Both options not only protect the surface but also elevate the character of the piece.
Choosing Between Wax and Glaze
- Wax: For a soft, matte finish, opt for a clear or colored wax. This product enhances the texture and provides a warm, natural glow.
- Glaze: If a more dimensional effect is desired, a glaze can offer depth with a glossy sheen. It can be tinted to match the base color, allowing for a striking contrast and highlighting details.
Application Techniques
When applying either medium, ensure the surface is clean and dry. I favor a soft cloth or a brush for wax, while for glaze, using a foam applicator or a brush works best to control the amount applied.
- For wax, dip the cloth lightly and rub it onto the surface in circular motions. Always work in small sections.
- With glaze, apply it using long strokes, following the wood grain, to achieve a smooth finish. Wipe away excess with a clean cloth to prevent pooling.
- Allow the finish to cure according to the manufacturer’s instructions, typically 24 hours for wax and 48 hours for glaze.
This step not only seals the paint but also enriches the texture and depth of the project. Experiment with both techniques to see which provides the desired effect for your piece.
Sealing Your Distressed Furniture for Longevity
Applying a protective finish is crucial for ensuring durability after achieving your desired aesthetic. I recommend using a clear polycrylic or polyurethane sealant. These products provide a robust barrier against moisture and wear while maintaining the appearance of the surface.
Here’s a streamlined process for sealing:
| Step | Action | Product Recommendation |
|---|---|---|
| 1 | Ensure the surface is clean and dry. | Microfiber cloth for dusting |
| 2 | Apply the first coat with a foam brush or synthetic bristle brush, following the grain. | Minwax Polycrylic or ZAR Polyurethane |
| 3 | Allow the coat to dry completely, usually 1-2 hours. | N/A |
| 4 | Lightly sand with fine-grit sandpaper for adhesion. | 220-grit sandpaper |
| 5 | Apply additional coats (typically 2-3), sanding between each. | Minwax or ZAR as needed |
| 6 | Final allow to cure for several days before heavy use. | N/A |
For an antique finish, consider a wax topcoat instead. Paste wax provides a subtle sheen and a soft touch while preserving the character of the finish. Applying wax usually requires a soft cloth to buff it into the surface, enhancing the aged appearance.
Lastly, choose the appropriate finish based on your usage. High-traffic areas may benefit from a tougher polyurethane, while occasional display pieces can opt for a simpler wax application.
Maintenance Tips for Preserving the Distressed Look
Regular dusting with a soft cloth helps maintain the finish’s appeal. Avoiding harsh chemicals ensures that the applied layers remain intact. A gentle soap and water solution can clean surfaces without damaging the aesthetic.
Protective Coatings
Applying a clear topcoat enhances durability and shields against scratches. Use a water-based polyurethane for a low sheen that doesn’t alter the original hues. Reapply every few years to retain freshness.
Handling and Usage
Using coasters and placemats prevents water rings and heat damage. Being mindful of heavy objects can reduce wear and tear, ensuring the patina develops organically over time. Rotate decorative items to limit contact on specific areas.