For maintaining the beauty of your outdoor hardwood seating, I recommend using a gentle mixture of warm water and mild soap. This solution effectively removes surface dirt and grime without harming the natural finish. Always begin by dampening a soft cloth or sponge in the soapy water, then gently wipe the surfaces.
After the initial wipe-down, I suggest rinsing with clean water to eliminate any soap residue. Transitioning to a dedicated wood conditioner can enhance the resilience and appearance of the material, providing a protective layer against the elements. Choose a product specifically formulated for the type of surface you’re working with, as this ensures compatibility and optimal results.
Furthermore, regularly applying this conditioner helps maintain the rich color and texture of the material. Depending on environmental factors, I recommend performing this maintenance every few months to keep your outdoor seating looking its best and to extend its lifespan significantly.
Cleaning Tips for Your Teak Patio Products
Combine warm water with a few drops of mild dish soap. Using a soft-bristled brush, gently scrub the surfaces, paying attention to crevices where dirt accumulates.
For tougher stains, create a paste from baking soda and water. Apply it to the affected area and let it sit for 10-15 minutes, then scrub gently before rinsing.
If you notice green mold or mildew, mix equal parts vinegar and water. Spray the mixture onto the surface and allow it to sit for about 30 minutes. Rinse thoroughly.
After washing, always dry the items with a soft cloth to prevent water spots.
Consider treating your outdoor items with specialized oils designed for this material every 6-12 months to maintain its natural hue and protect against the elements.
Store these products in a shaded area during harsh weather conditions for added longevity.
Regularly inspect for signs of wear, such as rough spots or discoloration. Sand these areas lightly with fine-grit sandpaper, then reapply oil where needed.
Adopt this routine to enhance their lifespan and preserve their beauty, ensuring they remain an inviting spot for relaxation.
Understanding Teak Wood Properties
Teak is renowned for its remarkable durability and resistance to the elements. With its natural oils, this material inherently resists moisture, making it a preferred choice for outdoor seating options.
When working with this type of timber, consider the following characteristics:
- Density: This timber has a high density, contributing to its strength and longevity.
- Natural oils: The presence of oils provides a protective layer, enhancing its resistance to decay and insects.
- Color variation: Ranges from golden to deep brown shades, allowing for aesthetic versatility.
- Ageing process: Over time, the surface can develop a silver-gray patina, which many appreciate for its rustic appearance.
- Low maintenance: While it doesn’t require intensive upkeep, periodic treatment can help maintain its appearance.
Understanding these properties is essential for making informed choices regarding care and maintenance of outdoor pieces crafted from this exceptional timber.
Gathering Necessary Cleaning Supplies
First, choose a suitable cleaning solution. I prefer a mix of mild soap and water, as it effectively removes dirt without damaging the finish. Alternatively, natural options like vinegar diluted in water can work well.
Tools Required
Gather these tools to aid in the process:
- Soft-bristle brush for scrubbing
- Microfiber cloth for drying
- Bucket for mixing solutions
- Hose for rinsing
Protective Gear
Consider wearing gloves to protect your hands, especially if you’re using chemical cleaners. Additionally, wearing an apron can prevent any splashes on your clothes.
| Item | Purpose |
|---|---|
| Soft-bristle brush | Gently scrub surfaces |
| Microfiber cloth | Absorb water efficiently |
| Bucket | Mix cleaning solutions |
| Hose | Rinse off residue |
| Gloves | Protect hands from chemicals |
| Apron | Prevent clothing damage |
With these supplies on hand, I am ready to tackle the task with confidence and ensure the items maintain their beauty and durability.
Preparing the Furniture for Cleaning
I recommend beginning by moving the items to a shaded area, preventing the sun from drying any cleaning solution too quickly. This maintains its effectiveness during the process.

Next, inspect for any loose connections, screws, or parts. Tighten or secure them as necessary to avoid damaging the structure while working.
Dust the surfaces using a soft brush or a microfiber cloth to remove dirt and debris. This step aids in reducing scratching during deeper cleaning.
For stubborn stains or grime, a gentle scraper can help, but take care not to damage the finish. Always test any tools on a small, hidden area first.
Lastly, ensuring the workspace is clear of any items or obstacles will help facilitate a smoother cleaning process.
Choosing the Right Cleaning Solution
For optimal results, I opt for a mild soap mixed with warm water. This combination is gentle yet effective, eliminating grime without damaging the surface. I typically use a liquid dish soap, as it effectively lifts dirt and oil while being safe for treated surfaces.
Alternatively, I may consider a specialized botanical or eco-friendly cleaning product designed specifically for outdoor wood surfaces. These formulations often contain natural ingredients and are free from harsh chemicals, ensuring a safe application.
If there are stubborn stains or mildew present, adding a mixture of vinegar and water can be helpful. This solution acts as a natural disinfectant and works particularly well on tough spots. I normally mix one part vinegar with two parts water for the best results.
Before applying any solution, I always perform a patch test in an inconspicuous area. This ensures compatibility with the material and prevents any unwanted discoloration. Once I confirm that the selected cleaner works, I feel confident proceeding with the full treatment.
Step-by-Step Cleaning Process
First, I ensure the area is free from debris and loose particles by sweeping the surface thoroughly. Next, I prepare the cleaning solution according to the manufacturer’s instructions, typically mixing mild soap with warm water.
Using a soft-bristle brush, I gently scrub the surfaces. I pay special attention to any stained or discolored areas, applying a bit more pressure where needed. Rinsing with clean water is crucial to remove any soap residue.
If mold or mildew is present, I create a diluted bleach solution (one part bleach to ten parts water) and apply it cautiously. I let it sit for about ten minutes before rinsing off completely to avoid any damage.
After rinsing, I use a clean, dry cloth to wipe down the furniture. This helps in absorbing any remaining water, minimizing the risk of warping.
Finally, I let the pieces air dry completely in a shaded area. This step prevents direct sunlight from causing any discoloration as they dry.
Removing Stains and Mildew
To tackle unsightly marks and mildew, I start with a solution made of equal parts white vinegar and water. I spray this mixture directly onto the affected areas and let it sit for 10-15 minutes. This combination helps break down stubborn spots without harsh chemicals.
Manual Scrubbing
After allowing the solution to penetrate, I take a soft-bristle brush and gently scrub the surfaces. I focus on grain patterns where dirt and mold often settle. Rinsing the area with clean water once I’m done helps remove any residue from the vinegar solution.
Stain-Specific Approaches
For more serious stains, I find using a commercial oxygen bleach solution effective. I follow the manufacturer’s instructions for dilution, usually mixing with water. Application of this solution requires thorough coverage; I leave it on for around 30 minutes before rinsing it off.
| Stain Type | Recommended Treatment |
|---|---|
| Water Marks | Vinegar & Water Solution |
| Oil Stains | Oxygen Bleach |
| Mildew | Vinegar & Water Solution |
| Color Fading | Oxygen Bleach for Restoration |
After the application, I ensure everything dries completely before using the area again. This prevents regrowth of mildew and maintains a clean appearance for future enjoyment.
Drying and Restoring the Finish
After cleaning, I let the surfaces dry completely before proceeding with any restoration tasks. Natural drying usually takes 24 to 48 hours, depending on humidity and temperature. Placing the items in a shaded area accelerates the drying process and prevents direct sunlight exposure, which can create uneven drying and damage the finish.
Restoring the Surface
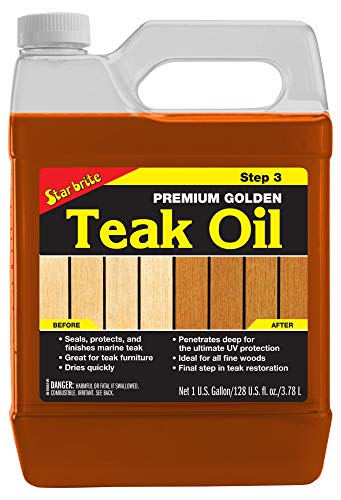
To restore the original sheen, I apply a high-quality teak oil to nourish the fibers. Using a soft cloth, I spread the oil evenly, following the grain pattern. After letting it absorb for about 15 to 30 minutes, I wipe off any excess to avoid a sticky residue. This important step not only revitalizes the color but also provides protection against future weathering and stains.
Maintaining the Finish
Regular maintenance is key for longevity. I schedule periodic applications of oil every six months or as needed, especially after heavy exposure to elements. This routine keeps the natural beauty while protecting against cracking and fading. Additionally, I avoid using harsh chemicals or abrasive materials that could damage the surface during maintenance.
Maintenance Tips for Long-Lasting Teak Furniture
Regular upkeep extends the life of my outdoor pieces significantly. I prioritize routine inspections to catch any issues early, which helps in maintaining the integrity of the material.
Cleaning Frequency
- Wipe down surfaces monthly to remove dust and debris.
- Perform a deeper wash every three to six months to prevent build-up.
Protective Measures
- Use furniture covers during inclement weather to guard against moisture and sun damage.
- Position items away from direct sunlight for prolonged periods to minimize fading.
- Apply protective oil or sealant annually to maintain a rich hue and barrier against the elements.
Monitoring for signs of wear or deterioration such as cracks or rough areas ensures I can address them promptly. Spot treatment with appropriate oils helps retain the natural beauty while preserving functionality.


