Begin with a quality microfiber cloth to gently lift residue from surfaces without scratching. Dampen the cloth slightly with water for more effective removal, ensuring it doesn’t soak the material.
If needed, mix a small amount of mild dish soap with water to create a soapy solution. Lightly moisten a separate cloth with this mixture, applying it to stubborn areas. Afterward, use another damp cloth to wipe away any soap residue.


For wooden pieces, a bit of mineral oil can be useful to restore shine after all particulates have been removed. Apply a small quantity to a clean cloth and buff the surface, ensuring to work in the wood grain direction.
Lastly, avoid using harsh chemicals or abrasive tools, as these can damage delicate finishes. Patience and a gentle touch will yield the best results, leaving your items looking pristine.
Removing Residue from Surfaces
Begin with a microfibre cloth or a soft broom. Gently wipe or sweep across the surfaces to lift up the fine particles. Avoid rubbing too hard to prevent scratching.
For stubborn residue, dampen the cloth with a mixture of warm water and a small amount of mild detergent. Lightly moisten the cloth rather than soaking it; excess moisture may damage finishes.
If the surface is particularly delicate, test the cleaning solution on a hidden area first to ensure it won’t cause discoloration or damage.
After wiping, follow up with a dry cloth to absorb any remaining dampness and prevent streaks. If necessary, repeat the process until all remnants are removed.
Consider using a vacuum with a brush attachment for larger pieces. This can effectively gather loose particles without causing harm.
Finish by applying a suitable polish or conditioner if applicable, which will help maintain the appearance and protect the surface from future buildup.
Gather Necessary Cleaning Supplies
I recommend gathering the following items before commencing the removal of residue from your belongings:
- Microfiber cloths: These are excellent for trapping fine particles and preventing scratches.
- Soft-bristle brush: Ideal for loosening stubborn particles from crevices and textured surfaces.
- Vacuum cleaner with brush attachment: Perfect for efficiently sucking up loose debris without scattering it further.
- White vinegar: A natural solution that can assist with breaking down stubborn residues when mixed with water.
- Bucket of warm water: Useful for dampening cloths or rinsing tools as needed.
- Latex gloves: Protects your hands from chemicals and any irritating materials that may be present.
- Protective eyewear: Shields your eyes from airborne particles during the cleaning process.
Having these supplies ready will streamline the process, making it more manageable and thorough.
Prepare the Area for Dust Removal
Clear the workspace by moving items that could complicate the cleaning process. I usually relocate small decorations, electronics, and any other belongings away from the vicinity.
Protect surfaces with drop cloths or old sheets. This prevents any lingering particles from settling back on surfaces after I’ve completed the cleaning.
I seal off doorways or openings with plastic sheeting or tape to confine the residue within a specified area. This helps in managing the cleanup efficiently.
Ensure that windows are open for ventilation. Fresh air circulation is crucial in minimizing the inhalation of airborne remnants during my task.
Lastly, I gather tools and materials in advance to streamline the process. Having everything at hand allows me to avoid interruptions once I begin tackling the mess.
Use a Dry Cloth to Remove Initial Residue
I recommend using a clean, dry microfiber cloth to wipe away the initial residue. This material effectively captures tiny particles without spreading them around. Begin at one end of the surface and move systematically to the opposite side, ensuring that I don’t miss any areas.
<pAvoid applying pressure; this could cause any remaining particles to scratch the surface. Instead, lightly glide the cloth over the area. For intricate designs or crevices, I fold the cloth to get into those tight spots, ensuring complete coverage.
<pAfter wiping, I inspect the surface for any residual particles. If necessary, I repeat the process with a fresh part of the cloth to ensure thorough removal before proceeding to any additional cleaning steps.
Apply a Damp Cloth for Stubborn Residue
For persistent marks, I recommend dampening a soft cloth with water. This will help dissolve the remaining particles. Gently wipe the affected surfaces, applying minimal pressure to avoid scratches.
Follow these steps for optimal results:
- Choose a microfiber or soft cotton cloth to avoid any damage.
- Lightly moisten the cloth–ensure it’s damp, not soaking wet. Excess water can cause harm to the material.
- Gently rub the surface with the damp cloth in circular motions. This helps lift the stubborn residue more efficiently.
- Rinse the cloth frequently to avoid redepositing the dislodged particles.
- After removing the residue, use a dry cloth to wipe any leftover moisture, ensuring the surface is dry.
If any marks remain after this process, consider repeating it or using a specialized cleaner suitable for the specific material. Always perform a spot test in an inconspicuous area to prevent any adverse reactions.
Choose the Right Cleaning Solution for Different Surfaces
For wood surfaces, I prefer a gentle mixture of mild soap and water. After wetting a soft cloth, I wring it out to prevent excess moisture, ensuring my furniture stays unharmed. Avoid harsh chemicals that may strip the finish.
For glass or mirrored items, I opt for a specialized glass cleaner. I spray the cleaner directly onto the surface and wipe with a microfiber cloth. This approach guarantees a streak-free shine without damaging the glass.
When dealing with metal, such as stainless steel or chrome, I utilize a solution containing vinegar mixed with water. I apply it sparingly, allowing it to break down residue before buffing with a soft cloth. This effectively removes any lingering particles.
For fabric upholstery, a delicate approach is necessary. I mix equal parts of water and white vinegar in a spray bottle. Lightly spray the solution, then blot with a clean cloth, ensuring not to oversaturate the material, which could cause staining.
| Surface Type | Recommended Solution | Application Method |
|---|---|---|
| Wood | Mild soap and water | Wipe with a damp cloth |
| Glass | Glass cleaner | Spray and wipe with microfiber cloth |
| Metal | Vinegar and water solution | Apply and buff with a soft cloth |
| Fabric | Water and white vinegar | Light spray and blot with a clean cloth |
Check for and Remove Dust from Hidden Areas
Begin at the base of your pieces, inspecting corners and underneath for settled particles. Use a flashlight to see into hard-to-reach spots, ensuring thoroughness. A microfiber cloth wrapped around a flat-head screwdriver can help you reach crevices, where grime often accumulates unseen.
Remove any items from shelves, tables, and other surfaces before accessing these hidden spaces. Employ a vacuum nozzle attachment to eliminate finer particles that may reside near walls or behind larger items. Pay attention to areas adjacent to electrical outlets and baseboards, as they frequently collect debris.
After vacuuming, lightly dampen a cloth to tackle any stubborn residue left behind. Wipe down these areas carefully, ensuring not to scratch surfaces. Frequent checks help maintain cleanliness, especially after renovation projects, to prevent buildup in obscured regions.
To finalize, inspect all surfaces one last time to confirm thorough removal. It’s crucial to keep these locations clear to maintain the integrity of your belongings and enhance their longevity.
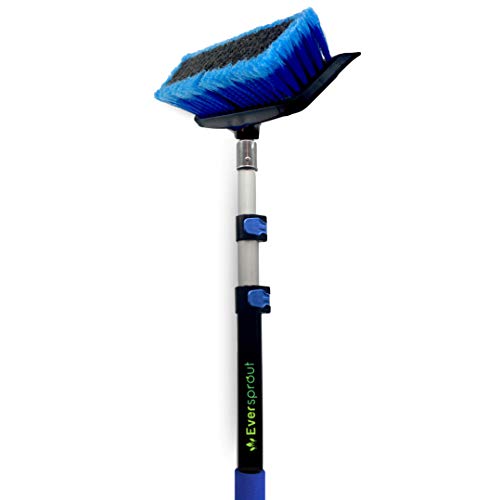
Clean Furniture with Vacuum Attachment for Fine Particulates
For tackling fine particles lingering on surfaces, a vacuum equipped with a specialized attachment proves handy. Using this method retains surface integrity while ensuring effective removal.
- First, select the appropriate attachment. A soft brush or upholstery tool minimizes the risk of scratching.
- Adjust vacuum settings. Utilize a low suction setting to handle delicate materials and prevent damage.
- Begin at the top of the piece. Work downward, allowing particles to fall to lower areas as I proceed.
- Direct the nozzle along seams and crevices. Pay close attention to ornamental details and edges where fine particles tend to settle.
- Occasionally pause to empty the vacuum canister or bag. A full canister may reduce suction efficiency, leading to suboptimal results.
This approach guarantees that surfaces remain unharmed while effectively clearing out unwanted residue. Regular maintenance with this technique keeps surfaces looking pristine.
Prevent Future Accumulation of Residue on Surfaces
Regularly applying a protective layer, such as wax or polish, can significantly reduce the likelihood of residue settling on surfaces. Choose a product suited to the material of your items for optimal results.
Maintain an Organized Space
Decluttering is key; remove unnecessary objects that can trap particles. Keep surfaces as open as possible, allowing for easy cleaning and minimizing accumulation.
Utilize Air Purifiers
Investing in an air purification system can help trap airborne particles before they settle. Look for devices with HEPA filters for maximum effectiveness in capturing fine particulates.
Regular ventilating of the area helps disperse remaining particles, further minimizing the risk of buildup. Keep windows open during dry conditions to facilitate airflow.
Employing microfiber cloths during routine maintenance limits the potential for residue transfer. Their electrostatic properties attract small particles, making everyday cleaning more efficient.
Maintain Furniture Post-Cleanup for Longevity
Regularly apply a protective coating to surfaces to prevent wear and tear. For wooden pieces, consider using furniture polish or a specialized wax every few months. This not only enhances shine but also creates a barrier against scratches and stains.
Ensure to place coasters under beverages to prevent rings and moisture damage. Felt pads on the bottom of decorative items help to avoid scratches when moving them.
Perform periodic checks for signs of damage or wear. Tighten loose screws and hinges immediately to maintain stability. Small repairs can prevent larger issues down the line.
Keep the temperature and humidity levels in check to prevent warping or cracking, especially for wooden items. Use a dehumidifier in damp climates and avoid placing items in direct sunlight for prolonged periods.
Rotate decorative pieces and frequently used items to ensure even exposure to light, reducing uneven fading. This practice also refreshes the aesthetic of your space.
Dust surfaces regularly with a microfiber cloth to avoid buildup. A clean surface prevents scratches and prolongs the finish. Establish a routine to maintain cleanliness.
Utilize storage solutions like bins or baskets for items that are not frequently used, eliminating clutter that can attract dirt and debris. This keeps spaces tidy and easier to manage.
Engage in thorough inspections for any hidden areas where dirt may accumulate. Regular upkeep of these spots promotes a pristine environment.
FAQ:
What are the best methods for removing plaster dust from wooden furniture?
To effectively clean plaster dust from wooden furniture, you can use a few methods. Begin with a microfiber cloth or a soft duster to gently wipe the surface. If the dust persists, slightly dampen the cloth with water, making sure it’s not soaking wet, and wipe the furniture again. For more stubborn dust, a mild soap solution can be helpful; just ensure to test it on a small, inconspicuous area first. After cleaning, dry the surface properly to prevent moisture damage.
Is it safe to use a vacuum cleaner to remove plaster dust from furniture?
Using a vacuum cleaner can be effective, but caution is needed. If your vacuum has a brush attachment, it can gently lift the dust without scratching the surface. However, using a vacuum without proper attachments might cause damage. Ensure that the vacuum’s suction power is not too strong, as it can scratch or dent delicate finishes. Always follow up with a microfiber cloth to catch any remaining dust.
Can I use cleaning products on my furniture to remove plaster dust?
Yes, but you should choose cleaning products carefully. Opt for mild, non-abrasive cleaners specifically designed for wood or furniture. Spray the cleaner onto a cloth rather than directly on the furniture to avoid oversaturation. Always test any product on a small area first to ensure it does not affect the finish. While these products can help, often a damp microfiber cloth is sufficient for plaster dust removal.
How can I prevent plaster dust from settling on my furniture during renovations?
To minimize plaster dust during renovations, you can take several preventive steps. First, cover your furniture with drop cloths or old sheets which can easily be removed afterwards. Use painter’s tape to seal any gaps around doors and windows to limit dust from spreading. Regularly vacuum the area being renovated will capture dust before it settles on surfaces. Lastly, close doors to contain dust within one room, keeping other areas clean.
What should I do if plaster dust gets stuck in the crevices of my furniture?
If plaster dust settles in the crevices of your furniture, use a soft brush or an old toothbrush to gently dislodge the dust. After this, you can use a vacuum with a hose attachment to suck up the loosened particles. Alternatively, a slightly dampened cloth can also be effective; just be careful not to get too much moisture into the crevices, as this could damage the finish. For really tough spots, consider using a can of compressed air to blow the dust out.
What are the best methods to clean plaster dust off wooden furniture?
To clean plaster dust off wooden furniture, start by using a soft, dry microfiber cloth to gently wipe the surface. This will help to collect the loose dust without scratching the wood. For more stubborn deposits, dampen the cloth slightly with water or a mild furniture polish, making sure not to soak the wood. Wipe again with a dry cloth to remove any remaining moisture. If the dust has settled in crevices, consider using a soft-bristled brush to reach those areas without damaging the finish. Always remember to test any cleaning product on an inconspicuous area first to ensure it does not damage the surface.
Is it safe to use a vacuum cleaner to remove plaster dust from furniture?
Using a vacuum cleaner can be an effective way to remove plaster dust, but caution is required. If you decide to use a vacuum, make sure it has a soft brush attachment to avoid scratching the furniture’s surface. Keep the vacuum at a low suction setting to prevent any damage. Additionally, it’s advisable to use a HEPA filter vacuum, as this type can trap fine dust particles without spreading them back into the air. Always check the manufacturer’s recommendations for your specific furniture before using a vacuum cleaner to ensure that it is safe for your items.


