


The first step involves using a vacuum cleaner with a soft brush attachment to gently remove dust and crumbs from the fabric surface. This prevents dirt from embedding itself, making subsequent upkeep much easier.
Next, for stains, a mixture of warm water and mild soap can be effective. Dampen a soft sponge with the solution and gently blot the stain, avoiding any aggressive scrubbing which might damage the fibers.
For tougher residues, employing a small amount of white vinegar mixed with water can often yield successful results. Apply the mixture with a clean cloth and let it air dry, allowing the fabric to maintain its integrity.

Regular maintenance, including flipping cushions and rotating items, can help preserve the appearance and longevity of your upholstered pieces over time. This simple act minimizes wear on specific areas, ensuring an even look.


Finally, consider using specialized cleaning solutions designed for delicate materials when needed. Always test any product on a hidden area first to verify compatibility with your specific upholstery.
How to Maintain Textiles on Seating
For optimal results, I utilize a soft-bristle brush to gently remove dust and debris. This method ensures that the surface remains free from particles without causing any damage. After brushing, I recommend a damp sponge or cloth to tackle faint stains; dampening is crucial to avoid saturating the fabric.
In cases of stubborn marks, a solution of water and gentle detergent works wonders. I mix a few drops of the cleaner with water, dampen the sponge, and test it on an inconspicuous area first. If successful, I use this mixture on the affected spots with a light touch.
After treating any stains, I follow up with a clean, dry towel to absorb excess moisture. I allow the material to air dry, ensuring proper ventilation to prevent dampness.
Regular routine maintenance using vacuum upholstery attachments can prolong the life of the seating. A weekly vacuuming session keeps dust build-up at bay and preserves the integrity of the fibers.
For a finishing touch, I occasionally consider using a fabric protector spray. This adds a layer of defense against future spills and dirt. I remember to allow any treatment or spray to fully dry before resuming regular use of the item.
Understanding Microfiber Materials
Choosing the right fabric for upholstery is crucial. I often opt for synthetic blends that mimic natural fibers, providing durability and comfort. The structure consists of tiny fibers, dramatically finer than human hair. This unique composition contributes to its ability to trap dust and dirt effectively.
- Composition: Generally, polyester and polyamide are the primary components. These materials unite to create a strong yet soft surface.
- Water Resistance: Many varieties repel liquids, making spills easier to manage. This characteristic is a result of the fibers’ tight weave.
- Durability: Resilient to wear, these materials can withstand frequent cleaning without degrading quickly, but the method of maintenance is crucial.
Colors and textures vary widely, allowing options that suit different aesthetic preferences. Selecting versatile tones can enhance the overall decor while ensuring longevity.
For allergy sufferers, the fine fibers can trap allergens like dust mites, presenting a dual benefit: beauty paired with cleanliness. Regular upkeep minimizes any buildup, maintaining a fresh environment.
Understanding the specific type of this fabric aids in making informed choices during upkeep. Identifying the weave and treatment can guide appropriate care routines, ensuring lasting satisfaction with any piece.
Gathering Necessary Cleaning Supplies
I ensure I have the right tools before tackling any maintenance task. For this process, I typically gather the following items:
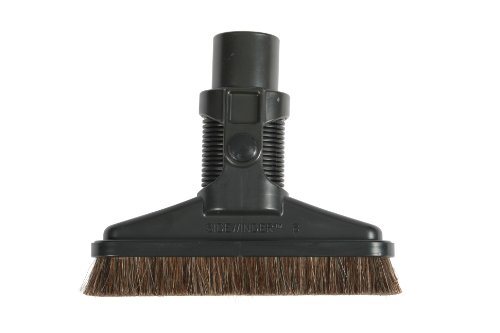
1. A soft bristle brush or vacuum attachment: This helps to remove loose debris and dust effectively without damaging the material.
2. A gentle detergent: I choose a mild soap or upholstery cleaner, avoiding harsh chemicals that could harm the delicate fibers.
3. Distilled water: Using distilled water prevents mineral deposits from tap water, which can leave unsightly spots.
4. A spray bottle: This is useful for evenly distributing the cleaning solution for better application.
5. A clean, white cloth: I prefer white to avoid color transfer that colored fabrics might cause during the process.
6. An optional soft brush: For stubborn spots or ingrained dirt, a clean soft brush can be handy for gentle scrubbing.
Additional Recommendations
I also keep a pair of gloves on hand to protect my hands from any cleaning solutions. It’s vital to maintain a clutter-free workspace, so I ensure the area around is clear to facilitate easy movement. Having all supplies organized helps me focus solely on the task at hand, ensuring thoroughness and efficiency in the work.
Preparing the Furniture for Cleaning
Remove all items from the surface, including decorative objects, books, and electronic devices. This ensures that I can access every area without obstruction.
Gently vacuum the material using a soft brush attachment to eliminate dust and debris. This step prevents particles from scratching the surface during the subsequent steps.
Check for any stains or spots. Identifying these issues beforehand allows me to target them specifically when I begin the treatment process.
For items with detachable covers, if possible, remove them for easier handling. This lends greater flexibility for thorough cleaning.
Lastly, ensure the space is well-ventilated. Opening windows or turning on fans helps in drying and minimizes any potential chemical odors from cleaning solutions.
| Step | Action |
|---|---|
| 1 | Remove items from the surface |
| 2 | Vacuum surface with a soft brush |
| 3 | Check for stains or spots |
| 4 | Remove detachable covers if possible |
| 5 | Ensure good ventilation |
Choosing the Right Cleaning Solution
I recommend considering the type of stains and the material composition of your pieces when selecting a cleaning solution. Opt for water-based cleaners for water-safe textiles and solvent-based ones for oil or grease stains.
Commercial Cleaners
- Check for pH-balanced formulas to avoid damage.
- Look for products specifically labeled for your fabric type.
- Test any new cleaner on a hidden area first.
DIY Solutions
- Mix equal parts of water and white vinegar for a natural option.
- A few drops of liquid dish soap in water can work wonders on tough marks.
- For stubborn spots, baking soda can serve as an abrasive cleaner; just sprinkle, let sit, and wipe off.
Always remember, less is more when applying any solution. Start small and gradually increase if needed, ensuring no residue remains to attract dirt later.
Applying the Cleaning Solution Properly
To effectively treat spots and areas on upholstered items, I apply the solution by using a spray bottle. This method ensures an even distribution without soaking the surface. I hold the bottle approximately 6-8 inches away, aiming to mist rather than drench. This prevents saturating the fibers, which can lead to water damage or mold.
I focus on small sections at a time, allowing the solution to penetrate without overwhelming the material. After spraying, I gently blot the area with a clean, dry towel to absorb dirt and excess moisture. I avoid rubbing vigorously, as this could damage the texture.
Testing Before Full Application
Before tackling any visible stains, I test the cleaning mixture on an inconspicuous area to ensure it doesn’t alter the color or texture. Waiting for the test spot to dry fully allows me to assess if the treatment is safe for broader use.
Using the Right Technique
After spraying, I use a soft-bristled brush to lift the pile gently. This technique ensures that the fabric remains fluffy and doesn’t flatten out during the treatment process. Following this, I let the area air dry completely to prevent any residual dampness that could attract more dirt.
Completing these steps not only revitalizes the texture but also maintains the integrity of the upholstery. Regular maintenance with this approach keeps items looking fresh and inviting.
Techniques for Stain Removal
For oil-based stains, I apply a small amount of dish soap mixed with water directly onto the affected area. Using a soft cloth, I gently blot the stain, taking care not to rub it further into the fibers. After treatment, I wipe the area with a clean, damp cloth to remove any soap residue.
For water-soluble stains like beverage spills, I use a solution of white vinegar and water. I mix equal parts and apply it to the stain using a spray bottle. By allowing it to sit for a few minutes, I aid the cleaning process. Then, I blot the area with a clean, dry towel to absorb the liquid.
Pen marks require a more targeted approach. I use rubbing alcohol applied to a cotton ball or cloth, dabbing it on the stain. This method helps lift the ink without damaging the fibers. After treatment, I rinse the area with water to eliminate any remaining alcohol.
For stubborn stains, I recommend a paste made from baking soda and water. After applying it to the stain, I let it sit for 15-20 minutes. Once time is up, I gently scrape off the dried paste with a plastic spatula and vacuum the residue.
For dried stains, I find that lightly steaming the area can loosen residue. I carefully hover a steam cleaner over the stain, ensuring not to saturate the material. After a few moments, I use a clean cloth to blot up any remaining moisture.
Regular maintenance with a brush designed for this specific textile helps prevent the buildup of dirt and stains, prolonging the lifespan of your upholstery.
Drying and Restoring Microfiber Texture
After washing, I recommend air-drying the fibers instead of using a dryer. Lay the item flat on a clean, dry surface away from direct sunlight. This helps maintain the integrity of the material and prevents shrinking.

If the fabric appears flat or stiff, gently fluff it up. Use a soft-bristled brush or your fingers to restore the texture. Brushing helps separate the fibers and brings back its softness.
For an added boost, lightly mist the surface with water to dampen it, then brush again. This technique can revive the pile and enhance the tactile feel.
It’s beneficial to avoid fabric softeners during the drying process, as they can coat the fibers, reducing their effectiveness and altering their texture. Stick to natural drying methods.
If stains persist after drying, a light steam treatment can assist in relaxing the fibers. Hold a steam iron at a distance to avoid direct contact, and allow the steam to penetrate the material.
| Method | Recommendation |
|---|---|
| Air-Drying | Lay flat on a clean surface away from sunlight |
| Fluffing Up | Use a soft brush or fingers |
| Light Mist | Lightly spray water before brushing |
| Avoiding Softener | Do not use fabric softeners during drying |
| Steam Treatment | Use steam iron from a distance for deep cleaning |
Maintaining Microfiber Furniture Regularly
Regular brushing or vacuuming using a soft brush attachment removes dirt and debris, preventing buildup. I make it a habit to do this at least once a week to keep surfaces looking fresh.
I also recommend addressing spills immediately; dabbing with a clean, dry cloth prevents stains from setting. For deeper maintenance, I lightly spray a fabric-safe refresher every few months to keep the fibers looking vibrant and to eliminate odors.
To retain the texture and softness, I fluff the surfaces by gently rubbing them with my fingers or a soft cloth. This method keeps the fibers upright and enhances the overall appearance.
Every few months, I perform a thorough inspection for wear and tear on seams and edges, making minor repairs promptly using a suitable adhesive to prolong lifespan and maintain aesthetics.
FAQ:
What is the best way to clean microfiber cloth furniture?
To clean microfiber cloth furniture effectively, first, remove any loose dirt or debris by vacuuming with a soft brush attachment. Next, check the care label on your furniture for any specific cleaning instructions. If safe to do so, mix a few drops of mild dish soap with water in a spray bottle. Lightly mist the stained areas, taking care not to soak the fabric. Blot with a clean, white cloth to lift the stains. For stubborn spots, you might consider using a mixture of equal parts vinegar and water. After cleaning, allow the fabric to air dry, then gently brush the surface with a soft brush to restore its texture.
Can I use bleach on microfiber cloth furniture?
No, using bleach on microfiber cloth furniture is not recommended, as it can damage the fibers and cause discoloration. Microfiber is made of polyester and polyamides, which do not react well to harsh chemicals. Instead of bleach, opt for mild soap or a gentle upholstery cleaner designed for microfiber materials. Always test any cleaner on a small, inconspicuous area before applying it to the entire surface.
How often should I clean microfiber couch or chairs?
It is advisable to clean microfiber furniture at least once every month to keep it looking fresh and to prevent dirt buildup. However, if you have pets or children, you may want to clean it more frequently—perhaps every two weeks. Regular vacuuming helps maintain its cleanliness between deep cleans. Spot cleaning any stains as soon as they occur can also help keep your furniture in good condition for longer periods.
Are there specific cleaning products recommended for microfiber furniture?
When cleaning microfiber furniture, it is best to use products that are safe for delicate fabrics. Look for cleaners specifically labeled for use on microfiber or upholstery. Water-based cleaners and gentle upholstery shampoos can be effective. Avoid using solvent-based products unless the care tag specifically indicates they are safe. Always follow the instructions on the product label and conduct a patch test before full application to ensure compatibility with your fabric.
What should I do if my microfiber furniture has water stains?
If you notice water stains on your microfiber furniture, start by lightly spraying the stained area with a mixture of one part vinegar and one part water. Gently blot the area with a clean, white cloth to lift the stain. You may need to repeat this process a few times. After the stain is removed, allow the fabric to air dry completely, and then brush it with a soft brush to restore the original texture. It is crucial not to rub the area too hard, as this can damage the microfiber finish.