Begin with a thorough cleaning. Dust and wipe down your surfaces using a damp cloth to ensure no dirt interferes with the adhesion of the paint. Let it dry completely before proceeding.
For the base, select a high-quality primer suited for your specific surface. Applying a primer enhances paint adherence and ensures an even finish. Use a brush for intricate details and a roller for larger areas to maintain a smooth application.


Once the primer has dried, choose a suitable paint that provides good coverage. Chalk paint is often favored for a matte finish, while water-based paint offers excellent durability. Apply at least two coats, allowing ample drying time in between to achieve that flawless, polished appearance.
After painting, seal the surface with a protective topcoat, particularly if it’s a high-traffic area. This step enhances durability and maintains the brightness of the finish. A satin or semi-gloss topcoat works well to protect your newly refreshed look.
Transforming Items to a Lighter Shade
Begin with thorough cleaning of the surfaces. Dust and dirt can prevent paint from adhering properly, so a clean base is essential. Use a mild detergent and a damp cloth to wipe down every part of the piece.
Choosing the Right Materials
Select high-quality primer and paint specifically designed for the material of your item, whether it’s wood, metal, or other composites. For a smoother finish and better durability, opt for water-based varieties. A semi-gloss or satin finish will provide a subtle sheen, enhancing the contemporary look.
Application Technique
Use a brush or roller for application. Start with a thin layer of primer to ensure good adhesion and prevent bleed-through. Allow it to dry completely before proceeding. Then, apply the paint in even strokes, working in small sections, and avoid overloading the brush to prevent drips. Two to three coats may be necessary, with drying time in between.
Finally, seal the surface with a clear topcoat for added protection and longevity. This step is particularly important for high-traffic areas or surfaces that encounter moisture.
Choosing the Right Type of Paint for Furniture
Opt for high-quality acrylic latex paint, which provides excellent adhesion and durability on various surfaces. It is water-based, ensuring easy cleanup with soap and water while minimizing harmful fumes.
Consider using chalk paint for a matte finish that can be distressed for a vintage look. It requires minimal surface preparation and can adhere well to different textures, making it quite versatile.
For an ultra-smooth, polished finish, alkyd (oil-based) paint works best. This type takes longer to dry but creates a hard, durable finish ideal for frequently used items.
Priming is crucial. Use a primer designed for your selected paint type, ensuring better coverage, adhesion, and reduced paint absorption. This step is particularly important for dark surfaces.
Test the paint on a small, inconspicuous area. This will allow you to gauge the finish and coverage before committing to the entire piece.
| Type of Paint | Finish | Adhesion | Drying Time |
|---|---|---|---|
| Acrylic Latex | Satin/Gloss | Excellent | Quick |
| Chalk Paint | Matte | Good | Moderate |
| Alkyd (Oil-based) | Semi-gloss/Gloss | Very Good | Long |
By selecting the right type and conducting thorough testing, I ensure that the outcome meets my expectations and the finish is both beautiful and lasting.
Preparing Your Furniture for Painting
Thoroughly clean the surface before applying any paint. Use a mixture of warm water and mild soap to remove dust and grease. For tougher stains, consider using a degreaser.
Sand the piece adequately to create a smooth surface for the coating. Begin with medium-grit sandpaper to eliminate imperfections, followed by fine-grit for a polished finish. Ensure to sand in the direction of the grain.
Repair any damage, such as dents or scratches, with wood filler. Apply it to the affected areas, let it dry, and sand it smooth, ensuring a seamless appearance.
Remove hardware including knobs, handles, and hinges. This ensures that the paint job is neat and prevents overspray on these components.
Consider using a primer if the original surface is dark or glossy. A quality primer will improve adhesion and enhance the final appearance of your new finish.
Before starting the painting process, prepare the workspace. Lay down a drop cloth to protect your floors and have all your tools within easy reach.
Finally, ensure adequate ventilation in the painting area. Open windows and use fans to promote airflow, preventing the buildup of fumes during the application.
Applying Primer for a Smooth Finish
I recommend starting with a good-quality primer to achieve a flawless surface. Choose a primer designed specifically for the material you’re working with, whether it’s wood, laminate, or metal.
Before applying, ensure the piece is clean and dry. I usually wipe it down with a damp cloth and allow it to air dry completely. If there are any rough spots, I sand them lightly to create an even base.
Using a foam roller or a high-quality brush, I apply a thin, even coat of primer, working in the direction of the grain or texture. This minimizes the appearance of brush strokes and ensures better adhesion for the next layer. I typically let it dry according to the manufacturer’s instructions, which is usually a few hours.
After the primer has dried, I give it a light sanding with fine-grit sandpaper. This step creates a smoother surface for the topcoat, helping to eliminate any imperfections.
In some cases, a second coat of primer can be beneficial, especially for darker pieces being transformed to a lighter shade. I repeat the application process, sanding lightly between coats to maintain a smooth finish.
Once the primer is set and sanded, I feel confident moving forward with the painting, knowing that a solid foundation has been established for a polished look.
Selecting the Best Painting Technique
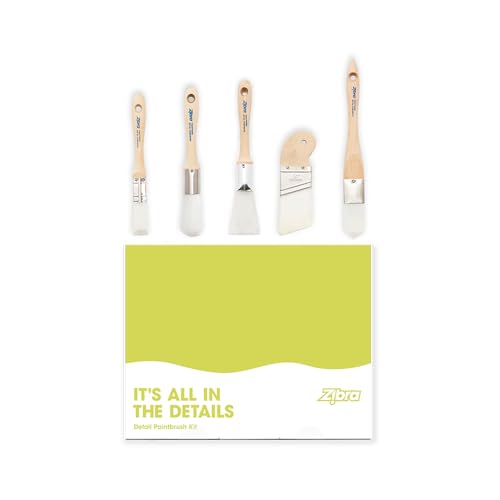
I prefer the brush technique for precise applications on smaller pieces. A high-quality brush allows for better control and even coats. For larger surfaces, I recommend the roller method. It covers more area quickly and provides a smooth finish with minimal marks.
Another option is spray painting, which is perfect for intricate details and a flawless appearance. However, this technique requires outdoor use or a proper ventilation system to avoid inhalation of fumes.
Before choosing, consider the texture. Smooth surfaces benefit from brushes or rollers, while textured items may require spray for complete coverage. Always test a small, inconspicuous area first to ensure the method works well with your chosen paint.
For best results, use multiple thin coats regardless of the technique. This approach minimizes drips and unevenness, leading to a polished look. Remember to allow adequate drying time between each layer.
Finally, ensure your workspace is prepared. Good lighting makes a difference in visibility during the process, enabling me to identify any missed spots and ensure an even application.
Sealing Your White Furniture for Longevity
Applying a protective finish is essential for preserving the appearance and integrity of your newly transformed pieces. I recommend using a high-quality sealant to shield against scratches, stains, and wear.
Consider the following options for protection:
- Polyurethane: This provides an impermeable barrier, especially for frequently used items. Opt for water-based options for a clear finish that dries quickly.
- Wax: Applying wax offers a matte finish and requires periodic reapplication. It’s suitable for low-traffic pieces.
- Topcoat Spray: Easy to apply, sprays are ideal for intricate areas. Ensure to choose a product suitable for the paint you’ve used.
Before sealing, allow the paint to cure fully, typically around 24 to 48 hours. Lightly sand the surface with fine-grit sandpaper to promote adhesion of the sealant.
Application tips:
- Use a clean brush or roller for an even coat.
- Apply multiple thin layers, allowing each to dry before the next. This enhances durability.
- Follow the manufacturer’s instructions for optimal results.
Regular maintenance extends the life of your pieces. Keep the surfaces dust-free and consider reapplying the finish annually, especially for high-use items. This proactive approach ensures your investments remain pristine for years to come.
Troubleshooting Common Painting Issues
If I’m faced with paint that is peeling, it’s essential to strip the affected areas back to the bare material before applying a fresh coat. I ensure the surface is clean and smooth, using sandpaper if necessary.
For uneven or patchy results, I like to thin the paint slightly or apply an additional coat to achieve a uniform appearance. It’s important to monitor the drying time, as applying subsequent layers too quickly can lead to imperfections.
Dealing with Streaks and Brush Marks
When brush strokes become noticeable, I switch to a foam roller for a smoother finish. I also consider using a higher-quality brush designed for the specific type of medium I’m using. Ensuring proper load and technique avoids those unwanted marks.
Addressing Color Variations
If the final hue doesn’t match expectations, I might need to blend two shades to achieve the desired tone. Conducting a small test patch beforehand helps confirm the result before proceeding with the entire piece.
In cases of drips, I immediately smooth over the excess paint with my brush or roller while it’s still wet. After it dries, I’ll sand the drip gently before continuing with additional layers.
No matter the challenge, methodical attention to each problem helps me stay on track for a successful outcome.
Maintaining the Fresh Look of Bright Furnishings
Regular cleaning is essential. For daily upkeep, I use a soft, damp microfiber cloth to wipe away dust and smudges. This prevents grime and stains from becoming stubborn.
Utilizing Protective Covers
Using slipcovers or throws can shield surfaces from spills, scratches, and general wear. When hosting gatherings, I opt for these covers to maintain the pristine appearance of my pieces.
Promptly Addressing Stains
For accidental marks or spills, immediate action is crucial. I blot the area gently, avoiding rubbing, which can spread the stain. Using a mild solution of soap and water usually does the trick, but I always test it on a hidden spot first.
Applying a coat of clear sealant every couple of years can help protect surfaces from wear and yellowing. I always ensure the sealant is compatible with my previous layers of paint for an even finish.
Regular inspections for scratches or scuffs allow me to address minor issues promptly, preventing them from becoming larger problems. Keeping a small touch-up kit handy simplifies the process.


