 Caleb Turner

Begin your project by gathering the necessary supplies: a pair of color finishes, brushes, a spray bottle of water, painter’s tape, and a sanding block. Proper preparation is key to achieving a flawless look.
Ensure the surface is clean and free of dust: wipe it down with a damp cloth. Lightly sand any rough spots to promote adhesion. If you’re working on a previously finished piece, stripping or priming may be required.

Next, apply painter’s tape carefully: delineate the areas where you want each color to meet. This will aid in creating sharp lines and a professional appearance. Be meticulous in your placement, ensuring that the tape adheres well to prevent bleeding.
Start with the lighter shade first: apply the initial coat evenly using your brush. Allow it to dry completely before proceeding to the second hue. Two thin coats typically achieve better coverage than one thick application.
Once the first color is dry: carefully remove the tape and then apply the darker tone. This contrast will enhance the depth and character of the piece. After the final layer, a protective sealant will help to maintain the finish over time.

Finishing touches are essential: inspect for any touch-ups needed, and sand lightly between layers if you wish for a smoother texture. Your transformed piece should now reflect your unique style with complementary tones both standing out and harmonizing.
Painting Techniques for a Two-Tone Finish
I recommend using a painter’s tape to achieve clean lines between different shades. First, apply the tape carefully along the boundaries where the two hues will meet. Press down firmly to prevent any bleeding during application.
Select a base coat that complements your desired top shade. Allow the base layer to dry completely before applying the second hue. It’s crucial to have a well-prepared surface; lightly sand any rough spots and make sure to clean the piece to eliminate dust.
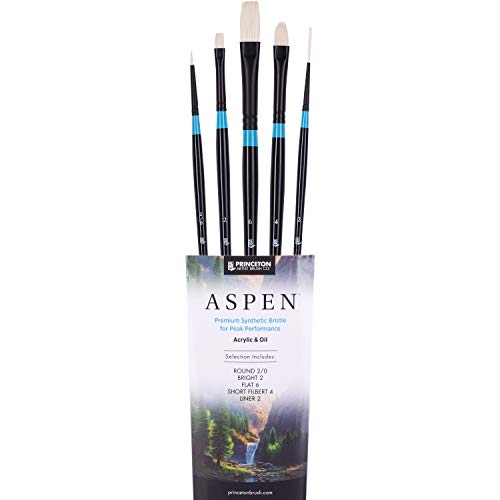
Apply the first hue using a brush or foam applicator, depending on the texture you prefer. If you opt for a brush, use long strokes to ensure even coverage. It’s best to work in thin layers, allowing each coat to dry adequately before moving on. For the contrasting color, use a smaller brush for more detailed areas, especially when precision is required.
After applying the second shade, remove the tape while the paint is still slightly wet to avoid peeling. If necessary, touch up any areas where the colors may have overlapped. A sealant can enhance durability and provide a polished finish, so consider applying a protective topcoat after everything is dry.
Selecting the Right Chalk Paint for Your Project
Choose a brand that has a reputation for quality and adheres well to various surfaces. I prefer options that require minimal prep work, which saves time and effort. Look for water-based varieties as they allow for easy clean-up and lower odor levels.
Key Factors to Consider
Examine the finish options; some are matte, while others offer a slight sheen. A soft matte finish typically works well for a rustic look, while a satin finish can provide a more contemporary vibe. Additionally, ensure the selected product has good opacity; this allows for fewer coats, making the application process quicker.
| Brand | Finish Options | Opacity | Drying Time |
|---|---|---|---|
| Rust-Oleum | Matte, Satin | High | 1-2 hours |
| Miss Mustard Seed | Matte, Eggshell | Medium | 1-3 hours |
| Annie Sloan | Matte, Soft Sheen | High | 30 minutes |
Testing Before Committing
Before starting the main project, I recommend conducting a small test patch on an inconspicuous area. This will allow you to see how well it adheres to the surface and how the color looks once dried. Adjust your selection based on this test to achieve the desired outcome.
Preparing the Furniture Surface for Painting
Ensure the surface is clean and free from dust or grease. I typically use a damp cloth with a mild detergent to wipe down the item. This eliminates any particles that may interfere with adhesion.
If the piece is previously finished, lightly sand areas to promote better bonding. A fine-grit sandpaper works well to scuff the existing finish without damaging the underlying material. After sanding, another thorough wipe-down is essential to remove any sanding dust.
Repairing Imperfections
Before applying any color, it’s crucial to address chips, dents, or scratches. I use wood filler for wooden items, ensuring it’s smoothed out to match the surface. Once dried, a light sanding smooths the repaired area before wiping it clean.
Priming the Surface
For particularly glossy finishes or surfaces that might bleed, applying a primer can enhance coverage and durability. I recommend a primer suitable for the material type, which assists in achieving a more even final result. Allow adequate drying time before starting the coloration process.
Choosing a Color Combination that Works
I recommend starting with a color wheel for inspiration. Complementary shades, which are opposite each other on the wheel, create a striking visual contrast. For example, pairing a soft blue with a warm orange can add depth. Alternatively, analogous colors, like blue and green, yield a harmonious and cohesive look.
Testing Shades
- Purchase small samples of selected hues.
- Apply them to a discreet area of your item.
- Evaluate how they interact at different times of the day under varying light conditions.
This method helps you see which combinations truly resonate and complement each other.
Consider the Space
Think about where your piece will be placed. If it’s in a cozy nook, softer tones might enhance the ambiance. In larger spaces, bolder contrasts can make a statement. Take into account existing decor, textiles, and lighting in the room for seamless integration.
Lastly, ensure that your selection reflects your personal style. Ultimately, the chosen hues should evoke your desired emotions and aesthetics.
Applying the First Color: Tips and Techniques
Before applying the initial layer, ensure the piece is dust-free and dry. I prefer using a quality synthetic brush for smooth application. Load the brush with a moderate amount of the chosen shade to avoid drips. Start from the top and work your way down, as this helps control any potential splatters.
Technique Details
Use long, even strokes while keeping the brush at a slight angle. This allows for better coverage and fewer brush marks. In corners and detailed areas, utilize a smaller brush or a foam applicator to ensure precision. For larger surfaces, I often use a roller, which speeds up the process significantly without compromising the finish.
Drying and Sanding
After the first coat, let it dry completely, which typically takes about an hour but can vary based on environmental conditions. A light sanding with fine-grit paper once dry creates a smoother surface for the subsequent coat. Wipe away dust with a damp cloth before proceeding to enhance adhesion.
Choosing a complementary shade for the second layer and planning transitions between the two hues will yield the best result. Reassess areas that may need additional coverage, as the first color often reveals areas that could benefit from a second application.
Masking Techniques for Crisp Color Separation
Use painter’s tape to achieve clean lines between shades. Apply the tape carefully to outline the area you wish to mask. Press down the edges with a putty knife for a tighter seal, preventing bleed-through.
Types of Tape
- Blue Masking Tape: Ideal for straight edges, removable without damaging the surface.
- Green Painters Tape: Designed for delicate surfaces, perfect for intricate details.
- Foam Tapes: Useful for creating rounded edges and soft curves.
Additional Techniques
- Apply a base coat of the lighter hue along the edge of the tape. This step creates a barrier, sealing the tape and further preventing any leakage of darker tones.
- Cut the tape at an angle for ease of removal. This method allows for a more professional finish.
- Remove the tape while the last layer is still slightly wet to avoid peeling any paint away.
- If you accidentally get paint on the unwanted area, quickly wipe it off with a damp cloth before it dries.
Experimenting with these methods enhances the precision of your work, allowing for appealing visuals in your project. Practice makes perfect, so try these techniques on a small sample area first to master your skills.
Applying the Second Color: Best Practices
Before starting, ensure the initial layer is thoroughly dry to avoid blending. I recommend waiting at least 2-4 hours, depending on humidity and temperature.
For the second hue, select a high-quality brush or roller for smooth application. A synthetic brush works well for intricate areas, while a foam roller can cover larger, flat surfaces effectively.
Layering Technique
Gently stipple or feather the new shade over the first layer, taking care to avoid heavy accumulations. This technique creates depth and texture, enhancing the visual appeal. Always apply in thin coats to avoid drips.
Pay attention to areas where the two tones meet; these should transition seamlessly. If there’s any bleeding, quickly address it with a damp cloth before it sets.
Finishing Touches
After the second coat dries, examine the finish under varying lights, adjusting any areas needing a touch-up. A light sanding between layers can achieve a smoother texture, ensuring the final finish is polished.
Consider applying a protective sealant once everything is set. This step not only enhances durability but also elevates the overall look, making your project stand out.
Finishing Touches: Sealing and Protecting Your Work
To ensure longevity and durability, applying a protective finish is a must. Start with a clear wax or a water-based sealer specifically designed for the type of surface you’ve created. A wax finish provides a soft, matte look while enhancing texture, whereas a sealant offers a more robust, glossy finish.
Application Tips
Apply your chosen product with a clean, lint-free cloth or a soft brush. For wax, work in small sections, using circular motions to ensure even coverage. Allow it to dry completely before buffing with a dry cloth for a smooth finish. If you opt for a sealant, follow the manufacturer’s instructions regarding drying times and the number of coats needed.
Maintenance Advice
Regular maintenance is crucial. Reapply wax every 6-12 months, depending on usage. For sealed surfaces, clean gently with a damp cloth and avoid harsh chemicals. Using coasters and placemats can further protect against scratches and stains, preserving the beauty of your project for years to come.