Utilize modular elements to maximize the potential of your living quarters. Consider a multi-functional piece that easily transforms in response to various needs–like a sofa that converts into a bed or a table that collapses for convenient storage. This approach not only enhances usability but also allows for greater flexibility in room layout.
Incorporate vertical spaces by installing shelves that reach the ceiling. This strategy effectively draws the eye upwards and takes advantage of unused areas while providing additional storage for books, decorative items, and everyday essentials. Choosing open shelving keeps the environment airy and less cluttered.


Utilize hidden compartments to enhance functionality without compromising aesthetics. Furniture with built-in storage compartments can conceal items, maintaining a clean and organized space. For example, benches with storage beneath the seat or ottomans designed with internal space can be both attractive and practical.
Choose lightweight materials for easy rearrangement. Consider options that allow for simple repositioning, such as lightweight tables or stackable chairs. This capability provides the opportunity to reconfigure your layout based on activities or gatherings without much hassle.
Lastly, ensure that every piece has a purpose. Evaluate each item and eliminate the unnecessary to create a more streamlined and thoughtful environment. Focusing on functionality will ultimately transform your area into a more inviting and comfortable space.
Creating Multi-Functional Pieces
I focus on designing items that serve multiple purposes, maximizing usability in limited areas. A great example is a bed that incorporates drawers underneath for storage or a desk that can be folded away when not in use.
Choosing the Right Materials
Select lightweight yet sturdy supplies to facilitate easy movement and adaptability. Plywood or engineered wood offers durability without excessive weight, making it ideal for versatile constructs.
Incorporating Hidden Features
Add concealed compartments to provide hidden storage. Items such as side tables can incorporate drawers under their surfaces, allowing concealed storage for essentials without cluttering your surroundings.
Utilizing Vertical Space
Maximize height by installing shelving units that extend to the ceiling. This not only draws the eyes upward, creating an illusion of spaciousness, but also provides additional storage without occupying too much floor area.
Designing Modular Elements
Develop components that can be rearranged or connected based on needs. For instance, modular seating can be reconfigured for gatherings or solo use, combining comfort with flexibility.
Functionality in Aesthetics
Avoid sacrificing style for practicality. Opt for sleek finishes and harmonious color palettes that complement your surroundings while ensuring every piece serves a purpose, enhancing both appearance and utility.
Using Foldable Designs
Incorporate folding mechanisms in tables and seating for quick adjustments. Such features allow for easy transformation from a compact state to full functionality without occupying excess space.
Integrating Technology
Consider including electrical outlets and USB ports in desks or nightstands, offering modern convenience without additional items cluttering your environment.
Testing Your Constructs
Before finalizing any design, I recommend creating prototypes to ensure functionality meets expectations. This also allows for adjustments, refining designs for optimal usage.
Choosing the Right Materials for Compact Furniture
Opt for lightweight and durable options such as plywood or MDF. These materials provide structural integrity without adding unnecessary weight, making them ideal for compact designs.
Considerations for Durability
When selecting materials, prioritize those that can withstand wear and tear. This includes:
- High-Pressure Laminates: Great for surfaces needing scratch and stain resistance.
- Metal Components: Use steel or aluminum for frame support; they offer strength without bulk.
- Engineered Woods: Often treated for moisture resistance, ensuring longevity in varied environments.
Aesthetics and Functionality
Balance appearance with practicality. Consider these elements:
- Natural Finishes: Wood veneers provide a warm look while maintaining a lightweight profile.
- Textiles: Choose durable fabrics for upholstery that are both stylish and easy to clean.
- Multifunctional Features: Materials should allow for flexible designs, such as convertible or expandable pieces.
Experiment with combinations to create unique and efficient designs that resonate with your style while remaining practical.
Design Ideas for Multi-Functional Furniture
Consider incorporating a sofa bed that seamlessly transforms from a comfortable seating area into a restful sleeping space. This piece not only saves room but also serves dual purposes, making it ideal for small apartments.
Convertible Tables
Another innovative option is a convertible table. A dining table that can be expanded or collapsed based on the number of guests provides versatility. You might also explore nesting tables that can be stored together or used separately depending on your needs.
Storage Solutions
Storage ottomans can double as both seating and a place to tuck away blankets or magazines. Look for under-bed drawers to maximize unused space for stashing items out of sight, while still keeping them easily accessible.
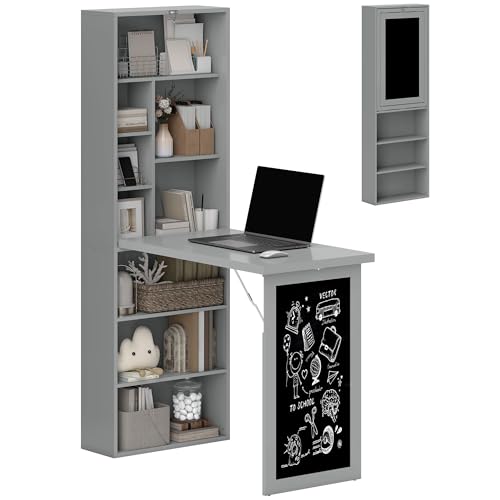
Incorporate wall-mounted shelves that function as both display areas and storage, freeing up floor space and adding visual interest. Utilize a foldable desk to create a workspace that can be tucked away when not in use.
Step-by-Step Guide to Building Folding Tables
Choose the right dimensions for your project. A standard size for a folding table is 60 inches long and 30 inches wide. Determine the height based on chairs you plan to use, typically around 30 inches.
Materials needed: 1×4 lumber for the tabletop frame, 3/4-inch plywood for the surface, 2×4 lumber for legs, hinges, and screws. Ensure all wood is smooth and free of splinters to maintain safety and aesthetics.
Begin by constructing the tabletop frame. Cut the 1×4 boards to create a rectangle. Join the corners using wood screws, ensuring a sturdy base. Attach the plywood on top using screws spaced about every 12 inches for security.
Next, create the legs. Cut four pieces of 2×4 lumber to your desired height. To allow for folding, use a simple hinge mechanism. Secure one side of the hinge to the tabletop frame and the other side to each leg.
To stabilize the structure when set up, add diagonal braces on the legs. Cut shorter pieces of 2×4 at a 45-degree angle. Attach these at the midpoint of each leg to connect with the tabletop frame.
Finish with a protective coat. Sand the entire table thoroughly and apply polyurethane or a suitable stain to enhance durability and appearance. This also helps in protecting the wood from moisture and wear.
| Step | Action | Materials |
|---|---|---|
| 1 | Choose dimensions | Measuring tape |
| 2 | Create tabletop frame | 1×4 lumber, screws |
| 3 | Attach plywood | 3/4-inch plywood, screws |
| 4 | Cut and attach legs | 2×4 lumber, hinges |
| 5 | Add diagonal braces | 2×4 lumber |
| 6 | Finish surface | Sandpaper, polyurethane |
Test stability before regular use. Ensure all joints are secure to prolong the life of your creation. This method allows for a practical, portable solution that fits neatly into limited spaces.
Incorporating Storage Solutions in Small Spaces
Utilizing vertical storage is paramount. Wall-mounted shelves free up floor area while providing essential space for books, decor, or even plants. Consider adjustable shelves to accommodate different item sizes.
Multi-Functional Pieces
Opt for items that serve dual purposes. A bench with internal storage can function as seating while concealing seasonal items or footwear. Choose ottomans that open up for additional storage, providing flexibility without overcrowding.
Closet Enhancements
Maximize closet utility by adding extra rods or hanging organizers. Utilize vacuum-sealed bags for bulky items like winter coats. Over-the-door racks can hold shoes or accessories, maximizing verticality in tight quarters.
Measuring and Planning for Optimal Space Usage
Begin with precise measurements of the area available for your project. Take note of the room’s dimensions, including height, width, and length, as well as any architectural features such as windows, doors, and outlets. Use a tape measure to ensure accuracy; it’s easier to adjust your designs if you have exact figures from the start.
After obtaining your measurements, create a scaled drawing of the intended area. Graph paper can assist in visualizing the layout and allows for easy adjustments. I often use software tools tailored for interior design to simulate the placement of items digitally. This approach helps in determining how much room each piece will create.
Assess your requirements carefully to prioritize functionality. Identify the primary uses of the area and the activities that will occur there. Each item must contribute to these goals while minimizing clutter. For instance, if you’re designing a compact living area, consider elements that can serve dual purposes, like a desk that can transform into a dining table.
When conceptualizing dimensions for each piece, account for accessibility and movement. Leave ample pathways to foster ease of movement throughout the space. A minimum of 24 inches between pieces is usually comfortable, but this may vary based on personal preference and the nature of the activities.
Incorporate storage solutions in your plans. Utilize vertical space by including shelving and cabinets that extend upward rather than outward. This technique maximizes floor space while maintaining organization. Drawer depth and shelf spacing should align with the items you anticipate storing to ensure efficiency.
Finally, consider the aesthetic and how different pieces will harmonize within the environment. Create a cohesive look while keeping practicality at the forefront. Set a realistic budget that reflects the materials and designs you favor, and adjust your plans accordingly to stay within your financial means.
Techniques for Assembling and Disassembling Furniture
For seamless assembly, I recommend utilizing dowels and cam locks. These connectors offer stability and strength while allowing for easy disassembly. Align the components accurately before inserting dowels, ensuring a snug fit.
Incorporating modular designs can further simplify the process. Choose pieces that can be connected or taken apart without tools, relying on interlocking systems or sliding joints. This approach not only speeds up assembly but also enhances portability.
Label each part clearly during disassembly. I use color-coded stickers or a numbering system, which saves time and reduces frustration during reassembly. This is particularly helpful for larger installations.
To enhance durability, consider pre-drilling holes for screws. This minimizes the risk of splitting the material and ensures a tighter grip. Make sure to use the correct screw types tailored to the chosen elements of your structure.
Avoid over-tightening screws or connectors. This can lead to material damage or difficulty when reversing the process. Test each joint for stability without excessive force.
Utilizing a felt pad or foam can protect surfaces during assembly and disassembly. This technique reduces scratches and makes it easier to slide components together without resistance.
When it’s time to take apart, reverse the order of assembly. Following the sequence allows for a smoother operation and reduces wear on components. Keep track of all connectors and hardware to ensure nothing is lost.
Incorporating these strategies allows for convenient management of concealed systems, enabling efficient transformation of any compact living area according to need.
Finishing Touches to Enhance Space Saving Designs
Incorporating tailored accessories can elevate your compact creations. Consider using modular components that allow for quick adjustments based on user needs. For example, adding detachable shelves or pull-out drawers can maximize functionality without compromising aesthetic appeal.
Practical Accessories
Adding cushions or padded elements offers comfort while ensuring that items remain lightweight and mobile. Choose materials that are durable yet soft to enhance the usability of your designs. Opt for removable covers for easy cleaning and maintenance.
Color and Texture
Select a cohesive color scheme that creates a sense of harmony in smaller areas. Light colors can brighten a room, making it appear more spacious, while contrasting textures add depth. I often suggest using a mix of textiles and finishes to create a layered look, which makes each piece stand out.
Incorporating lighting is another vital aspect. Integrated LED strips under shelves or around corners can enhance visibility while serving as a decorative element. This not only draws the eye but also makes the room feel larger by eliminating shadowy corners.
Finishing touches like wall-mounted artwork or decorative items can personalize your setup. Ensure these accents are lightweight and easy to move–this flexibility allows for a dynamic environment that adapts as needed.
Utilizing multi-purpose items, such as benches that double as storage or side tables with built-in compartments, maximizes utility in limited areas. The more functions a piece serves, the better it contributes to an organized and stylish setting.


