Begin your project with thorough cleaning to remove dust, grease, and old finishes. A simple mixture of mild detergent and water works wonders. Wipe down surfaces using a damp cloth, and ensure everything dries completely before proceeding.
Next, I recommend applying a primer specifically designed for non-porous materials. This step is crucial as it enhances paint adhesion and prevents peeling over time. After applying the primer, allow it to cure as per the manufacturer’s instructions.
Once primed, select a high-quality paint suitable for the desired finish. I personally prefer spray paint or a roller for a smooth application. Two to three coats, with adequate drying time between each, should provide an even, durable result. Don’t forget to finalize with a clear topcoat for extra protection and longevity.
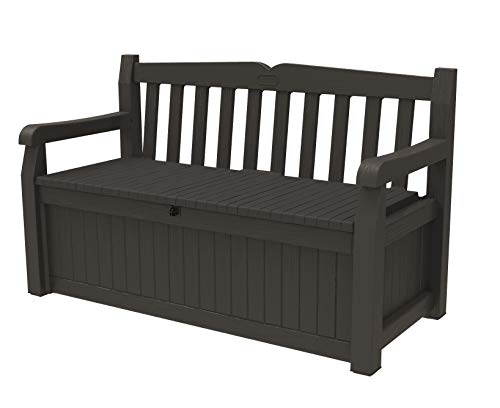
Rejuvenating Your Particle Board Pieces
Begin by thoroughly cleaning the surface with a damp cloth to remove dust and debris. Let it dry completely.


Preparation Steps
Use fine-grit sandpaper to lightly scuff the surface, creating a better grip for the upcoming layers. Focus on edges and areas prone to peeling. After sanding, wipe down the surface with a clean, dry cloth to eliminate any dust particles.
Painting Process
Select a high-quality primer suitable for your chosen finish. Apply the primer evenly with a foam roller or brush, ensuring full coverage. Allow it to dry as per the manufacturer’s instructions. Follow this with your selected paint, ideally a latex or acrylic option, applying thin coats to prevent drips and ensure a smooth finish. Between coats, lightly sand again to achieve optimal adhesion. Finish with a protective topcoat for durability.
Remember, patience is key. Allow each layer ample drying time before adding the next for the best results.
Choosing the Right Paint for MDF
Selecting the correct type of coating is fundamental. I recommend using acrylic or water-based paints, as these provide excellent adhesion and flexibility, reducing the chance of cracking. They are also low in volatile organic compounds (VOCs), making them a safer choice for indoor use.
Paint Types Comparison
| Paint Type | Advantages | Disadvantages |
|---|---|---|
| Acrylic Paint | Quick drying, easy to clean up, non-toxic | Can require multiple coats for full coverage |
| Oil-based Paint | Durable finish, excellent for high-traffic items | Longer drying time, harsher fumes |
| Chalk Paint | Matte finish, great for a vintage look, minimal prep | Less durable, may need sealing for protection |
Choosing a paint with a satin or semi-gloss finish enhances durability and makes cleaning easier. It’s also wise to consider primer; a high-quality primer designed for engineered wood can seal the surface and prevent absorption of paint, ensuring even application and longevity.
Color Selection Tips
Consider the room’s color palette and the intended mood. Lighter tones can create a spacious feel, while darker shades add drama. Samples are beneficial; testing a small area helps in visualizing the final result.
Preparing the Surface for Painting
First, ensure the surface is clean. I use a damp cloth to wipe down any dust or debris. If there are stubborn stains, I apply a mild detergent solution and scrub gently before rinsing and drying.
Sanding the Board
Next, I take fine-grit sandpaper (220 grit works well) and lightly sand the entire area. This step creates a smooth texture and promotes better adhesion of the paint. I make sure to sand in the direction of the grain to avoid scratches and damage.
Applying a Primer
After sanding, I apply a high-quality primer formulated for synthetic materials. I choose a spray or brush-on type, ensuring even coverage. Priming helps seal the surface, prevents peeling, and enhances the final color. Once applied, I leave it to dry according to the manufacturer’s instructions before moving on to paint application.
Necessary Tools and Materials for Repainting
For this project, I gather a few critical items to ensure the coating sticks well and looks polished. First, I need high-quality primer suitable for non-porous surfaces to create a solid base for my new finish.
Next, I choose an appropriate paint that adheres effectively to the surface. Acrylic latex paints or water-based enamel works best for a durable top layer. I ensure I have a color that matches my vision or the existing color scheme.
I stock paintbrushes in various sizes, including a wide one for larger areas and a smaller brush for precise edges and corners. A foam roller can also be valuable for achieving a smooth finish on flat sections.
A good-sized painting tray allows easy access to paint while working. I grab some painter’s tape to cover any areas I want to protect from paint splatter.
For preparation, I collect sandpaper or a sanding sponge to smooth out the surface. A damp cloth helps remove dust and particles after sanding, ensuring a clean area for painting.
Finally, I wear protective gear, such as gloves and a mask, to keep myself safe from fumes and irritants during the process. Having drop cloths on hand protects the surrounding areas from accidental spills.
Applying a Primer to MDF Furniture
For optimal adhesion and finish, I always begin with a quality primer specifically designed for porous surfaces. This step is non-negotiable. I use an oil-based or water-based primer, ensuring it’s compatible with the paint selected later on.
Before applying, I give the primer a good stir to mix it thoroughly. Using a foam roller or a wide brush, I coat the entire piece evenly, avoiding drips and thick layers. I focus on edges and corners, where the material tends to absorb more paint. After the first layer dries–usually after a few hours–I lightly sand the surface with fine grit sandpaper. This smooths any imperfections and prepares it for the subsequent coats, ensuring a polished end result.
It’s vital to let the primer cure fully before proceeding with paint application. Typically, I wait at least 24 hours to ensure the best adhesion and finish quality. This foundational step makes a significant difference in the longevity and appearance of the final coat.
Techniques for Applying Paint Smoothly
To achieve a flawless finish, I prioritize the method of application. Here are the techniques that work best:
- Use a High-Quality Brush: I select a synthetic bristle brush or a foam brush, as they provide even coverage without leaving streaks.
- Work in Thin Coats: I apply paint in thin layers, which prevents drips and allows for smoother drying. This method helps build up depth without clumping.
- Maintain a Wet Edge: I overlap each stroke while the paint is still wet. This prevents visible lines and creates a seamless look.
I find that rolling can be beneficial for larger surfaces:
- Use a Foam Roller: A high-density foam roller gives a smooth finish, especially on flat areas.
- Roll in One Direction: I always roll in one direction to maintain an even texture and avoid uneven patches.
I also incorporate these techniques:
- Tip the Brush: For edges and corners, I load my brush without excess paint and gently tip to smooth the application.
- Sand Between Coats: I lightly sand the surface with fine-grit sandpaper after each coat has dried, which enhances adhesion and smoothness.
- Use a Paint Conditioner: This helps slow drying time, allowing for longer working periods and a smoother finish.
Following these specific techniques results in a more polished appearance, minimizing imperfections and ensuring longevity.
Choosing the Best Brushes and Rollers for MDF
Selecting the right application tools significantly impacts the finish quality. For smooth surfaces, I recommend using high-density foam rollers. These rollers minimize texture and provide an even coat on large areas, ensuring efficient coverage.
Brush Types and Their Uses
When choosing brushes, consider the following options:
- Synthetic bristle brushes: These are ideal for water-based paints and primers, delivering a smooth finish.
- Nylon-polyester blend brushes: Versatile for various paints, these brushes retain their shape and can handle heavier paint types without losing effectiveness.
- Angular sash brushes: Perfect for edges and corners, these brushes help achieve precision and minimize the risk of paint bleeding.
Roller Options
For roller selection, note these key points:
- Nap length: A short nap (1/4 inch) is suitable for smooth surfaces, while a medium nap (3/8 inch) is better for slightly textured finishes.
- Foam vs. traditional rollers: Foam rollers tend to provide a smoother application, while traditional fabric rollers may leave a bit more texture but can hold more paint.
Always test your chosen tools on a small area before full application to ensure compatibility with the paint and achieve the desired finish. Proper tool selection enhances both the efficiency and appearance of the final result.
Drying Times and Curing for Painted MDF
Wait at least 24 hours for the initial drying stage after applying a coat of paint. During this time, ensure the area is well-ventilated to help speed up the process. Check the manufacturer’s recommendations for specific drying times, as they can vary based on the type of paint used.
Understanding Curing
Curing differs from drying as it’s the process where the paint hardens completely, reaching its maximum durability. This can take anywhere from a few days to several weeks, depending on environmental factors like humidity and temperature. For optimal results, avoid heavy usage of the painted item until curing is fully complete. Before any heavy handling, allow at least a week for the finish to harden adequately.
Tips for Testing Dryness
To check if the surface is dry, lightly touch an inconspicuous area with your fingertip. If you don’t see any smudging or transfer of paint, it’s likely dry to the touch. However, for reliable results in preparation for additional coats or usage, adhere to the recommended drying and curing times. Patience during this phase ensures a long-lasting finish.
Finishing Touches: Sealing and Protecting the Paint
For optimal durability and a polished look, I apply a clear coat or sealer over the painted surface. Choose a product designed for use on painted surfaces to withstand wear and tear.
Here’s a guide for ensuring your work remains beautiful and protected:
- Types of Sealers:
- Polyurethane: Provides a hard, durable finish. Use water-based for easy cleanup.
- Varnish: Ideal for a glossy finish, but take note of its drying time.
- Wax: Offers a softer finish; best for light use pieces.
- Application Method:
- Use a clean brush or foam applicator to avoid bubbles.
- Apply in thin, even coats to prevent drips and keep the surface smooth.
- Follow instructions on the product label for drying times and recoating.
- Keep it Ventilated:
- Ensure the workspace is well-ventilated to help fumes dissipate.
- Consider using a fan to improve air circulation during the sealing process.
- Final Inspection:
- Check for any uneven spots or missed areas after the first coat dries.
- Lightly sand between coats with fine-grit sandpaper for a smoother finish.
After the final coat, allowing ample curing time is key. I typically let it cure for at least a week before placing items back on the surface to achieve maximum hardness and protection.
Common Mistakes to Avoid When Repainting MDF
Avoid skipping the priming step. Directly applying paint without a proper primer can lead to poor adhesion and an uneven finish.
Skipping Surface Preparation
Neglecting to properly prep the surface can result in paint chipping or peeling over time. Always clean the surface to remove dust and grime before starting. Use a fine-grit sandpaper to create a smooth finish and enhance paint attachment.
Using the Wrong Paint Type
Opting for standard wall paint instead of paint specifically designed for furniture often leads to dissatisfaction with the final result. Select paints that offer durability and flexibility to withstand daily use and maintain an appealing look.
| Mistake | Consequence | Recommendation |
|---|---|---|
| Skipping primer | Poor adhesion and finish | Always use a suitable primer |
| Poor surface prep | Chipping and peeling | Clean and sand the surface |
| Wrong paint type | Unsatisfactory durability | Choose furniture-grade paint |
| Improper brush/roller use | Streaks or bubbles | Select appropriate tools |
| Inefficient drying time | Messy work and damage | Follow drying and curing instructions |
Taking the time to address these issues will significantly enhance the quality of your project and extend the life of the finish. Pay attention to detail to achieve a professional look.