The first step in renewing your aged wood items is to thoroughly clean them. Use a soft cloth dampened with a mixture of soap and water to remove dirt and grime. Avoid soaking the wood; just ensure it’s slightly moist. This ensures the surface is ready for the next stages.
Next, assess the finish on your planks. If there are scratches or an uneven surface, sanding will be necessary. A medium-grit sandpaper is ideal for removing old finishes and smoothing imperfections. Sand in the direction of the grain, and don’t forget to wear a mask to avoid inhaling dust.
After sanding, wipe the area with a tack cloth to eliminate any particles. This prepares the surface for staining or sealing. Choose a finish that complements the wood’s natural beauty, enhancing the grain and color rather than obscuring it. Apply with a brush or a clean cloth, following the manufacturer’s instructions for drying times and application techniques.
If desired, a protective layer like polyurethane can be added after the base coat has dried. This not only enhances durability but also adds a beautiful sheen. Apply with a foam brush and ensure even coverage. Repeat if necessary for a robust finish.
How to Refinish Wooden Furniture
Choose a proper workspace with ample ventilation. Clear the area of any dust and debris to ensure a clean environment.


First, remove hardware like knobs and hinges. This makes the process smoother and prevents damage.
Use a high-quality stripper to eliminate old finish layers. Apply it generously with a brush, and let it sit as per manufacturer instructions. Scrape off the residue with a plastic scraper after the finish has softened.
Sanding comes next. Start with coarse grit sandpaper to remove any remaining finish, then progress to finer grits for a smooth surface. Always sand with the grain to avoid scratches.
For deeper scratches or dents, consider a wood filler that matches the color of your piece. Apply and allow it to cure before sanding it down to blend.
After achieving a smooth surface, clean the dust with a damp cloth. Allow it to dry completely before applying the new finish.
Select an appropriate stain or topcoat. Test the stain on an inconspicuous area to preview the final look. Apply it evenly with a brush or cloth, following the direction of the grain.
For a durable protective layer, opt for polyurethane. Apply several thin coats, allowing each to dry fully between applications. This enhances durability and maintains the aesthetic of the surface.
A final polish brings out the shine and ensures a smooth touch. Buff the surface with a soft cloth, giving it a fresh and lively appearance.
Choosing the Right Type of Finish for Your Project
For achieving the desired look and durability, selecting the appropriate type of finish is paramount. I personally recommend considering the environment in which the piece will reside and the level of use it will encounter.
Types of Finishes
Here’s a breakdown of common choices:
| Finish Type | Best For | Durability |
|---|---|---|
| Polyurethane | High-traffic areas | Excellent |
| Lacquer | Quick drying projects | Good |
| Oil | Natural look lovers | Moderate |
| Shellac | Indoor pieces | Fair |
Consider Your Application Method
Application method affects finish choice. Spraying lacquer can achieve a smooth coating quickly, while brushing oil can enhance grain visibility better. Choose what suits your skill level and equipment available.
Lastly, always test finishes on a small area first to see how they react with the material before proceeding with the entire piece.
Preparing Your Furniture for Refinishing
First, remove all hardware such as knobs, handles, and hinges to avoid damage during the process. This step allows for a thorough job without interference from metal parts.
Clean the surface thoroughly with a mixture of water and mild soap to eliminate dirt, grime, and oils that could prevent adhesion of new finishes. Dry the piece completely afterwards.
Assess and Repair
Inspect the item for signs of damage. Fill any cracks or holes with a suitable wood filler that matches the color of the wood. Sand these areas once dried to ensure a smooth finish.
Sand the Surface
Use sandpaper, beginning with a coarse grit (around 80) and progressing to a finer grit (220 or higher). Sand in the direction of the grain to avoid scratches. Ensure all previous finishes are removed for the best results.
After sanding, vacuum the dust and wipe the surface with a tack cloth to prepare for the application of new protective coatings.
Tools and Materials Needed for Refinishing
I recommend gathering the following items before starting your project:
Sandpaper: Various grits, from coarse (60-80) for initial stripping to fine (220) for finishing touches.
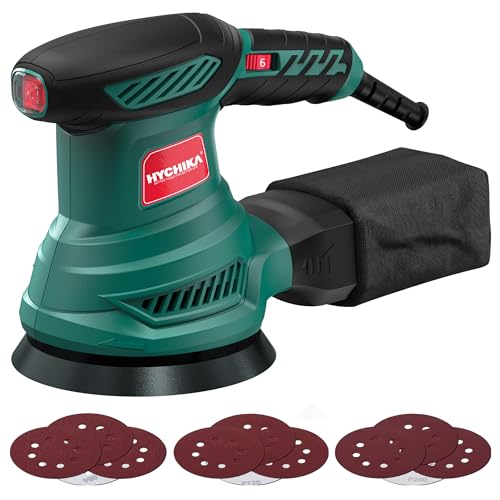
Orbital sander: A power tool that makes sanding quicker and more efficient, especially for larger surfaces.
Paint stripper: A chemical solution for removing old paint or finish. Choose a safer, biodegradable option if possible.
Clean cloths: Lint-free rags for wiping surfaces clean during the process and for applying finishes.
Putty knife: Useful for scraping off old coatings and filling in any cracks with wood filler.
Wood filler: To repair any damages or imperfections before applying the final coat.
Protective gear: Safety goggles and gloves to protect yourself from dust and chemicals.
Paintbrushes: Brushes of various sizes for applying stains or finishes evenly.
Finish type: Depending on your desired look, you may need varnish, oil, lacquer, or polyurethane. Select one that suits your preference and the item’s use.
Drop cloths or tarps: To protect your work area from spills and dust.
Having these tools and materials at hand will facilitate a smoother and more enjoyable experience during the transformation of your piece.
Step-by-Step Guide to Sanding Surfaces
Begin sanding with coarse-grit paper (60-80), especially if the piece has old finish or deep scratches. Secure the sandpaper to a sanding block for better control. Move with the grain to prevent swirl marks.
Progressing Through Grits
- After the initial pass, switch to medium grit (120-150) to smooth out the surface.
- Finish with fine grit (220-320) for a smooth, even texture, preparing it for the application of finish.
Techniques for Sanding
- Maintain even pressure while sanding to avoid creating uneven spots.
- Use circular motion in areas with intricate details, ensuring you don’t lose the fine features.
- Take breaks to inspect your progress, ensuring that the surface is consistent.
- Always wear a dust mask and goggles to protect against debris.
Once done, use a vacuum or damp cloth to remove dust. This ensures a clean surface for further treatment, preventing imperfections in the final coat.
Applying Stain and Sealant: Techniques and Tips
Choose a stain that enhances the natural hue of the timber. Test it on a scrap piece before applying it to your project. This saves time and ensures the desired outcome.
Application Techniques
- Use a high-quality brush or a clean cloth for even application.
- Work in sections to maintain a wet edge, preventing lap marks.
- Apply the stain in the direction of the grain for a smoother finish.
- Wipe off excess stain after a few minutes to achieve a balanced look.
- Consider using a foam applicator for intricate areas.
Choosing Sealant
Select a sealant that matches the intended use of the item. For high-traffic areas, a polyurethane finish offers superior durability.
- Oil-based sealants provide a rich finish but take longer to dry.
- Water-based options dry faster and have lower odors, making them suitable for indoor tasks.
Apply at least two coats of sealant to protect the surface effectively. Lightly sand between applications with fine-grit sandpaper to enhance adhesion.
Allow adequate drying time based on the manufacturer’s instructions. Ventilation is key to achieving a proper finish.
Maintenance Tips for Your Recently Finished Furniture
Regularly dust the surface with a soft, lint-free cloth to keep it clean and free from debris. Avoid using harsh chemicals or abrasive materials that could damage the finish.
Cleaning Solutions
For deeper cleaning, mix mild soap with warm water. Dampen a cloth in the solution, wring it out thoroughly, and gently wipe the surface. Always follow up with a dry cloth to avoid moisture damage.
Preventive Measures
Use coasters and mats to protect against heat and moisture. Position items to prevent direct sunlight exposure, which can fade colors over time. Regularly check for signs of wear or damage and address them promptly to extend the lifespan of your item.
FAQ:
What supplies do I need to refinish wooden furniture?
To successfully refinish wooden furniture, gather the following supplies: a sanding block or power sander, various grits of sandpaper (starting from coarse to fine), wood stain or paint, a suitable finish (like polyurethane or varnish), paintbrushes or rags, a clean cloth for dusting, and safety gear such as a dust mask and goggles. Additionally, you may want a drop cloth to protect your workspace from dust and spills.
How do I prepare wooden furniture for refinishing?
Preparation is key for a successful refinishing project. First, remove any hardware such as knobs and handles. Next, clean the surface with a damp cloth to eliminate dust and dirt. Once dry, sand the entire piece to remove the old finish. Start with coarse sandpaper for stubborn spots, then progress to finer grits to create a smooth surface. Be sure to wipe away dust between sanding with a clean cloth to ensure good adhesion of the new finish.
What is the best stain to use for refinishing furniture?
The choice of stain largely depends on the desired appearance and type of wood. Oil-based stains are favored for their rich color and durability, while water-based stains dry quickly and are easier to clean up. Test a small area to see how the wood reacts with the stain, as different woods absorb color differently. Popular stain choices include dark walnut, cherry, and oak, but you can select any shade that matches your aesthetic preferences.
How can I achieve a smooth finish after applying stain or paint?
To achieve a smooth finish, allow the stain or paint to dry completely as recommended by the manufacturer. After the first coat, lightly sand the surface with fine-grit sandpaper (around 220-grit) to remove any imperfections. Clean the surface thoroughly to remove dust before applying a second coat. For the final coat, consider using a high-quality brush or a foam applicator for an even application. Allow each coat to dry fully between applications for best results.
How long does it take to refinish wooden furniture?
The time required to refinish wooden furniture can vary significantly based on the size of the piece and the complexity of the finish. Generally, the process can take anywhere from a few hours to a few days. Preparation might take several hours, especially if there’s a lot of sanding involved. Drying times for stains and finishes can add additional hours or even days, so it’s important to factor in this waiting time to ensure everything is applied correctly and dries thoroughly.
What are the first steps to take when refinishing wooden furniture?
To begin refinishing wooden furniture, first gather your materials including sandpaper, a wood stain or paint, a brush, and a sealant. Next, remove any hardware and clean the piece thoroughly. Since you’re dealing with wood, you’ll want to sand the surface to remove the old finish and smooth out any imperfections. It’s often recommended to start with a coarser grit sandpaper and progress to a finer grit to achieve a smooth texture. Remember to work in a well-ventilated area and take necessary safety precautions, such as wearing a mask and goggles.