Choosing the right fabric for your project is crucial. Opt for durable materials like canvas or microfiber that can withstand everyday wear and tear. Bright patterns may add flair, but consider solid colors for versatility. Always order a bit extra to account for mistakes or miscalculations.
Next, make sure you have the right tools on hand. A high-quality stapler, staple remover, fabric scissors, and a measuring tape are essential. Consider investing in a seam ripper to help with disassembly. Gathering these items will streamline your process and ensure a smoother experience.


When removing the old covering, take photos to document the original staples and fabric layout. This will guide your installation of the new material. Work methodically, keeping track of the original components to avoid confusion during reassembly.
Once everything is stripped down to the frame, inspect for damage. Fix any structural issues before moving on. Sand down rough spots and apply new padding for comfort. Quality foam can enhance the end result, providing not just aesthetics but also support.
After prepping, you can begin applying the new covering. Smoothly pull the fabric tight over the surface, ensuring there are no wrinkles or bubbles. Secure the edges with staples, working from the center outwards to maintain tension. This will create a polished finish that looks professional.
Finally, remember to finish with any decorative elements like piping or nailheads. These details will elevate your work, giving it a custom look. With patience and attention to detail, your transformed piece will be a stunning addition to your space.
Step-by-Step Guide for Upholstering Your Items
Begin with selecting a high-quality fabric that matches the style of the piece. Look for durability and texture; consider options like canvas, linen, or velvet based on usage.
Next, gather necessary tools: a staple gun, scissors, a screwdriver, and a measuring tape. A fabric upholstery knife can also be helpful. Ensure everything is ready before you commence the process.
Take apart the existing covering carefully. Document the order of disassembly with photos to simplify reassembly later. Remove staples gently to avoid damaging the underlying material.
Once stripped down, inspect the underlying frame and cushioning for any potential repairs. Reinforce or replace worn areas to ensure longevity.
Measure the surface area to determine how much fabric you’ll need. Allow extra inches for folding under edges and including seams. Cut fabric accordingly, ensuring consistent patterns, if applicable.
Begin attaching the new fabric starting from the center and working your way outwards. Stretch the material tight but not excessively, securing it with a staple gun. Pay attention to corners for a neat finish; fold and tuck fabric smoothly.
After attaching, trim any excess fabric and ensure the edges are neatly tucked in. Reattach any buttons or embellishments that were removed earlier.
Finally, reassemble all components and configure the item back to its original form. Perform a quality check, ensuring every part is secure and the fabric is wrinkle-free.
Choosing the Right Fabric for Your Project
I recommend prioritizing durability and ease of maintenance when selecting materials. Look for fabrics with high rub counts, as they indicate resistance to wear and tear. Natural fibers like cotton and linen can provide comfort, while synthetic options like polyester and nylon offer enhanced longevity.
Consider the purpose of the item. For high-traffic areas, opt for upholstery rated for commercial use. If your piece is more decorative, lighter fabrics may suit your needs. It’s also essential to check the fabric’s cleaning requirements; some materials may require specific cleaners or professional care.
Evaluate texture and pattern. A busy print can hide stains and wear but may clash with existing decor. Solid colors can be versatile but might show marks more easily. Mixing textures can bring depth to the overall look; however, ensure they complement rather than compete with each other.
Always order samples before making a final decision. This allows you to see how the fabric looks and feels in your space, and to assess how it coordinates with the color scheme and other furnishings. Additionally, consider the weight of the fabric; heavier options can provide structure to sagging pieces, while lighter fabrics may be perfect for a fresh, airy feel.
Lastly, factor in the environmental impact of the materials chosen. Sustainable options are available and can elevate the overall appeal of your project, reflecting both style and responsibility. Overall, the right fabric will enhance the beauty and functionality of any piece you choose to transform.
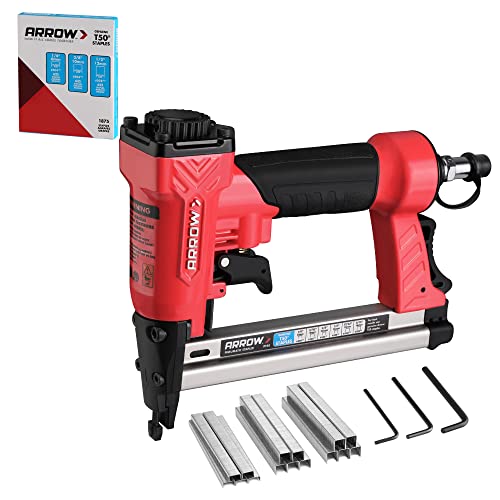
Tools You Need for Upholstery Work
Gather these tools to ensure successful tasks on your next project:
| Tool | Purpose |
|---|---|
| Staple Gun | Secures fabric to the structure. |
| Screwdriver Set | Removes and attaches hardware. |
| Electric Knife | Cuts fabric cleanly without fraying. |
| Upholstery Needles | Helps with sewing heavy materials. |
| Measuring Tape | Ensures accurate measurements. |
| Scissors | Trims excess fabric and threads. |
| Fabric Puller | Adjusts and tightens fabric for a smooth finish. |
| Hammer | Drives tacks into place. |
| Wood Glue | Repairs and reinforces wood components. |
| Foam Cutter | Shapes and trims foam padding efficiently. |
Having these tools at your disposal will streamline the entire process. Make sure to also have a clean workspace; it aids in maintaining focus and preventing any mistakes. Organize materials ahead of time to easily access what you need while working.
Step-by-Step Guide to Removing Old Upholstery
Begin by flipping the piece upside down or on its side to access the underside. Check for any staples or tacks securing the fabric to the frame.
Tools and Materials Needed
- Flathead screwdriver
- Pliers
- Utility knife
- Scissors
- Safety goggles
- Dust mask
Process Overview
- Put on safety goggles and a dust mask for protection.
- Use the flathead screwdriver to pry up staples or tacks. Insert the screwdriver under the fastener and twist gently to lift it out.
- For stubborn staples, use pliers to pull them out completely. Dispose of any removed fasteners safely.
- Once staples are removed, cut the fabric along seams or edges with scissors. Avoid damaging the underlying padding.
- Remove excess foam or padding carefully, checking for any additional fasteners beneath.
- Once the fabric is fully detached, inspect the frame for any repairs needed.
Organize the old fabric and padding for reference, especially if you need to match patterns or colors during the new covering process. Clean the frame thoroughly before proceeding to the next stage.
Preparing the Frame for New Upholstery
Begin by ensuring the integrity of the structure. Inspect for any missing or broken parts, and reinforce joints with wood glue or brackets as necessary. Tightening screws or adding new screws can increase stability.
Next, clean the frame thoroughly. Use a vacuum to remove dust and debris, paying special attention to crevices where dirt often accumulates. A damp cloth can help in wiping down any sticky surfaces.
Consider sanding any rough edges or surfaces that may cause damage to the new fabric. If there are areas with old glue or remnants from previous materials, use a scraper to remove these thoroughly.
If you’re dealing with a wooden frame, applying a wood finish or sealant can help protect it and enhance its appearance. This step is crucial if the frame is exposed, as it adds durability to the surface.
Finally, assess any existing padding or cushioning attached to the frame. Replace or add new foam or batting if the current materials are worn out. This not only provides comfort but also ensures the fabric lies smoothly and looks professional.
Techniques for Adding New Padding
To ensure maximum comfort and durability, I choose the appropriate material for my padding carefully. I prefer high-density foam for its excellent support and longevity. For softer sections, such as seat cushions, I often use a combination of foam and polyester batting.
Pre-Cutting the Foam
I begin by measuring the areas where padding is needed. I always account for the overall thickness I desire. I use an electric knife or a sharp utility knife for accurate cutting, which allows me to achieve smooth edges and proper fit.
Layering for Comfort
In order to enhance the comfort level, I layer different types of padding. Here’s what I typically do:
- Apply a base layer of high-density foam.
- Top it with a layer of medium-density foam for softness.
- Add a final layer of batting for a plush feel.
Securing each layer is vital. I use a spray adhesive to bond them, ensuring they stay in place during the upholstery process.
Wrapping the Edges
To achieve a finished look, I wrap the edges of the new padding. I use batting or upholstery foam wrap, ensuring that it extends slightly beyond the edge of the frame. This prevents any sharp edges from being exposed and helps create a smooth transition between the padding and the upholstery fabric.
Testing Before Final Installation
Before committing to the final installation, I sit on the piece to test the comfort and fit. Adjustments can be made by trimming excess foam or adding more layers for a custom feel.
Applying Fabric and Finishing Touches
For the best outcome, ensure the fabric is cut precisely, allowing for at least three inches of excess on each side. This excess will facilitate a clean wrap around the edges. Lay the material face down on a clean surface and position the furniture piece upside down on the fabric. Center it and start pulling the fabric over the edges, securing it with a staple gun at regular intervals.
Begin with the center of each side, attaching the fabric securely, then work outwards towards the corners. For a neat finish, fold the corners similar to wrapping a present. If the piece has intricate details, consider using a hot glue gun to adhere the fabric before stapling for additional stability.
Once the fabric is secured, trim any excess and ensure everything is taut. To conceal staples, a decorative trim can elevate the aesthetic. This can be applied with fabric glue or by stitching, depending on the material. Select a trim that complements the fabric to enhance overall appeal.
Lastly, after everything is attached, check for any wrinkles or sagging areas and adjust as necessary. Allow the piece to cure for at least 24 hours before using it, to ensure that the fabric adheres appropriately and holds its shape.
Maintaining Your Newly Upholstered Furniture
Regularly vacuum the fabric to remove dust and debris. Use an upholstery attachment to prevent snagging the fibers while keeping the surface clean.
Stain Treatment
Address spills immediately. Blot the stain with a clean cloth to absorb excess liquid; avoid rubbing, as this can spread the stain. Use a specific cleaner suitable for your chosen material, applying it gently according to product instructions.
Protective Measures
Consider applying a stain repellant treatment to guard against future spills. Additionally, avoid direct sunlight to prevent color fading and degradation of the material. Using throw pillows and blankets not only adds comfort but also offers an extra layer of protection from wear and tear.


