Begin with a thorough inspection of all surfaces and crevices. Pay special attention to seams, cushions, and any hidden areas where these tiny infestations might reside. A flashlight will assist in spotting them more efficiently.
Vacuuming is your first line of defense. Employ a vacuum with a narrow attachment to carefully eliminate visible specimens and their eggs from every accessible corner. Make sure to dispose of the vacuum bag or contents immediately in a sealed plastic bag to prevent any re-infestation.
Following this, apply a steamer on high settings to the affected items. Heat is detrimental to these unwelcome visitors, so ensure that every section receives direct exposure. This method not only eradicates adults but also disrupts the life cycle, killing any larvae and eggs present.
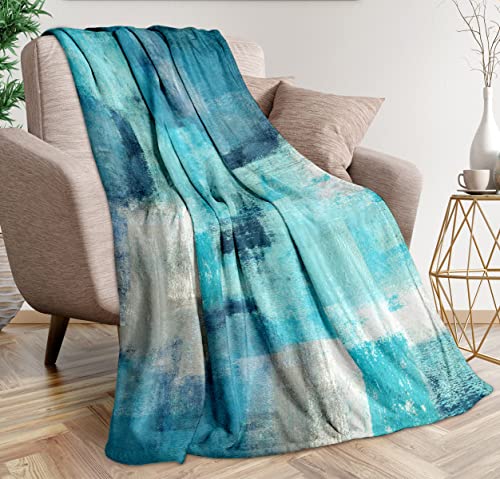
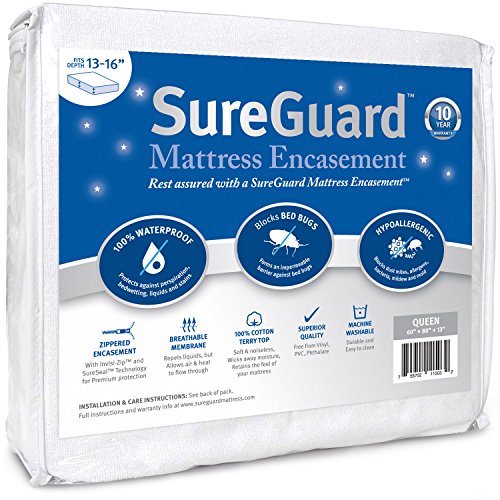
Utilize protective covers on cushions and mattresses. These encasements can trap existing insects and prevent new ones from invading. Opt for materials that are durable and wash them regularly to maintain a pest-free environment.
Finally, consider using insecticides specifically designed for such infestations. Always adhere to the manufacturer’s instructions regarding application and safety measures. This ensures that your space remains devoid of these intruders in the future.


Identifying Signs of Infestation in Upholstery
To confirm the presence of an intruder in your upholstered items, I look for small, dark spots, often resembling pepper or ink stains, which are actually excrement. These signs usually accumulate along seams, folds, and underneath cushions. Additionally, I inspect for discarded exoskeletons, typically found in hidden areas where these pests may have molted.
Visual Indicators
Another key indicator is the appearance of tiny, rust-colored stains on the fabric, which can often be mistaken for water damage. Upon close examination, I may spot small, oval-shaped insects, particularly at dusk when they are most active. Their presence in areas such as the edges of seams or beneath fabric can hint at larger colonies nearby.
Unusual Odors
A distinctive, musty odor may also be present if an invasion is extensive. This odor can be detected when inspecting close to the affected areas and is often described as resembling a damp, stale scent. Regular checks in less accessible spots like crevices, beneath cushions, and around the framework can help in identifying these signs early.
| Indicator | Description |
|---|---|
| Dark Spots | Excrement resembling pepper or ink stains |
| Exoskeletons | Discarded shells from molting |
| Rust-Colored Stains | Small stains indicating feeding sites |
| Visible Instigators | Small, oval insects, especially at dusk |
| Odor | Musty scent indicative of a substantial presence |
By staying vigilant and routinely checking for these visual and olfactory clues, I can take necessary actions before the issue escalates. Regular inspections empower me to maintain a pest-free environment in my living spaces.
Choosing the Right Treatment Methods for Furniture
Select specific approaches like steaming, using chemical solutions, and employing heat treatments based on the material and design of your items. For delicate fabrics, steaming can effectively kill hiding pests without damaging upholstery.
Steam Cleaning
Harness the power of high-temperature steam to eliminate infestations in soft furnishings. I recommend using a steamer with a nozzle that can penetrate seams and crevices, where these intruders often thrive. Make sure to keep the steam moving and avoid concentrating on one area for too long to prevent damage.
Chemical Treatments
If opting for chemical applications, select a product specifically designed for home use. Follow the instructions carefully, ensuring adequate ventilation during application. Focus on treating hidden compartments and areas that can trap these nuisances. Always conduct a patch test first on a small area to confirm compatibility with your item.
For wooden structures, consider insecticides that specifically target the lifecycle stages of these pests. After treatment, I suggest sealing any cracks or crevices to help prevent future occurrences.
Using Heat to Eliminate Unwanted Infestations from Furniture
I utilize heat treatment as a reliable method for eradicating unwanted pests. This approach involves raising the temperature of the affected items to a level lethal for these nuisances, typically around 120°F (49°C) for at least 90 minutes. It’s imperative to ensure that all areas, including seams and folds, reach this temperature to achieve full effectiveness.
I recommend using professional-grade heaters designed specifically for this purpose. These devices can efficiently distribute heat within confined spaces, ensuring uniform temperature. For smaller items, placing them in a high-temperature dryer can also work; just ensure the items are dryer-safe.
Before applying heat, inspect and prepare the items thoroughly. Remove any loose debris and items that could block heat penetration. It’s also wise to check material compatibility with high temperatures, as some textiles may be sensitive.
After the treatment, allow the items to cool down gradually while monitoring for any signs of resurgence. Following a heat application, vacuuming the area and surrounding surfaces helps catch any individuals that may have escaped the heat treatment.
This method not only eliminates existing critters but also reduces the likelihood of a re-infestation, especially when combined with other treatment strategies.
Applying Insecticides Safely on Upholstery
I recommend selecting a targeted insecticide formulated specifically for upholstery applications. Always read the label for safety instructions, including recommended protective gear such as gloves and masks. Ventilating the area is crucial; open windows to ensure proper air circulation during treatment.
Spot Testing
Before applying any product, I conduct a patch test in an inconspicuous area. This helps determine if there are any adverse reactions on the fabric. If discoloration or damage occurs, choose a different solution or test another spot.
Application Technique
Utilize a spray bottle with a fine mist setting for even distribution, maintaining a distance of about 12 inches from the surface. Focus on seams and folds where insects often hide. Avoid over-saturation to minimize residue and promote quick drying. After application, allow the treated area to air dry completely before using. This ensures safety for both the material and occupants.
Vacuuming Techniques for Removing Pests
First, ensure the vacuum has a strong suction power. Choose a vacuum equipped with a HEPA filter to capture small particles effectively. Before starting, inspect the targeted area for signs of infestation, like dark spots or shed skins.
Preparation Steps
- Remove any loose items or debris from the surface to allow for thorough cleaning.
- Use a brush attachment for upholstery and crevices. This helps dislodge hidden contaminants.
- Seal vacuum bags tightly before disposal to prevent escape of any trapped creatures.
Vacuuming Process
- Begin from the edges, moving towards the center, ensuring every inch is covered.
- Pay close attention to seams, zippers, and folds where these insects hide.
- After vacuuming, immediately empty the vacuum canister or dispose of the bag outside, sealing it tightly to avoid reinfestation.
Repeat this process regularly, ideally every few days, to ensure no surviving individuals remain. Combining vacuuming with other treatment methods maximizes success in achieving a pest-free environment.
Encase and Protect Your Furniture During Treatment
I’ve found that encasing items with protective covers is crucial during the extermination process. Use fine weave encasements specifically designed to trap any remaining creatures and their eggs. Ensure these covers are tightly sealed and made of durable materials to prevent breaks.
Before applying any treatment, I wrap upholstery and soft furnishings with plastic sheeting. This minimizes the chance of contamination spreading to other areas. Seal all edges securely with high-quality tape to avoid any openings.
It’s important to keep all encased items undisturbed for a minimum of several weeks. This allows any hidden inhabitants to be eliminated effectively, thinning their population over time.
Regularly check the encasements for tears or signs of wear. If any damage occurs, replace the encasing immediately to maintain protection.
A second measure involves placing desiccant packets within the encased items. These packets absorb moisture, creating an unwelcoming environment for any residing organisms.
After the treatment is complete, I wash all removable fabrics in hot water and conduct a thorough inspection before unwrapping any protected items. This extra precaution helps confirm that no traces remain.
Cleaning and Laundering Items Near Infested Furniture
Isolate all fabric items near the affected area. Begin by collecting everything that could harbor unwanted guests, ensuring no contaminated article is left behind.
Steps for Effective Laundering
- Use hot water (at least 120°F or 49°C) for washing machine cycles.
- Dry all items on high heat for a minimum of 30 minutes to ensure pests are eliminated.
- Carefully inspect laundry baskets and hampers; these can also be hiding spots.
Cleaning Non-Washable Items
- Utilize a vacuum with a HEPA filter on surfaces that can’t be laundered.
- Place items that require deep cleaning in a dryer on a no-heat cycle for about 15 minutes.
- Consider steam cleaning for upholstery and curtains, as it can reach hidden crevices.
Seal clean items in plastic bags until the treatment process is complete to prevent re-infestation. Regular inspections and repeated cleaning may be necessary to ensure complete eradication.
Preventing Future Infestations in Your Home
Regular inspections of your living spaces can deter unwanted visitors. Check seams, folds, and crevices in textiles and furnishings, especially after travel or acquiring second-hand items.
Seal cracks and gaps in walls and baseboards with caulk to limit entry points. Pay attention to electrical outlets, window frames, and doorways.
Utilize mattress and pillow covers designed to inhibit these intruders. Encase sleeping surfaces to reduce exposure and add a barrier against future occurrences.
Maintain cleanliness by frequently vacuuming floors, carpets, and upholstered items. Dispose of vacuum bags immediately to prevent re-infestation.
Control clutter, as it provides additional hiding spaces. Organize belongings, especially around sleeping areas and other high-risk locations.
Create a proactive strategy for traveling. Before returning home, inspect luggage and belongings. Consider placing items in a sealed plastic bag or container to minimize risk.
Monitor ongoing pest control measures in your environment. Consult professionals for routine inspections to ensure continued vigilance against future invasions.
Educate all household members on recognizing indications of a potential problem. Awareness is crucial in addressing issues before they escalate.