

To begin crafting your own exterior seating arrangements, focus on selecting durable materials that can withstand various weather conditions. Pressure-treated wood, cedar, or composite materials serve as excellent options, combining longevity with an appealing aesthetic. Consider using a water-resistant finish to further protect your creations against moisture damage.
Next, precise measurements are crucial. Sketch out the design of the seating; having a clear visual plan can save time during the construction phase. Use measuring tape to ensure all pieces fit together accurately, resulting in a sturdy and cohesive structure. Don’t overlook the importance of comfortable seating; incorporate cushions or ergonomic designs to enhance relaxation.


Assembly follows the blueprint. Utilize strong joinery techniques, such as pocket holes or dowels, to ensure stability. Make sure to drill pilot holes to prevent splitting, especially in wood. Once assembled, test the strength of your seating by applying weight evenly to confirm its reliability.
Finally, consider finishing touches like paint or stain to complement your overall outdoor design theme. Proper finishing not only enhances the visual appeal but also adds a layer of protection, ensuring your creations endure for years to come.
Choosing the Right Materials for Your Outdoor Seating
Opt for weather-resistant materials like teak or eucalyptus, which naturally repel water and resist decay. Choosing aluminum is a smart option due to its lightweight and rust-proof properties, making it ideal for easy rearrangement.
Wood Selections
If a warm aesthetic is your goal, hardwood options such as mahogany or oak provide durability and style. Pressure-treated pine is an economical alternative, but it requires sealing every few years to prevent water damage.
Metal and Synthetic Options
Consider stainless steel for a sleek, modern look with high corrosion resistance. Wicker or rattan made from high-density polyethylene (HDPE) offers flexibility in design while being UV and moisture-resistant. For cushions, opt for fade-resistant fabrics that withstand sun exposure.
Incorporating various materials can enhance stylistic appeal while ensuring longevity, sparing you frequent replacements and maintenance efforts.
Measuring and Planning Your Design
Begin with precise measurements of the area designated for your creation. Use a tape measure to capture the length and width, accounting for any existing features like trees or structures that may influence your design.
Sketch a layout on graph paper or use design software to visualize your project. Ensure to represent scale accurately; this will help determine the proportions of different pieces. Consider the space needed for movement and seating comfort, adding at least 24 inches between seats and any barriers.
Evaluate the ideal height for tables and chairs. Standard table height is approximately 30 inches, while seat height typically ranges from 18 to 20 inches. Adjust measurements if planning for cushions or unless a specific style requires otherwise.
Include storage solutions in your plans. Measure dimensions for items you wish to store and incorporate them into your layout. This not only maximizes space but enhances practicality.
Plan for finishes and features like built-in storage or shade. Take into consideration the weather conditions in your area, adjusting dimensions to ensure durability and comfort during various seasons.
Lastly, keep aesthetics in mind while measuring. Think about how colors and forms will harmonize in your outdoor space, ensuring everything aligns with your vision. Create a checklist of all measurements to maintain clarity throughout the construction process.
Building the Frame for Stability
Choose durable materials like pressure-treated lumber or composite boards for constructing the framework. These options resist rot and weather damage, ensuring longevity.
Use 2×4 or 2×6 lumber for the main support beams, as they provide the required strength. I cut the beams slightly longer than the designated length, allowing for adjustments during assembly.
For corners, utilize metal brackets to reinforce joints. Screwing the brackets into place creates a solid connection that enhances stability. Gun-style screws or lag screws work best for this purpose.
When joining pieces, pre-drill holes to prevent splitting the wood. I fix each joint with at least two screws for added security. It’s helpful to stagger the placement to distribute the load evenly.
Add cross-bracing between the support beams. This additional structure creates rigidity and prevents wobbling. I mainly use diagonal cut pieces for this, attaching them securely at each end.
Level the frame using a carpenter’s level; this ensures that the surface is even and reduces the chance of rocking. If I find discrepancies, shimming under the legs resolves any height issues.
Once the frame is assembled and secure, sand down sharp edges to enhance safety and comfort. This final touch can significantly improve the overall look and feel of the completed structure.
With a staggered assembly process and a keen eye for detail, the foundation of the seating unit becomes a robust base, ready to withstand the elements and years of use.
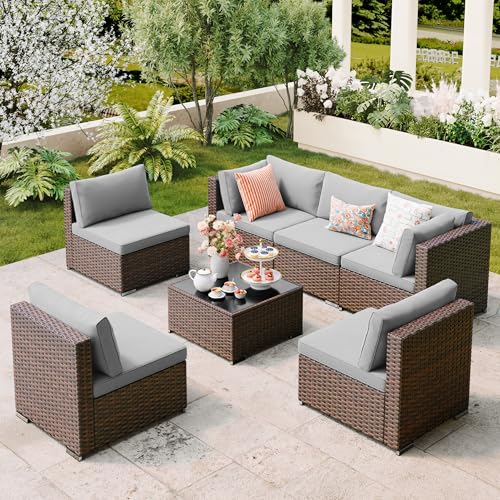
Selecting Comfortable Seating Options
Opt for deep seating arrangements that enhance relaxation. I often choose sofas or sectionals with generous cushions to invite guests to unwind. When selecting seating, look for upholstery made from weather-resistant materials like Sunbrella or Olefin, as they provide comfort without sacrificing durability.
Prioritize ergonomics by ensuring that the seat depth and height accommodate various body types. A seat depth of 20 to 24 inches generally suits most individuals, while a height of 18 inches from the ground works well. I personally test out seating by sitting down and standing up to assess comfort levels.
Add cushions or throws for versatility. Layering different textures not only increases comfort but also allows for easy updates in style. I typically choose cushions with removable covers for straightforward cleaning and maintenance.
Consider the layout of your area. Create cozy conversation groups by positioning chairs and loveseats close together. I often include a mix of seating types, such as a swing chair or lounge chair, to add visual interest and options for guests.
Don’t overlook shade solutions. Integrating umbrellas or pergolas enhances comfort, allowing extended use on sunny days. This allows my family and friends to enjoy the space for hours without discomfort.
Creating Weather-Resistant Finishes
Apply a high-quality marine varnish for the best protection against moisture and UV rays. This type of finish penetrates the wood while creating a glossy, durable surface. For best results, sand the furniture down to bare wood, clean dust particles, and then apply at least three coats of varnish, allowing adequate drying time between applications.
Consider using exterior paint specifically designed for outdoor applications. This not only offers a colorful aesthetic but also provides a solid barrier against the elements. Make sure to choose a paint that is resistant to fading and mildew.
Here’s a quick reference table for choosing the right finish:
| Finish Type | Benefits | Best Used On |
|---|---|---|
| Marine Varnish | Excellent UV and moisture resistance | Wood surfaces |
| Exterior Paint | Colorful and protective barrier | Wood, metal, and composite materials |
| Oil-Based Stain | Pentrates wood for a natural look | Natural wood finishes |
Don’t forget to maintain the finish regularly. Inspect the surface every few months for signs of wear. Reapply varnish or paint as necessary to ensure the longevity of the materials. Regular care prolongs the aesthetic appeal and functionality of the outdoor setup.
Assembling Your Furniture Pieces
Align all components accurately before securing them. Begin by using clamps to hold the pieces in place, ensuring a snug fit without any gaps. This technique minimizes movement during the assembly process, enhancing overall stability.
Fastening Techniques
For optimal durability, consider using screws instead of nails, as they provide a stronger bond. Pre-drilling holes can prevent wood from splitting and maintain the integrity of the structure. Use screws that are appropriate for the thickness of your materials; for instance, 1.25-inch screws work well for most connections in thicker wood.
Final Checks
After assembling each section, conduct a stability test. Apply slight pressure to different areas to identify any weak spots. Tighten any loose joints and adjust components as necessary to ensure your creation is sound and secure before applying any finishes.
Incorporating Storage Solutions into Your Design
Integrating functional storage into your layout can greatly enhance usability. Here are some practical methods I’ve found effective:
- Bench with Built-in Storage: Construct benches that open up to reveal compartments. This approach allows for seating while providing a place to store cushions or gardening tools.
- Under-Table Shelving: Create shelves beneath a dining table. These can hold items like tableware or entertaining essentials, keeping everything within reach yet organized.
- Ottoman Storage: Design ottomans that double as storage units. They can house blankets, games, or other items, adding comfort and practicality.
- Vertical Racks: Install wall-mounted racks or pegboards for hanging items like tools or outdoor decor. This solution saves space while keeping items accessible.
- Cedar Chests: Build a wooden chest that captivates with its design while serving as storage for items needing protection from moisture.
Consider using aesthetics to make storage solutions a feature rather than an afterthought. Stained wood or distressed finishes can add character while remaining functional.
Always plan for airflow in storage compartments to avoid moisture buildup, particularly in humid climates. Include drainage holes if necessary. Prioritize ease of access in your design to ensure that stored items can be quickly retrieved.
DIY Accessories to Enhance Your Outdoor Space
Incorporate planters into your area; they provide greenery and a welcoming atmosphere. Choose various sizes to create visual interest. Use durable materials like resin or treated wood to withstand the elements.
String lights can transform the atmosphere during evenings. Opt for warm white bulbs for a cozy feel, and hang them overhead or along fence lines. Consider solar-powered options to reduce energy consumption.
Making cushions adds comfort and color. Select outdoor fabric that resists fading and mildew. Use quality zippers for easy removal when washing is needed. Custom sizes ensure a perfect fit for your seating.
Create a fire pit using brick or stone for warmth and ambiance during cooler nights. Ensure safety by maintaining a safe distance from flammable materials. Use a fire bowl for a more portable option.
Install an outdoor rug to define spaces and add texture. Look for weather-resistant choices that won’t mold or fade. Bold patterns can make the area lively and inviting.
Consider windbreaks or screens to enhance privacy. Tall plants or bamboo panels can offer both protection and aesthetics. Ensure they’re securely anchored to withstand strong winds.
Include a bar cart for entertaining. Choose weather-resistant materials and allow for mobility. Stock it with glasses, napkins, and your favorite beverages, making it an attractive focal point.
Personalize the area with wall art or decorative signs. Use materials that can handle external conditions, ensuring they remain intact and visually appealing throughout the seasons.
Finally, add a few comfortable throw blankets for cooler evenings. Select durable, washable fabrics that can endure the wear and tear of outdoor use.
Maintaining Your Outdoor Furniture for Longevity
Regularly cleaning is fundamental. I wipe surfaces with a soft cloth and mild soap solution. This prevents dirt accumulation, mold, and mildew.
For wood items, a yearly application of wood conditioner or sealant helps protect against moisture. I sand rough spots lightly before reapplication to ensure an even coat.
Metal pieces require a rust-resistant treatment. I inspect for any scratches and touch them up with paint to prevent corrosion. Sealing the metal with a protective spray can provide an additional barrier against rust.
Plastic and resin items benefit from UV protection. I use products designed for outdoor plastics to maintain their color and integrity. Regular inspections for cracks or fading are key, as these can compromise their durability.
During seasonal changes, I store items in a dry, sheltered place or use furniture covers. This minimizes exposure to harsh weather, prolonging the life of every piece.
Keep cushions and textiles in a dry area when not in use, and wash them routinely according to care labels. This removes stains and prevents mildew.
Perform routine checks for stability. Tightening loose screws or hinges ensures everything remains secure and extends usability.
- Clean regularly with mild soap.
- Apply wood conditioner annually to wooden sections.
- Use rust-resistant treatments for metal.
- Protect plastics with UV coatings.
- Store in a sheltered area during inclement weather.
- Check and tighten screws periodically.


