Begin with selecting durable materials that withstand weather conditions. Personally, I favor pressure-treated wood or composite materials for their longevity and minimal maintenance. Choosing the right finish is also critical; I use a high-quality sealant to protect surfaces from moisture and UV damage.
Next, focus on design specifications. I recommend making use of ergonomic principles to ensure comfort. Standard dimensions for seating should include a height of around 18 inches and a depth of 24 inches for a relaxed fit. For tables, a height of 28-30 inches works well for dining purposes.
Another crucial aspect is assembly techniques. I prefer using stainless steel screws for their corrosion resistance; they hold up against rust and deterioration. Pre-drilling holes can save time and prevent wood from splitting. I also incorporate corner brackets to enhance stability.
Creating Relaxation Spaces with Outdoor Seating
Opt for sturdy materials like pressure-treated wood or cedar, as they resist weathering and decay. Use galvanized screws and waterproof adhesives to ensure durability. Start with a simple design; a bench or a couple of chairs will help gauge your skill level and comfort with tools.
Measurements and Design Plans
Determine space available before anything else. A standard bench should be about 18 inches off the ground for comfortable seating. If crafting individual chairs, aim for a height of approximately 20-22 inches, width around 24 inches, and depth of 18-20 inches. Sketch your layout considering arrangement and flow for ease of movement.


Assembly Process
Assemble using a combination of screws and brackets; these provide additional stability. Pre-drill holes to prevent wood from splitting. Sealing the wood with a water-repellent stain will prolong its life and maintain appearance. After assembling, consider adding cushions to enhance comfort, selecting fabric resistant to moisture and UV rays.
Choosing the Right Materials for Outdoor Seating
Teak is my go-to for outdoor seating. It withstands harsh weather, requiring minimal maintenance. I always look for sustainably sourced options to align with environmental responsibility.
Another solid option is cedar. Its natural resistance to decay makes it ideal for outdoor use. I appreciate its aromatic scent, which adds an additional sensory element to my space.
For budget-friendly selections, pressure-treated pine works well. It’s readily available and can be painted or stained to match various styles. However, I always ensure proper sealing to prevent moisture absorption.
Regarding synthetic materials, high-density polyethylene (HDPE) is a great choice. It mimics the appearance of wood while being resistant to fading and cracking. I find it particularly useful for casual seating arrangements that require durability.
When considering metal options, aluminum stands out for its lightweight nature and rust resistance. I often use it for frames and accents, combining it with other materials for a modern look.
For cushions, I prefer acrylic or solution-dyed fabrics. They resist fading and are easy to clean, making them suitable for outdoor environments. A good cushion can significantly enhance comfort in any setting.
I recommend mixing and matching materials for both aesthetics and functionality. This approach allows versatility in design while catering to weather conditions and usage needs.
Measuring Space for Your Outdoor Seating Arrangement
Begin with precise measurements of the area designated for your seating. Utilize a tape measure to obtain accurate dimensions in both length and width. It’s best to consider the following points:
- Identify the available area: Calculate the square footage of your space, noting any factors that may restrict movement, such as railings, columns, or existing structures.
- Plan for movement: Leave adequate pathways for comfortable navigation around your arrangement–typically, aim for at least 24 inches of space for walking.
- Consider furniture size: Research standard dimensions for seating options, such as chairs, lounges, and tables. Confirm that your picks provide a pleasant fit without crowding the space.
- Evaluate functionality: Determine how the area will be used–relaxation, dining, entertaining–and select dimensions accordingly to accommodate activities.
- Account for accessories: If you plan to add cushions, umbrellas, or other accessories, ensure their space requirements are factored into your measurements.
Document your measurements clearly, perhaps in a sketch, to visualize the proposed layout. This strategy will serve as your reference during selection and arrangement of your seating pieces, ensuring a cohesive design that maximizes the utility of your environment.
Creating a Design Layout for Outdoor Seating
Prioritize functionality and flow in your arrangement. Begin by sketching your space on graph paper, using a scale to accurately represent dimensions. This allows you to visualize how various elements will fit together.
Incorporate different zones: a lounging area, dining spot, and potentially a shaded nook. Ensure pathways between these areas are clear and allow for easy movement. Aim for a balanced layout by mixing large and small pieces to create visual interest.
Consider the orientation of your space. Position seating to maximize views while taking into account sun and wind exposure. This might mean angling chairs or placing tables in shaded spots to enhance comfort during meals or relaxation.
When selecting specific pieces, think about the intended usage. Sofas or loungers should be inviting and comfortable, while dining sets need to accommodate the size of your gatherings. Experiment with different configurations before committing to any installation.
Lastly, incorporate layered elements like cushions or rugs to add depth and coziness. These accessories can greatly enhance the appeal of your setup. Ensure the chosen materials are suitable for outdoor conditions to maintain durability.
Building a Basic Chair: Step-by-Step Guide
Gather materials: four pieces of wood for legs, two for the seat, and two for the backrest. Use high-quality, weather-resistant timber to ensure longevity.
Measure and cut the wood to the desired dimensions. For example, legs should be around 18 inches tall, with the seat width typically between 24 to 30 inches. Adjust based on your comfort preference.
Assemble the frame by attaching the legs to the seat using wood screws. Ensure a right angle between the legs and the seat for stability. Pre-drill holes to avoid splitting the wood.
Attach the backrest at a comfortable angle, typically 15 to 20 degrees from vertical. Use sturdy brackets or additional screws for reinforcement. Secure all joints firmly to prevent wobbling.
Sand the entire chair to remove rough edges and splinters. This process enhances not only the safety but also the aesthetic appeal. Finish with outdoor sealant or wood stain for protection against weather elements.
After allowing the finish to dry completely, place cushions for added comfort. Opt for weather-resistant fabrics to prolong their lifespan.
Regularly check for wear and tear. Tighten screws and replace any damaged parts to maintain the structure. Enjoy your newly crafted seating piece outdoors!
Assembling a DIY Table: Key Techniques
Begin with securing a sturdy frame. I typically use 2×4 lumber, which provides ample strength. Cut the pieces to the desired lengths and assemble them using pocket holes for a clean finish. This method avoids protruding screws, giving a polished appearance.
Joining Methods
My preferred method for connecting the tabletop is using wood glue combined with screws. This combination allows for a solid hold. After positioning the planks for the top, I apply glue along the edges and clamp them together until set. Once dry, I drill pilot holes and insert screws for extra stability.
Finishing Touches
After assembly, sanding surfaces helps to eliminate sharp edges and creates a smooth finish. I choose a weather-resistant stain to protect against moisture and UV damage. Applying multiple coats not only enhances durability but also enriches the aesthetic appeal.
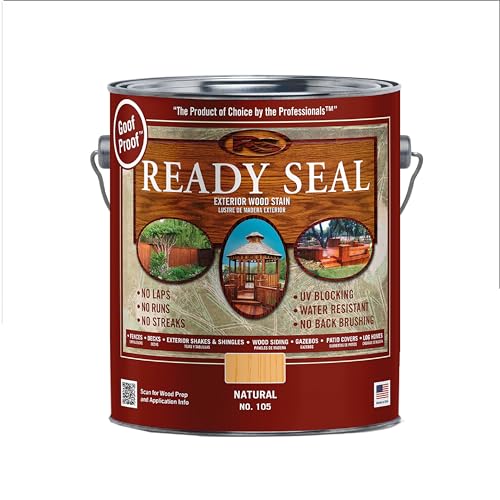
Finishing Touches: Staining and Sealing Your Outdoor Creations
Choosing the right stain is crucial. I recommend a semi-transparent option that showcases the wood grain while providing protection. Look for products with UV blockers to prevent fading and mildew resistance for longevity.
Before applying, ensure the surface is clean and dry. A pressure washer can eliminate dirt and previous finishes. After drying, lightly sand the surface to promote adhesion of the stain.
When applying, use a high-quality brush or a sprayer for even coverage. Apply in the direction of the grain to avoid streaks. Typically, I find two coats yield the best results; allow adequate drying time between applications according to the manufacturer’s instructions.
Sealing is next. A clear waterproof sealant adds an additional layer of protection. I prefer water-based sealers for easy clean-up and quick drying times. Apply it after the stain has cured fully. Use the same application method for a uniform finish.
Always test your chosen products on a small, inconspicuous area before full application. This ensures compatibility and satisfaction with the color and finish.
For maintenance, reapply the stain or sealant every few years, depending on exposure to the elements. Periodic cleaning and inspections can prolong the life of your outdoor pieces significantly.
Incorporating Storage Solutions in Deck Furniture
Integrating storage options into outdoor seating and tables enhances functionality while maintaining an aesthetically pleasing look. Here are specific methods to incorporate these solutions effectively:
- Under-seat Storage: Design benches or seating with lift-up lids or hinged tops. This creates a perfect spot to store cushions, gardening tools, or outdoor games, keeping everything organized and out of sight.
- Built-in Drawers: Opt for pieces like side tables or benches that include sliding drawers. This feature allows for easy access to items, such as napkins, cutlery, or personal belongings, while utilizing space efficiently.
- Storage Ottomans: Use ottomans that serve as both seating and storage. These versatile pieces can hold blankets or minor outdoor essentials, combining comfort with utility.
- Shelving Units: Consider adding vertical storage solutions like shelves or cubes alongside chairs or tables. These can house potted plants, decorative items, or additional supplies, maximizing vertical space.
- Portable Carts: Invest in rolling carts that can serve as mobile storage. These are great for serving drinks and snacks or stashing away items when not in use.
By focusing on multifunctional designs, I ensure that my outdoor area remains uncluttered while still being practical for everyday use. Each storage solution not only contributes to organization but also enhances the overall experience of the space.
Maintaining Your Outdoor Seating for Longevity
Regular cleaning is key to preserving the quality of your outdoor seating. I recommend using a soft brush and mild soap with warm water to gently scrub surfaces. Rinse thoroughly to prevent soap residue from damaging the finish.
Routine Inspections
I conduct inspections at least twice a year. Look for signs of wear, like splintering wood or rusting hardware. Early detection allows for prompt repairs, which can extend the lifespan significantly.
| Issue | Solution |
|---|---|
| Splintering Wood | Sand down rough areas and apply a protective sealant. |
| Rust on Metal Parts | Use a wire brush to remove rust, then apply rust-inhibiting paint. |
| Loose Joints | Tighten screws or use wood glue for wooden connections. |
Protective Measures
During harsh weather, I always put covers on my outdoor components. It’s also helpful to store them in a sheltered area during winter months. Using UV-blocking sprays can further protect surfaces from sun damage.
Applying a fresh coat of sealant every couple of years helps maintain appearance and prevents moisture damage. For painted models, touch up chips and scratches as they appear to safeguard against peeling and corrosion.
FAQ:
What materials are best for building deck furniture?
When selecting materials for deck furniture, consider options like teak, cedar, or eucalyptus for wood, as they provide natural resistance to weather elements. Synthetic materials like HDPE (high-density polyethylene) or aluminum are also popular choices due to their durability and low maintenance requirements. Ultimately, the best material will depend on your climate and how much upkeep you are willing to perform.
How can I ensure my deck furniture will withstand different weather conditions?
To enhance the durability of your deck furniture, choose weather-resistant materials such as treated wood or synthetic options designed for outdoor use. Additionally, applying sealants or protective finishes will help guard against moisture, UV rays, and temperature fluctuations. Regular maintenance such as cleaning and reapplying protective coatings can also prolong the life of your furniture.
What furniture styles are suitable for a deck?
Deck furniture styles can vary widely, from casual lounge chairs and tables to elegant dining sets. Popular choices include rustic wooden designs, sleek modern pieces with metal and glass, or classic wicker styles. Your selection should complement the overall aesthetic of your outdoor space while meeting your practical needs, such as seating capacity and comfort.
How do I determine the right size for my deck furniture?
Measuring your deck space is essential for choosing the right size furniture. A good rule of thumb is to leave at least 2 feet of walking space around furniture to allow for easy movement. Consider the dimensions of your deck and the intended use—if you plan to host gatherings, larger tables and more seating will be necessary, while smaller settings might suffice for relaxation and informal get-togethers.
Can I customize the design of my deck furniture?
Yes, customizing deck furniture is a great way to personalize your outdoor space. Many manufacturers offer options for colors, materials, and styles, or you can design furniture from scratch. DIY projects using plans available online can also be fulfilling, allowing you to create pieces that fit perfectly with your deck’s dimensions and aesthetic. Just ensure your designs are practical and suitable for outdoor use.
What materials are recommended for building deck furniture?
When building deck furniture, several materials can be considered based on durability, weather resistance, and aesthetics. Common choices include pressure-treated wood, which is relatively affordable and withstands the elements well. Cedar and redwood are also popular due to their natural resistance to decay and insects. For a more modern approach, composite materials made from wood fibers and plastic are durable and low maintenance. Metal frames, particularly aluminum, provide a sturdy option, often paired with cushions for comfort. Ultimately, the choice of material depends on your specific design preferences and climate conditions.
How can I ensure my deck furniture is safe and sturdy?
Ensuring the safety and sturdiness of your deck furniture involves several steps. First, choose high-quality materials that are appropriate for outdoor use. Next, pay close attention to the construction techniques. Make sure to use proper joinery methods, such as mortise and tenon or dowel joints, as these enhance structural integrity. Additionally, regularly check the furniture for any signs of wear or damage, including loose screws or rotting wood. If your furniture has cushions, ensure they fit well and are secured to prevent slipping. Lastly, consider weight distribution; evenly space seating and avoid overloading surfaces to maintain stability.


