Regular cleaning is a must; I recommend using a soft, damp cloth to wipe down these wooden treasures. Avoid harsh chemicals that can strip away the natural oils and damage the surface. For deeper cleaning, a mild soap solution can be useful, but ensure to dry the surfaces immediately after.
To maintain the rich color and grain, I apply a high-quality wood oil approximately every 6 to 12 months. This application not only nourishes the wood but also protects it against scratches and water damage. Remember to choose an oil specifically designed for hardwoods, as it will enhance the natural beauty without leaving a greasy residue.
Humidity control is essential; I always keep the environment between 40-60% to prevent excessive expansion or contraction. Adding a humidifier during dry seasons can help maintain this balance and prolong the life of these elegant pieces.
For those pesky stains, I gently sand the affected area before reapplying the oil. This method helps blend the finish seamlessly while eliminating minor blemishes. It’s a straightforward approach that keeps my wood looking pristine without compromising its integrity.
Furniture Care Techniques
Regular maintenance involves dusting with a soft cloth weekly to prevent dirt accumulation. For deeper cleaning, use a mild soap solution. Mix a few drops of liquid soap with warm water, dampen a cloth, and wipe the surface gently, ensuring no excess moisture remains.
Periodic Oiling
Oiling serves to enhance appearance and protect against moisture. I recommend using a high-quality penetrating oil designed for hardwoods. Apply it every six months. Here’s the process:
- Ensure the surface is clean and dry.
- Using a clean, soft cloth, apply the oil in the direction of the grain.
- Allow the oil to soak in for about 15-30 minutes.
- Wipe off any excess oil with a dry cloth.
Avoiding Damage
To maintain integrity, keep items away from direct sunlight to prevent fading. Use coasters and mats to avoid heat and moisture damage from cups and dishes. Additionally, maintain a stable humidity level (30-50%) to prevent cracking and warping.
Should scratches occur, I use a wood filler that matches the surface color. Apply it carefully, allow it to dry, then sand gently to blend with the surrounding area. Finish with an oil application for consistency.
Understanding Wood Properties
Knowing the characteristics of this material greatly influences maintenance choices. Here are key properties to consider:
- Density: This material is dense, providing strength and durability, making it resistant to scratches and dents.
- Natural Oils: High oil content repels moisture and increases resistance to decay, contributing to longevity.
- Color Variation: Ranges from golden brown to dark brown, potentially changing over time due to exposure to light.
- Grain Patterns: Unique, interlocking grain adds visual appeal, influencing styling choices.
- Thermal Properties: This material remains cool to the touch, making it comfortable in varying temperatures.
- Workability: It can be easily shaped and finished, suitable for various design aesthetics.
- Resistance: Highly resistant to termites and other pests, reducing the need for chemical treatments.
Understanding these attributes helps in making informed decisions about care and preservation, ensuring that your pieces maintain their quality and appeal over time.
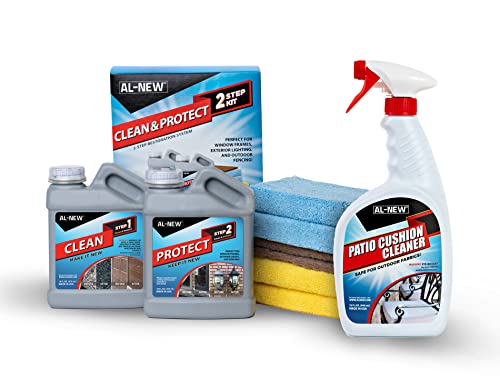
Choosing the Right Cleaning Products
Opt for products specifically designed for natural wood finishes. Avoid abrasive cleaners that can damage the surface. Instead, I use a mild pH-balanced soap mixed with warm water. This solution effectively removes dirt without harming the wood’s integrity.
Recommended Ingredients
- Neutral pH soap
- Natural oils, such as mineral oil or lemon oil
- Beeswax for added protection
When seeking commercial options, check for cleaners that list “safe for wood” on their labels. Products containing harsh chemicals, like bleach or ammonia, should be avoided; these can strip the finish or discolor the material.
Application Tips
- Use a soft microfiber cloth to apply the cleaning solution.
- Wipe in the direction of the grain to avoid scratches.
- Rinse the cloth frequently to prevent dirt from being spread back onto the surface.
After cleaning, I recommend applying a thin layer of natural oil to maintain moisture and enhance the wood’s appearance. Ensure the surface is completely dry before any oil treatment.
Steps for Regular Cleaning of Teak Furniture
Begin with a soft cloth or a microfiber rag to remove dust and debris. I typically use a clean, dry cloth for this initial step to avoid scratching the surface.
Next, prepare a mixture of warm water and a mild soap. I find that a few drops of gentle dish soap in a bucket of warm water works effectively. Avoid harsh cleaners that can damage the surface.

Using a soft sponge or cloth, I dip it into the soapy water, wring it out well, and wipe down the surfaces. It’s essential not to oversaturate the material, as excess water can lead to swelling and warping.
After cleaning, I rinse the sponge or cloth with fresh water and go over the areas again to remove any soap residue. This step ensures the wood is not left with a sticky film.
Next, I dry the surfaces thoroughly with a separate clean, dry cloth. This prevents water spots and further protects the wood.
Lastly, I recommend performing this cleaning process every few months or as needed. Regular upkeep keeps the appearance polished and extends the lifespan of my pieces.
Applying Oil for Moisture Retention
Regular application of oil is key to preserving the natural beauty of your wooden pieces while ensuring they stay hydrated. I recommend using a high-quality teak oil that penetrates deeply and provides moisture retention. For the best results, clean the surface thoroughly before application to remove dust and old residues.
Steps for Oiling
1. Begin by shaking the oil container well to ensure even consistency.
2. Using a soft cloth or brush, apply a generous amount of oil in the direction of the wood grain. Avoid excessive pooling of oil on the surface.
3. Allow the oil to absorb for about 15-30 minutes.
4. Wipe off any excess oil to prevent a sticky finish.
5. For optimal results, repeat this process every few months, or more frequently if the climate is particularly dry.
Benefits of Oil Application
Utilizing oil not only enhances the aesthetic appeal but also shields your pieces from moisture loss and potential cracking. The application restores the wood’s natural oils, ensuring it remains supple and resistant to wear.
By adhering to this routine, I find that my wooden pieces maintain their elegance and last longer, exhibiting the true character of the material.
Dealing with Scratches and Scuffs
For minor scratches and scuffs, I use a soft cloth and a wood polish specifically designed for unlacquered surfaces. I apply a small amount of polish and gently rub it into the affected area in a circular motion. This often helps to disguise blemishes.
Using a Repair Kit
If the damage is more pronounced, a wood repair marker or a touch-up pen can be handy. I select a color that closely matches the natural hue of the wood. After applying the marker, I blend it in with a clean cloth to ensure the finish looks uniform.
Sanding and Finishing
For deeper scratches, I lightly sand the area with fine-grit sandpaper, going with the grain to avoid further damage. After sanding, I apply a thin layer of penetrating oil to restore moisture and match the surrounding finish. This step requires patience as I often need to repeat the process until the area blends seamlessly.
Preventing Water Damage on Wood Surfaces
To safeguard against liquid exposure, I always place coasters under drinks to prevent rings and stains. Any spills are quickly absorbed with a soft cloth to minimize potential harm.
Regular Maintenance
Applying a protective sealant every few years fortifies the wood against moisture. I choose high-quality teak oil, ensuring the surface remains smooth and less prone to water infiltration. This treatment enhances the barrier, reducing the likelihood of warping or discoloration.
Humidity Control
Maintaining a stable humidity level in the room is essential. I use a humidifier or dehumidifier as needed, aiming for a relative humidity of 30-50%. This balance prevents the wood from becoming too dry or absorbing excessive moisture, both of which can lead to damage.

Restoring Faded Wood Pieces
To revive the color of a muted piece, I usually begin by cleaning the surface with a mixture of mild soap and water. This removes dust and grime, creating a clean work surface. After drying thoroughly, I assess the extent of the fading. If the hue resembles a dull grey, using a medium-grit sandpaper gently helps remove the oxidation layer.
Next, I switch to a finer grit to smoothen out any scratches caused by the previous sanding. It’s vital to sand in the direction of the grain to prevent further damage. Once smooth, I wipe away the dust created from sanding with a damp cloth and allow it to dry completely.
Applying a specialized wood conditioner or oil is my next step. A quality product helps to restore the natural oils in the grains, allowing for a rich, warm color to re-emerge. I use a soft cloth to apply it evenly, ensuring it penetrates well. After a few minutes, I polish the surface gently with a clean, dry cloth to remove any excess.
For ongoing care, I make it a point to maintain a moisture balance in the environment to prevent future fading. This includes using humidifiers when needed and placing the item away from direct sunlight or heat sources. Regular maintenance makes a noticeable difference in preserving the appearance of these natural materials.
Protecting Teak from Sunlight Exposure
I recommend placing your wooden pieces away from direct sunlight. Prolonged exposure can lead to fading and alterations in color. Utilize sheer curtains or UV-filtering blinds to filter harsh rays while allowing natural light to illuminate the space.
For enhanced protection, consider applying a specialized sealant designed to block UV rays. This creates an additional barrier, preserving the wood’s rich tones and preventing discoloration. Always follow the manufacturer’s instructions for application to achieve optimal results.
Regular inspections for signs of sun damage are crucial. If you notice any fading, it’s a prompt to take action, whether through reapplication of protective coatings or adjusting the positioning of your items.
| Tip | Description |
|---|---|
| Placement | Avoid direct sunlight by positioning away from windows. |
| Use UV Filter | Install curtains or blinds that filter harmful rays. |
| Apply Sealant | Choose a sealant that specifically blocks UV rays. |
| Regular Checks | Inspect periodically for any signs of damage from sunlight. |
Scheduling Maintenance for Longevity
I recommend creating a maintenance calendar to ensure the durability of your pieces. Set a specific day each month for cleaning and inspection. Use this time to check for any signs of wear or potential damage.
Monthly Checklist
| Task | Description |
|---|---|
| Surface Cleaning | Wipe surfaces with a soft, damp cloth to remove dust and debris. |
| Inspect for Scratches | Look for any new scratches or scuffs and note them for treatment. |
| Check Moisture Levels | Assess the wood for any signs of dryness or cracking. |
Quarterly Actions
Every three months, apply a quality oil to nourish and protect the surfaces. This will help maintain moisture balance and prevent warping.
Annual reviews are also crucial. Dedicate time each year to fully clean and restore any pieces that have faded or suffered from exposure. This schedule ensures every item remains functional and aesthetically pleasing for years to come.