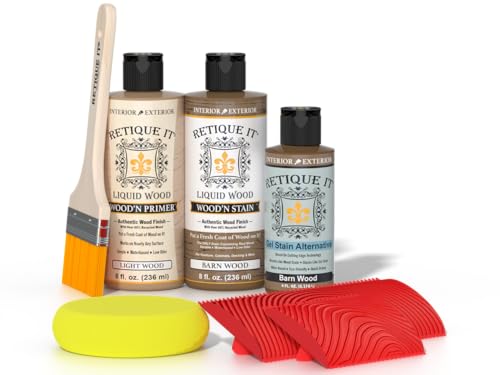
Begin by selecting a quality acrylic or water-based finish in your desired tone. These options offer excellent adhesion and durability, making them perfect for revitalizing light-hued décor. Before proceeding, ensure that the piece is clean and free from dirt or grease to promote proper bonding.
Next, lightly sand the surface with fine-grit sandpaper. This process enhances adhesion, allowing the new hue to adhere more effectively without damaging the underlying material. Wipe away any dust with a damp cloth to prepare for the next step.

For application, use a foam brush or a soft cloth to apply the chosen product evenly across the surface. Working in sections will help achieve a uniform finish. Allow it to dry thoroughly before adding a second coat; this ensures a deeper and richer appearance. Finish off with a protective top layer to seal and preserve the new color.
Transforming Light-Colored Pieces to Rich Hues
To achieve a darker tone on your bright items, follow these steps meticulously:
- Prepare the area by covering floors and nearby surfaces to prevent accidental spills.
- Clean the surfaces thoroughly using a mild detergent to ensure no dust or oils interfere with the process.
- Sand the surface gently using fine-grit paper. This helps the new color adhere properly.
- Choose a suitable wood dye or gel that provides the desired depth. Test on a small, inconspicuous section first.
- Apply the chosen product with a brush or cloth, working with the grain to achieve an even application.
- Allow it to penetrate for the recommended time, then wipe off excess for a more natural finish.
- For deeper color, consider applying additional coats after the initial layer dries completely.
- Seal the newly colored surface with a protective topcoat to enhance durability and appearance.
This approach ensures a beautiful transformation while maintaining the integrity of the item. Careful execution yields the best results, allowing the grain to show through while providing a warm undertone.
Choosing the Right Stain for Your Furniture
Firstly, I recommend selecting a product that showcases warmth and depth. Look for water-based options; they dry quickly and facilitate easier cleanup. If you prefer a solvent-based finish, ensure good ventilation during application as they emit stronger fumes.
Consider Your Desired Finish
Determine whether you want a matte, satin, or glossy surface. Matte finishes hide imperfections but may require more frequent touch-ups. Satin offers a balanced look, while gloss enhances colors but may highlight flaws. Testing samples on an inconspicuous area will guide your decision.
Color Matching and Compatibility
Choose a tone aligning with your existing decor. Test shades on a small surface as colors can fluctuate based on the wood type and existing finish. Always opt for a product designed for your specific type of material, ensuring optimal adherence and finish quality.
Lastly, consider the overall durability you require. Some formulations provide added protection against scratches and moisture, which is beneficial for high-traffic areas. Investing in the right mixture will enhance the longevity and appearance of your pieces.
Preparing the Surface for Staining
Before applying any finish, thorough preparation of the surface is crucial. I begin by cleaning the item with a mixture of mild soap and water to remove any dirt or oils. After rinsing, it’s wise to let the piece dry completely.
Next, I sand the surface to create a smooth texture and enhance adherence. I use a medium-grit sandpaper (around 120 grit) to tackle any rough areas, followed by a finer grit (220) for a polished feel. Always sand in the direction of the grain to avoid scratches.
After sanding, I take a clean, damp cloth to wipe away any dust created during the process. This step is essential to ensure no particles interfere with the application later on. If the item has an existing finish, stripping it may be required to achieve an even look. I opt for a chemical stripper or a heat gun, based on the complexity of the finish.
Assessing the Wood Type
Knowing the type of wood can help in deciding if a pre-stain wood conditioner is necessary. Softer woods, like pine, tend to absorb color unevenly, so treating them with conditioner creates a more uniform appearance. After letting the conditioner sit for a while, I apply it according to the manufacturer’s instructions.
Final Touches
Once all preparations are complete, using a vacuum or a clean brush to remove any remaining debris is mandatory. The surface should feel smooth and clean, ready to receive the desired hue. This meticulous preparation will ensure a beautiful and lasting transformation.
Applying the Stain Evenly
To achieve a uniform finish, I recommend using a high-quality applicator, such as a foam brush or lint-free cloth. Starting from one corner, I apply the mixture in long, consistent strokes while working in manageable sections. This prevents lines or blotches from emerging, ensuring an even application across the surface.
Technique
I prefer to go with the grain rather than against it. This method enhances the natural texture and appearance of the material, leading to a richer look. Additionally, I maintain a wet edge to avoid overlaps that can create darker spots. If I notice uneven areas during the process, I can lightly sand those spots once dried, ensuring a smooth overall outcome.
Layering
One coat usually suffices, but I can add a second or third layer if a deeper hue is desired. Between layers, I wait until the first coat is completely dry, assessing the depth of color before proceeding. This method guarantees precise control and the desired aesthetic without overwhelming the initial finish.
Dealing with Existing Finishes
Begin by determining the type of finish already on your piece. If it’s a clear coat like polyurethane, you will need to scuff it up to promote adhesion for the new color. Use a fine-grit sandpaper (220 grit works well) to lightly sand the surface. Focus on areas that will be most visible, ensuring you create a uniform surface for your project.
If the current coating is oil-based, you might need a different approach. Apply a deglosser, which is a liquid product that removes the gloss without sanding. Follow the manufacturer’s instructions carefully. Ventilation and protective gear are mandatory during this process.
After sanding or applying a deglosser, wipe down the surface thoroughly with a damp cloth to remove dust or residue. Once dry, consider a primer specifically designed for such projects. A primer can help the new shade adhere better and provide a more even tone.
| Finish Type | Preparation Method |
|---|---|
| Polyurethane | Lightly sand with fine-grit sandpaper. |
| Oil-based Coating | Use a deglosser to remove gloss. |
| Paint | Sand lightly and apply primer. |
Once prepped, allow the furniture to dry completely before proceeding. This ensures the conditions are optimal for a successful transformation, preventing any unexpected issues during application of the new finish.
Tips for Achieving a Desired Shade
To reach the specific tone you want, mix different products. Combine different varnishes or tints to create a custom hue.
Selecting the Right Base
The base of your product can greatly influence the final appearance. A water-based solution tends to dry faster and offers a lighter finish, while an oil-based variant might provide a richer, deeper color. Consider using a gel or cream for a thicker application that allows for more control.
Testing Before Application
Always conduct a test on a scrap piece or an inconspicuous area. This helps in visualizing how the color interacts with the surface. Allow it to dry fully before assessing the shade.
- Start with a lighter application to build color gradually.
- Apply multiple thin layers instead of one thick layer to achieve depth.
- Keep a notebook to track your mixtures and ratios for future projects.
Use rags or brushes that suit your technique. A sponge can create a softer look, while a brush gives a more textured finish. Pay attention to the application method, as it can change the final appearance significantly.
Finishing Touches
After achieving the desired color, seal the surface with a clear coat. Choose a glossy or matte finish based on your aesthetic preference. Remember, the final coat can impact the overall tone, making it appear darker or lighter.
Protecting the Stained Surface After Application
To safeguard the newly treated surface, I opt for a durable clear finish. Water-based polyurethane offers excellent protection while maintaining clarity, preventing yellowing over time.
Once the color is dry, I apply the sealant with a synthetic bristle brush for an even coat. It’s crucial to choose a finish with a satin or semi-gloss sheen, as this enhances depth without overpowering the wood’s appearance.
Drying and Curing Times
I allow the first coat to dry completely, usually around two to four hours, before applying additional layers. For full curing, I wait at least 72 hours before subjecting the piece to regular use. This ensures maximum durability and adhesion.
Regular Maintenance
To keep the surface looking pristine, I recommend using a soft, slightly damp cloth for cleaning. Avoid harsh chemicals that could damage the protective layer. Periodically, I apply a fresh coat of the clear finish every few years to refresh the appearance and maintain its protective qualities.
Maintaining Brown-Stained Furniture
Regular cleaning is essential for longevity. I recommend using a soft, damp cloth to wipe surfaces. Avoid harsh chemicals that can strip or discolor the finish.
To preserve the hue, consider using a gentle wood polish once every few months. Apply it sparingly, as too much can create a greasy residue.
Minimize exposure to direct sunlight, which can fade colors over time. If possible, use curtains or blinds to manage light levels.
To prevent scratches and dents, always use coasters, placemats, and protective pads under items placed on surfaces. This small step can save the finish from daily wear.
For any spills, act immediately–dab the area gently with a clean cloth to prevent stains from setting in. Avoid rubbing, as it could damage the surface.
Annual inspections for signs of wear or moisture damage help in maintaining the aesthetic. Address any issues promptly with appropriate touch-up solutions.


